

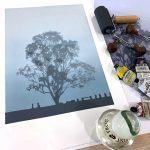
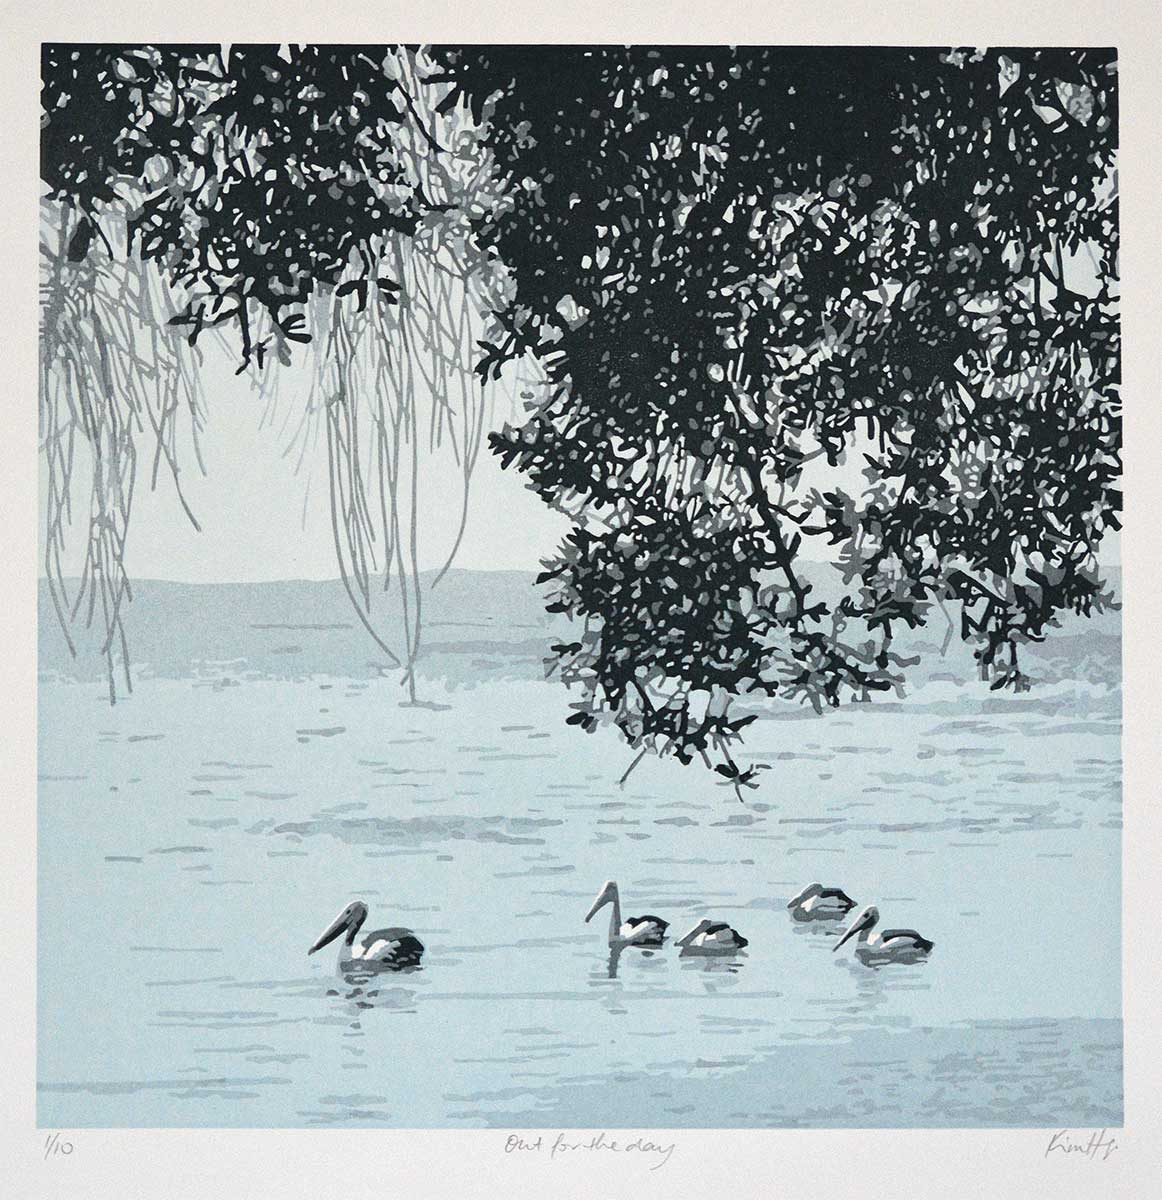
Out for the day – a new Reduction Linocut
It feels like a distant memory … those days when we were allowed to travel about for the day, exploring, stopping for coffee or lunch and wander somewhere in nature. We’re experiencing such strange times at the moment … not able to visit friends, no gallery-hopping, no artist open studios to visit, no coffee shops to stop in at, no aimless wandering. The home isolation and social distancing measures associated with COVID19 are taxing, but necessary to gain control of that pesky coronavirus. I admit that its taken me longer than I anticipated to find my printing groove, but I’m happy to report that I think I’ve found it. I enjoyed this print, and am ready and rearing to go on the next one 🙂 But first …
The Inspiration
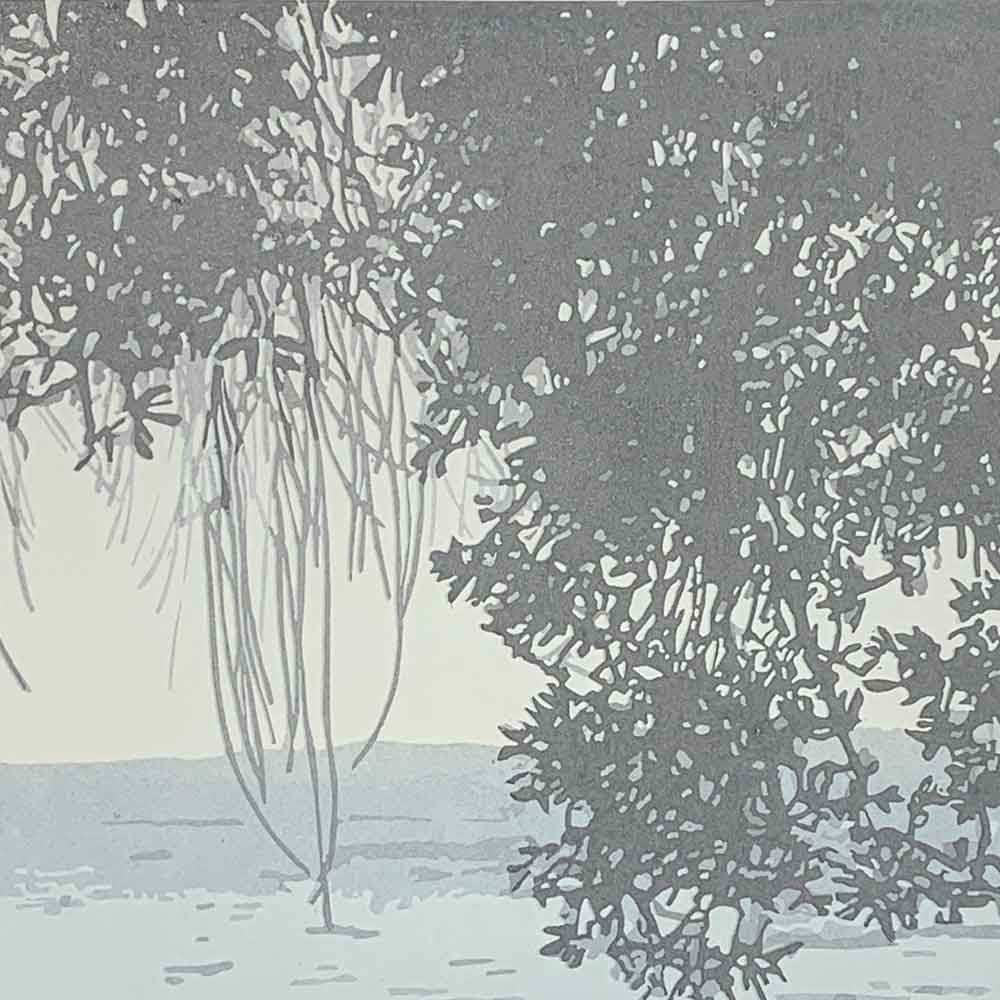
My husband and I took ourselves out for the day to the northern end of Noosa late-2019, visiting local artist Michele Knightley as part of the Noosa Open Studios trail. We went for a drive to Boreen Point then followed the edge of Lake Cootharaba … I am enamoured with pelicans and mangroves; and the lining of Lake Cootharaba shares plenty of both. It is such a beautiful and peaceful area, tranquil and serene where we were exploring; and it is that feeling that I hoped to share with this print.
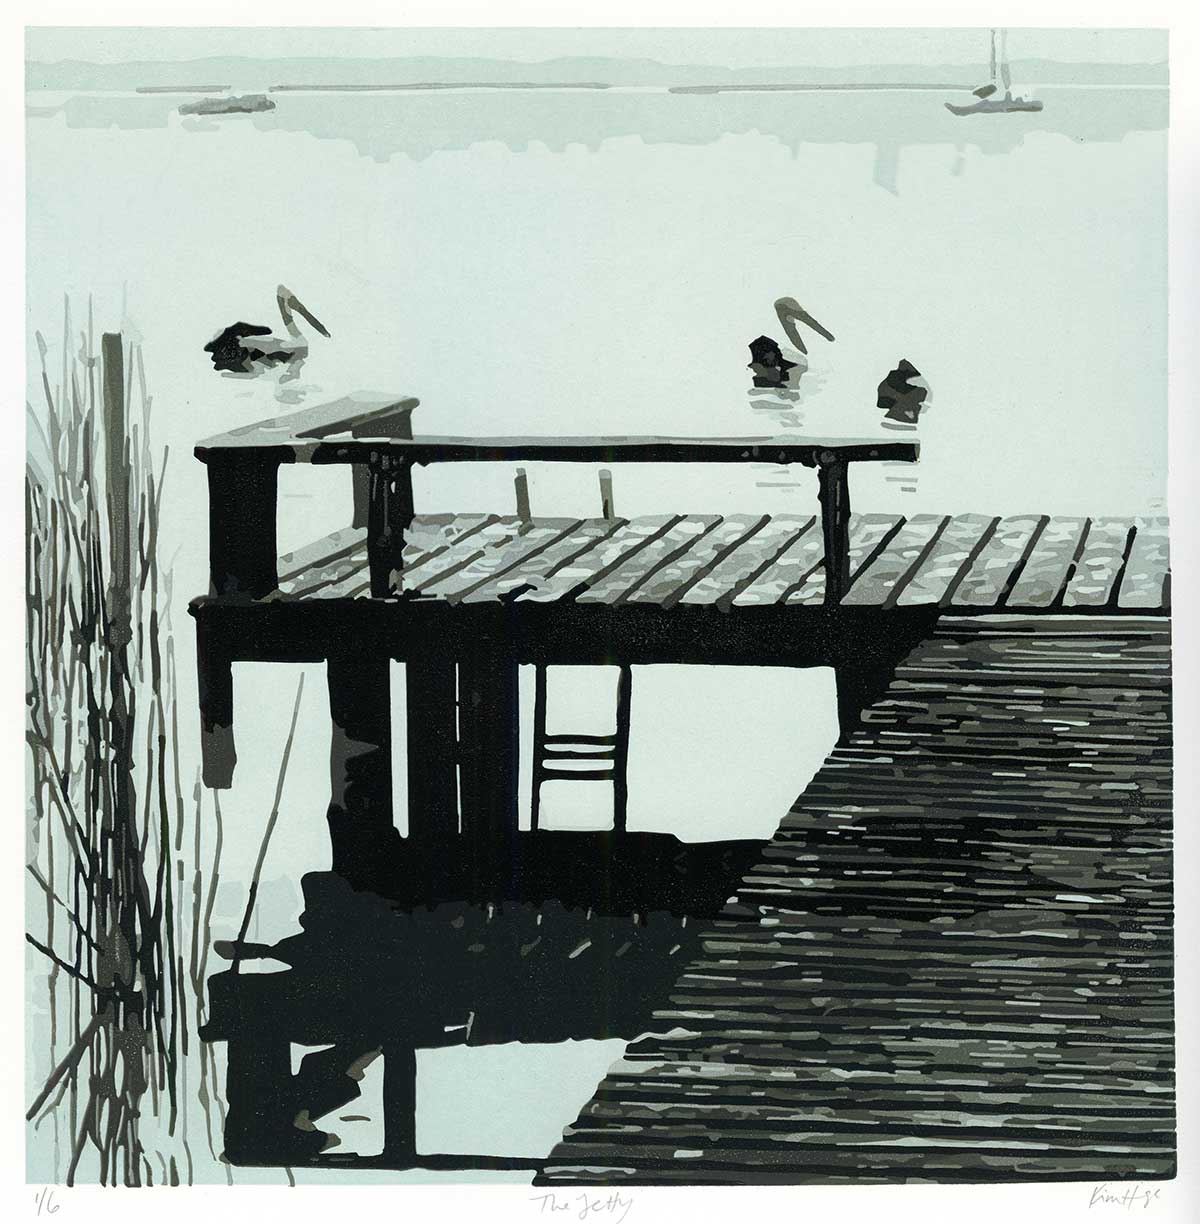
As the COVID19 shutdowns began, I had started working on my reduction linocut print The Jetty. I admit that I struggled with that print – I struggled to focus as the gravity of the pandemic unfolded, and as a result I experienced several technical difficulties that resulted in a smaller-then-usual edition size.
Both ‘Out for the day’ and ‘The Jetty’ are referenced from the same day’s outing and collection of photos:


The Process and Layers
As I love to do, I was going to bring this print to life with a monochromatic palette, similar to my previous linocut prints Still, After the Rain and You are here. The strong contrast of the highlight of the lake’s surface against the dark shadows in the foreground foliage meant I could tell the story of this print in just 6 layers. The time I saved in printing was well made up for with the carving detail in the foreground foliage!
Every colour mix for this print was a combination of prussian blue, yellow and red, mixed with a lot of white and a smidge of black. In all my linocut prints I work with just the primary colours plus (a lot of) white and (a smidge of) black ink. I’ve grown to love mixing my colours. I emphasise ‘grown to love’ as for a long long time I struggled with it. I struggled with colour in general. But my confidence has grown the more I challenge myself with my colour mixing.
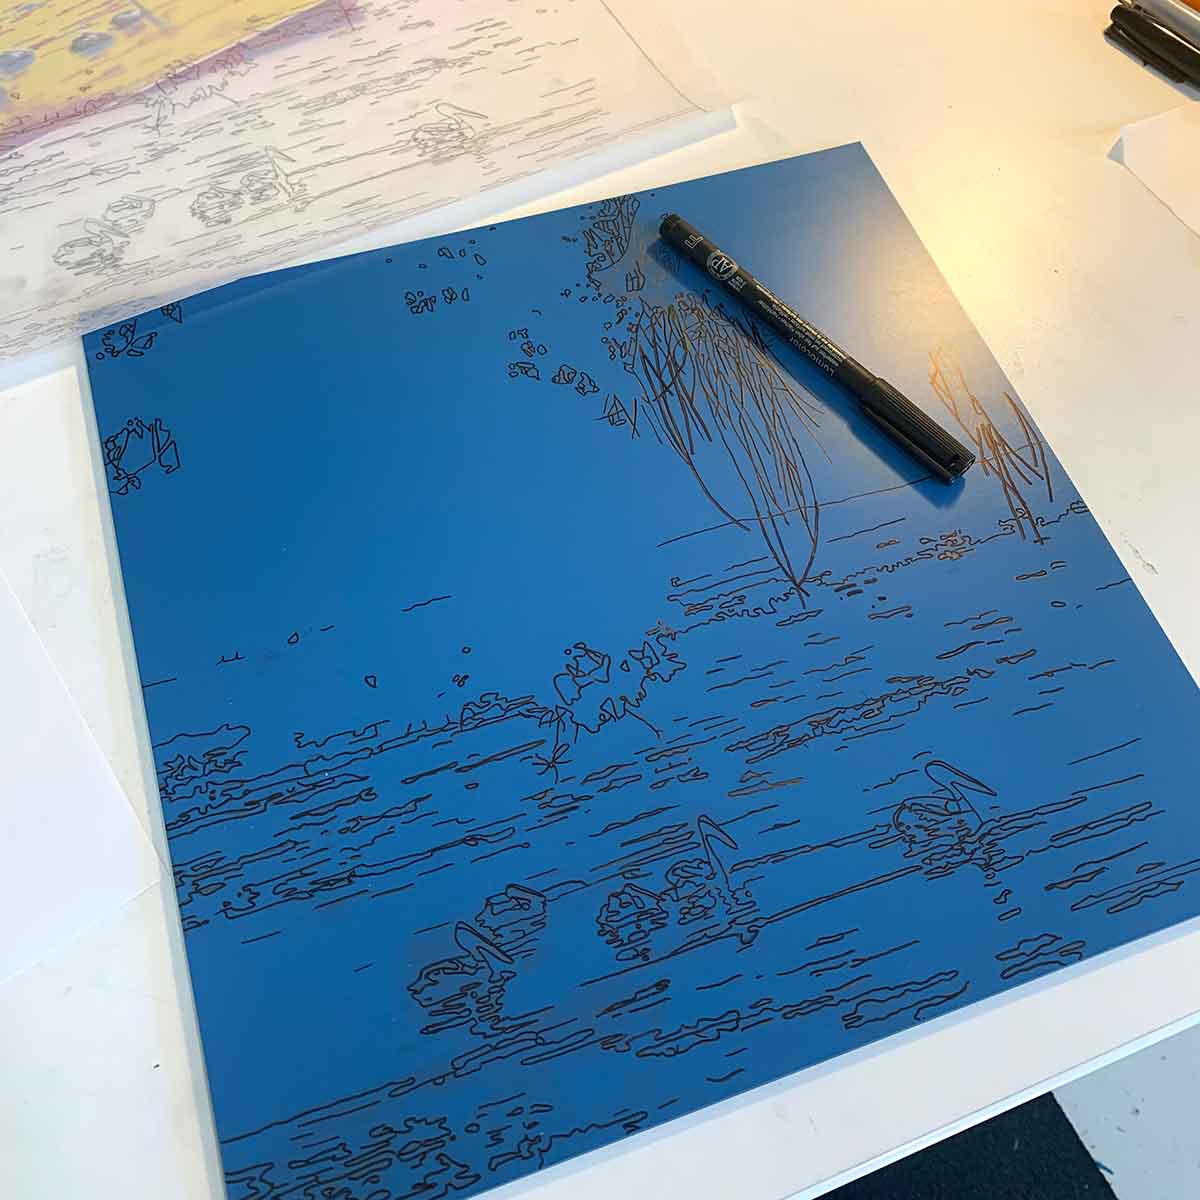
Moving from Layer 1 to Layer 2

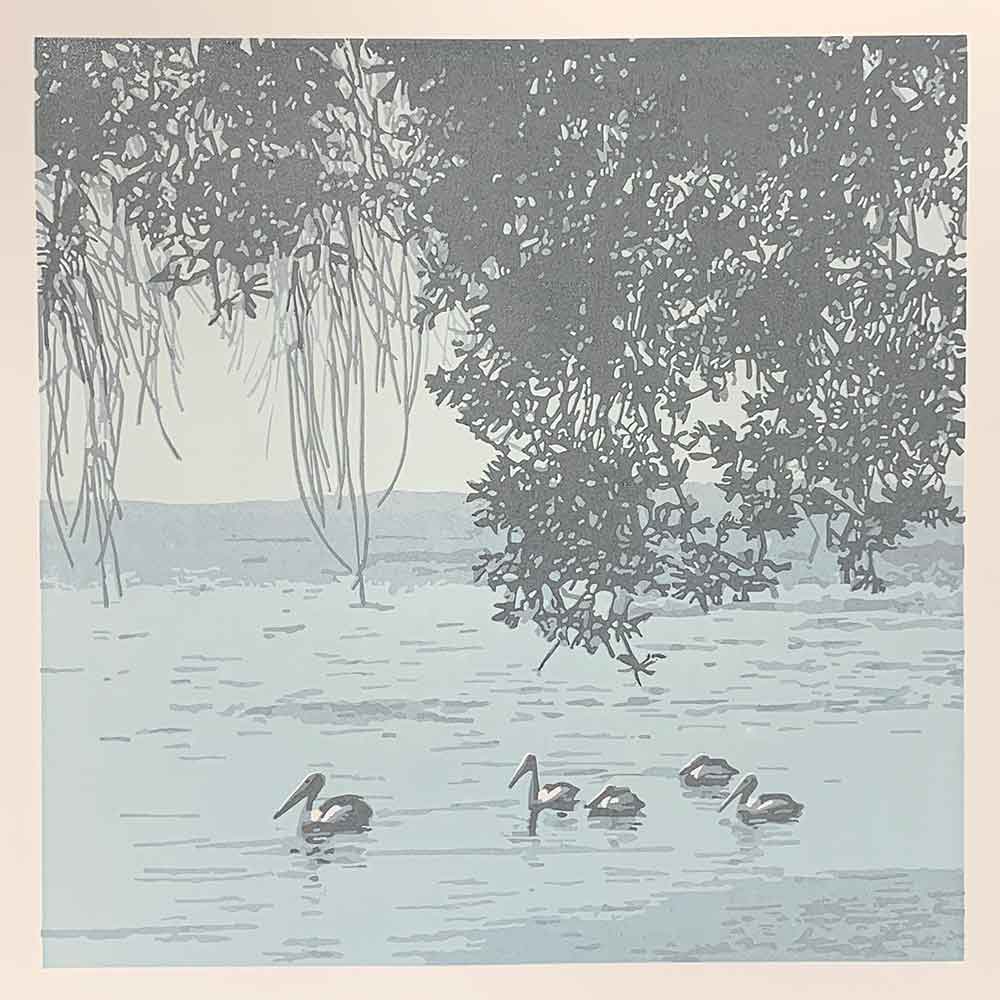
I wanted my pelicans to pop on this print … they were going to have to compete with the heavy shadow of the foreground foliage. So, I made their white feathers the brightest highlight on the print. To do this I carved them before I printed my first layer. Whatever is carved away before printing the first layer is essentially white … white being the colour of the paper. This reveals the paper as ‘white’, and can not be covered by any ink on subsequent layers because the block has been carved. Unless of course there are registration issues, but that’s a whole other conversation 😉
When it came to printing the first layer, I opted to print the sky and lake surface in the one impression. The landmass on the other side of the lake was going to create the perfect overlay in layer 2 for where the sky and lake colours met.
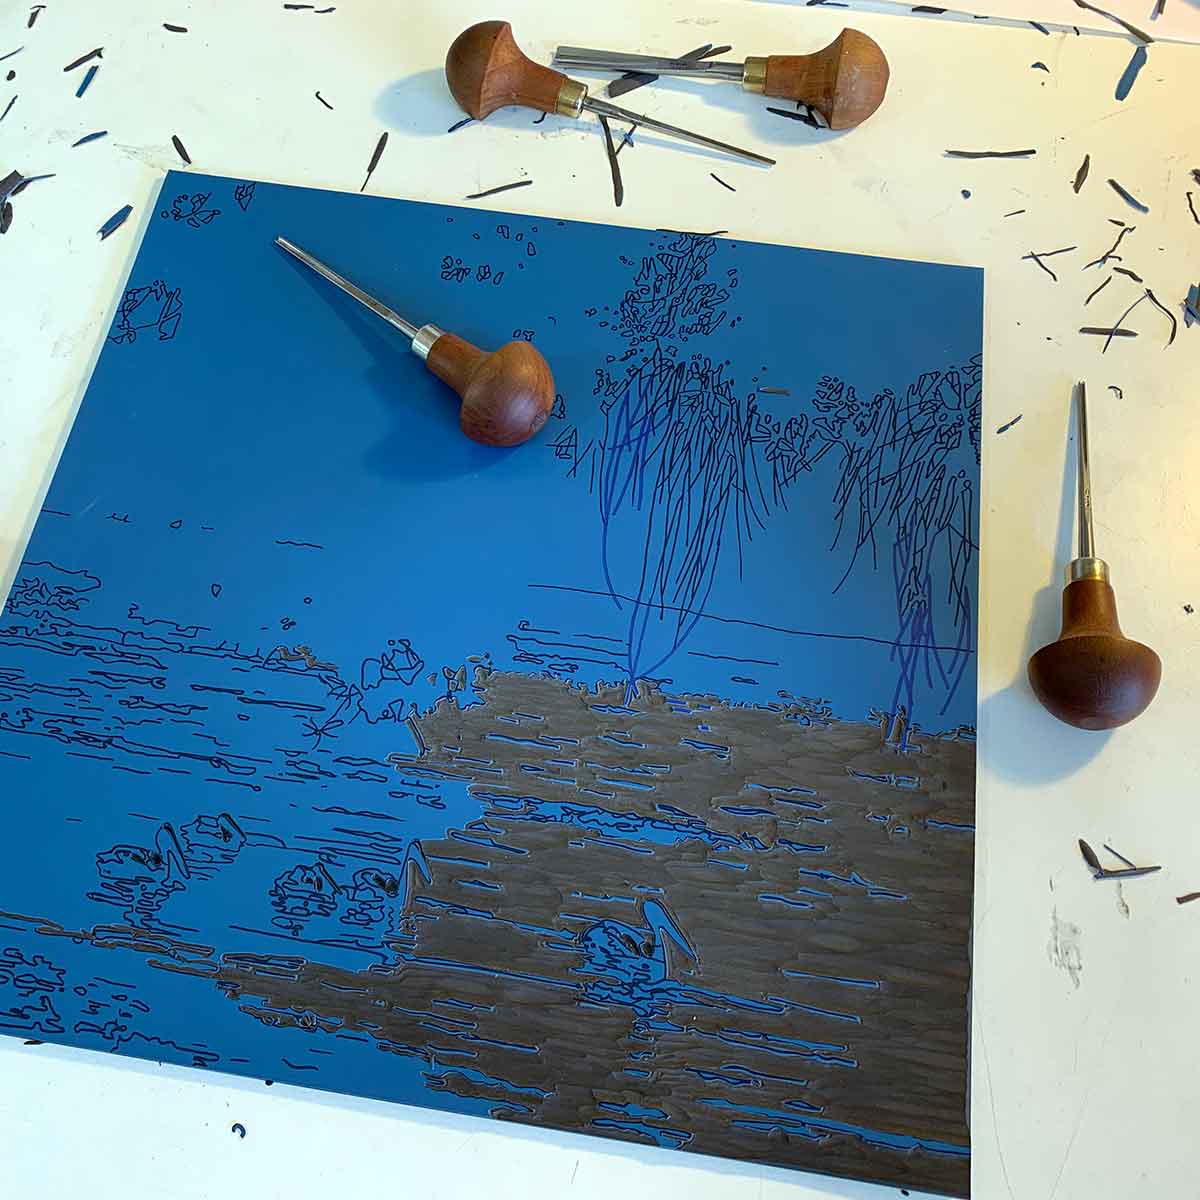
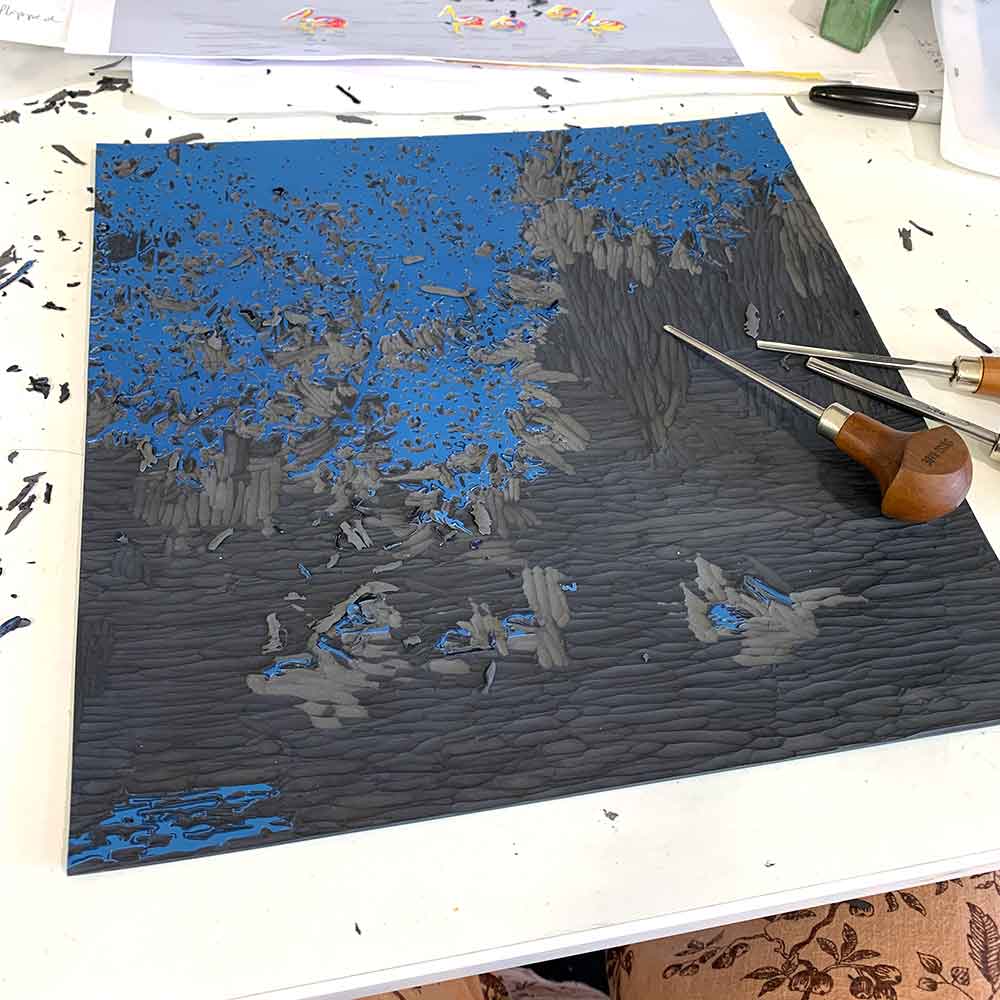
Carving and printing the first layer was pretty straight forward. Not much carving, and a simple division on the block to print the 2 colours in the one pass. However, layer 2 was going to be a very different story with its carving … a lot of carving!
While carving and printing my previous print, Still, I noticed how much I had slowed in my carving. That slowing I think is in response to the overall slowing of life in our CV19 environment. I consciously maintained that slowed approach with this print … and loved it. I really took my time carving ALL layers, mindfully feeling the movement of the blade through the lino.
Just to mix it up a bit, I wanted to see what an hour or two carving looked like in time lapse. The video below is about 1 minute, but I lost track of how long it was in real time. Does anyone out there know how real time translates to iPhone time lapse time?
Layer 2

So I don’t really know how long it took me to carve layer 2. I did a lot of late night/early morning carving.
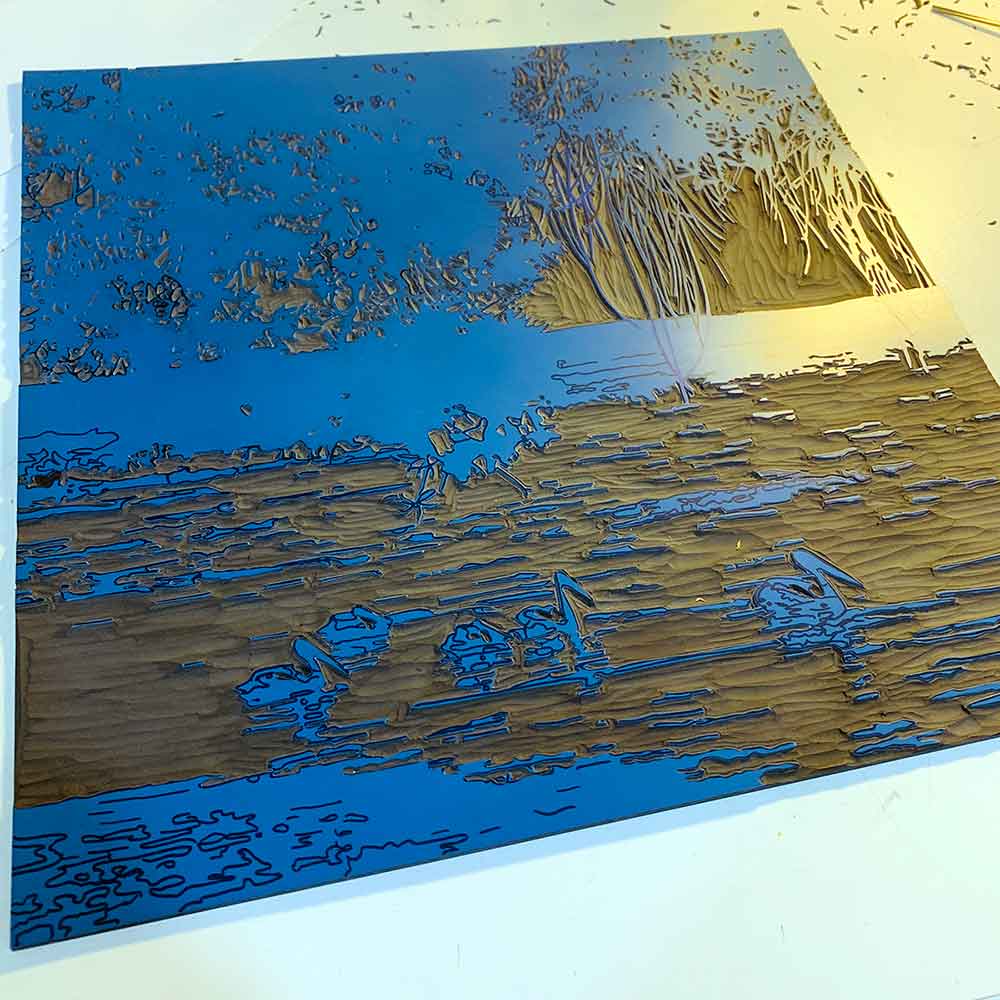
Layers 3, 4 and 5
And so continued the process of carving and inking and printing and carving and inking and printing and carving and inking and printing; all from the same block.
As with previous prints, I blotted each layer with tissue paper, and saved the blotting sheets to add to my growing stash of tissue papers to create with something in the future. Something. I’m just not entirely sure what yet.
Overall, this print moved along smoothly. Time consuming but cathartic carving. Good inking. And only a few registration issues. The good new was that I worked out why my registration went so array in The Jetty. While I can’t undo those problems, it was something new that I identified to look out for in my next print. The learning curve never ends 🙂
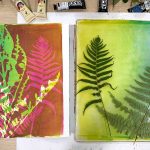
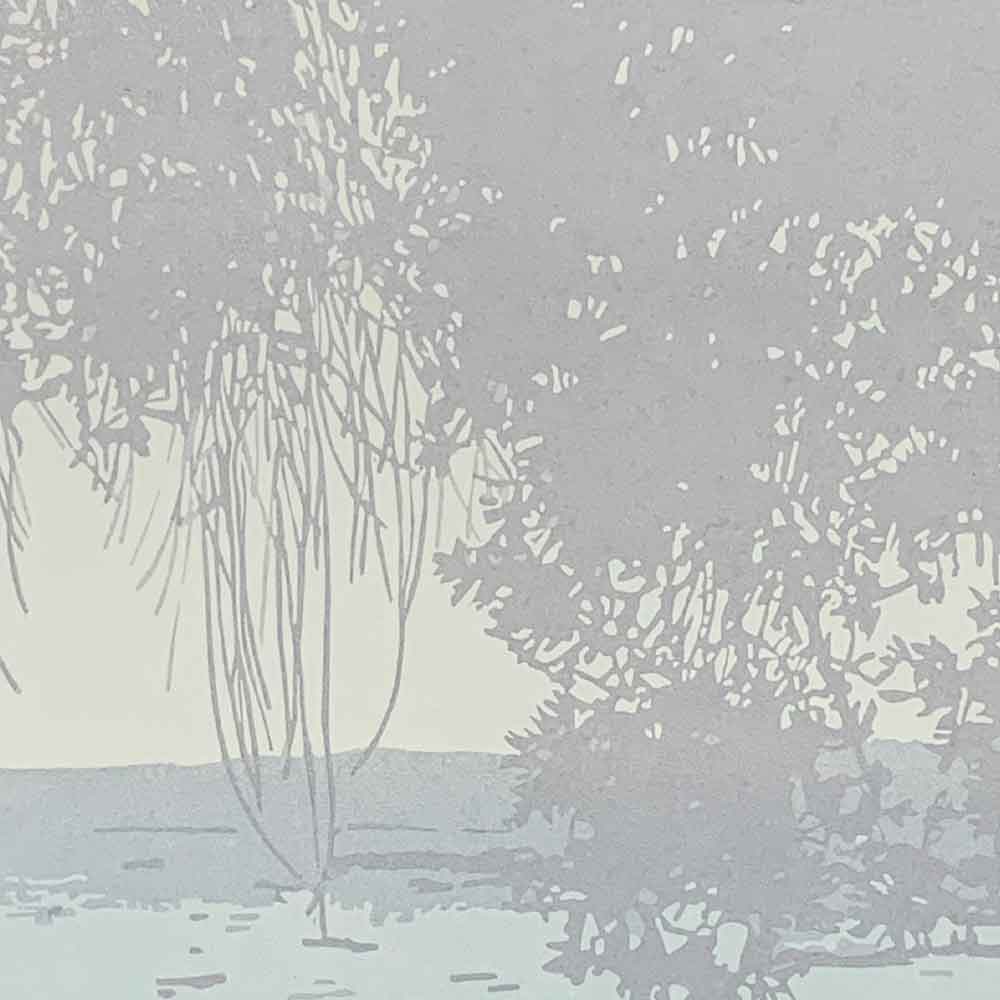
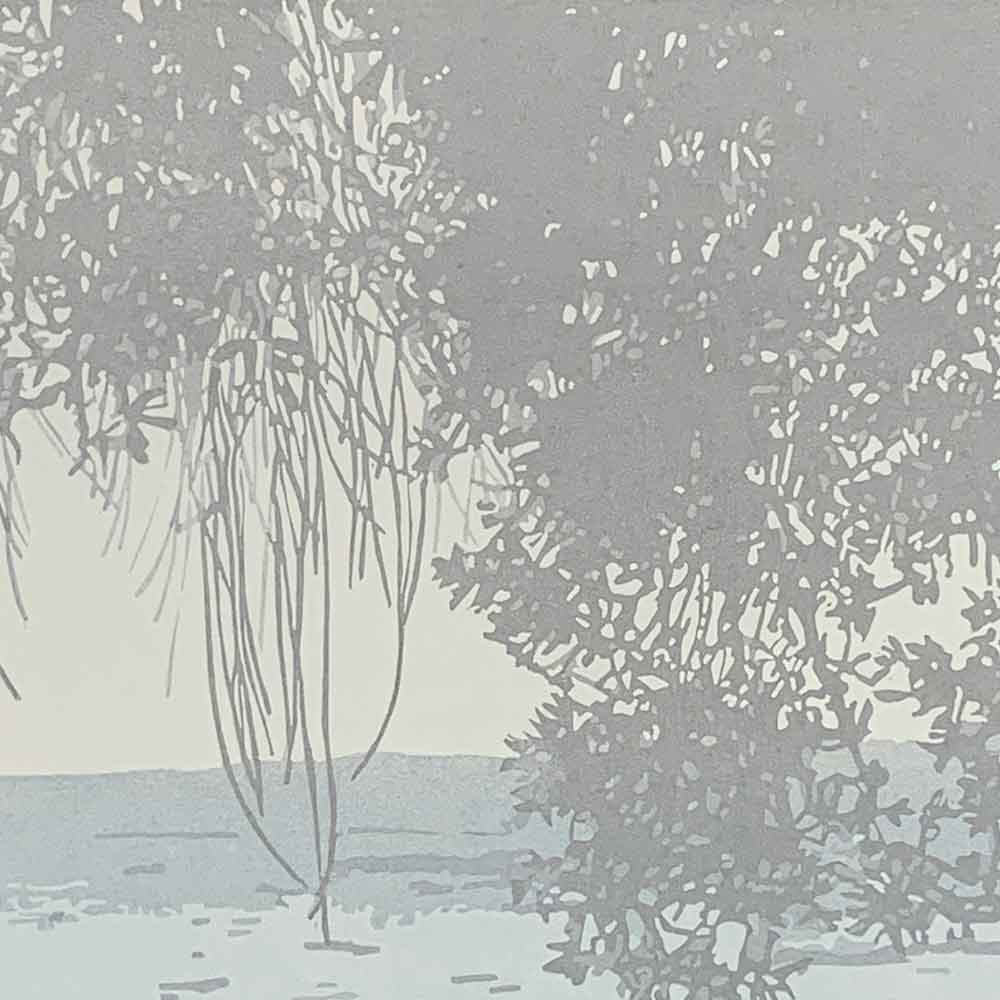
As with Still, I really enjoyed seeing the detail of each layer overlay then reveal the depth in the print. The four images above show the same area of the print across layers 3-6. For me it feels like the the detail is revealing itself in a story-telling kind of way.
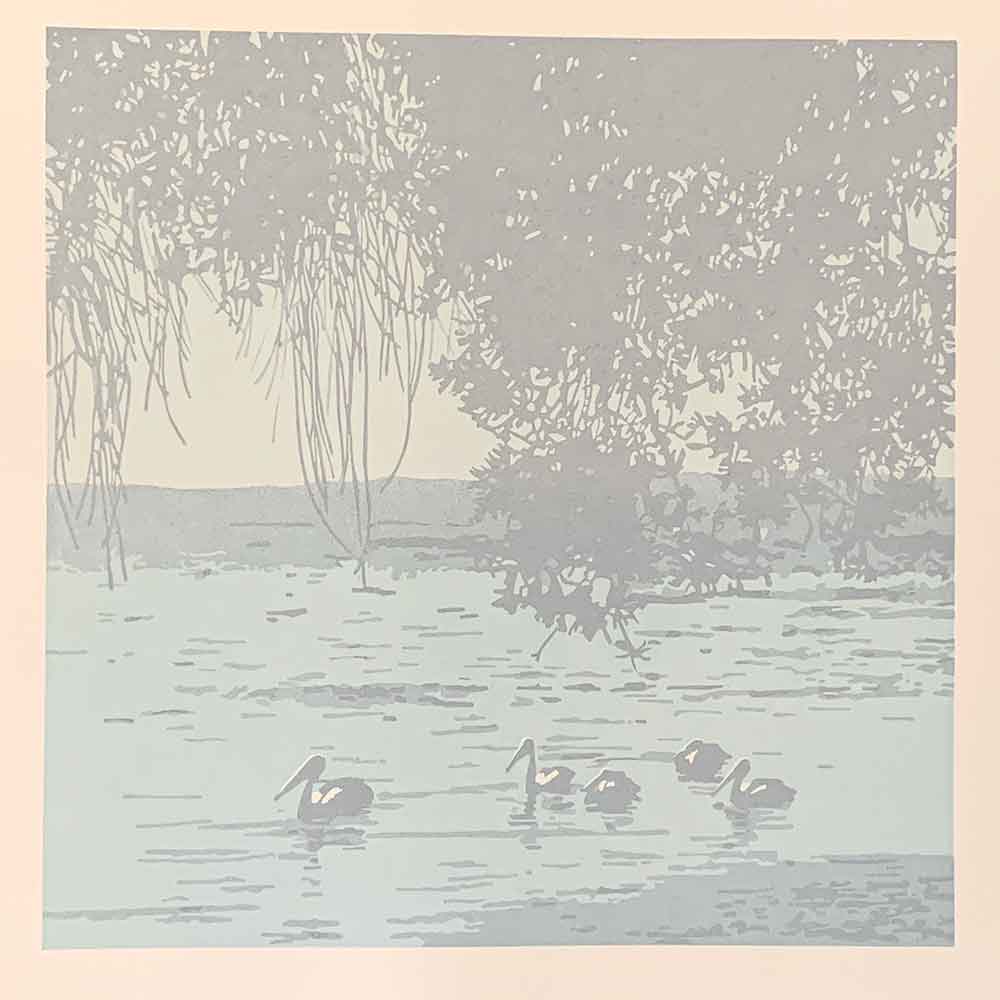
Layer 6, the Final Layer
As I was working through this print I was feeling quite attached to the subtle nature of the colours of each layer. So much so that I felt really hesitant when it came to printing the final layer with that strong shadow.
While I am generally very clear on the direction of the print before I start printing, it really isn’t until the print has been completed that I’ll know if it comes together as initially planned. There was a big jump in tone from layer 5 to layer 6 and I was feeling a little nervous.
The colour is a grey/blue. There is black in the mix, but more colour than not. I was super happy when I peeled back the paper on the first impression of layer 6.
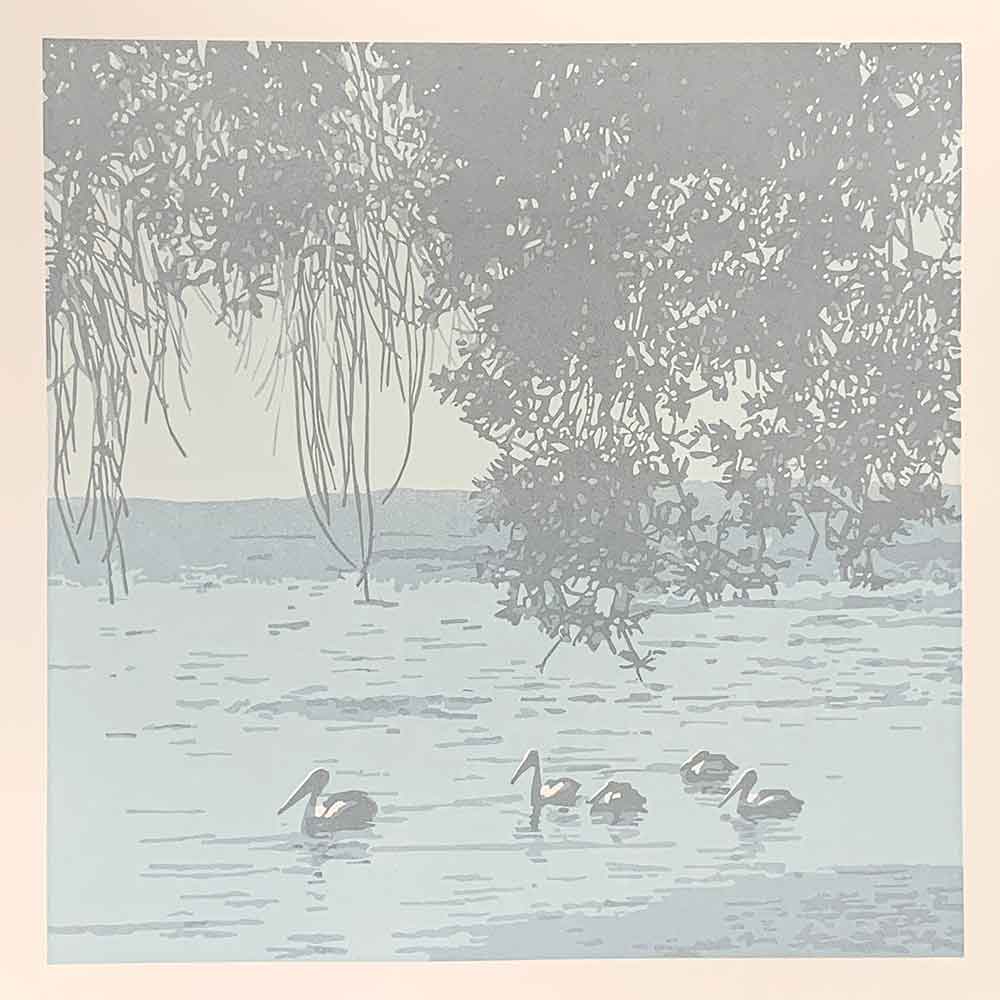
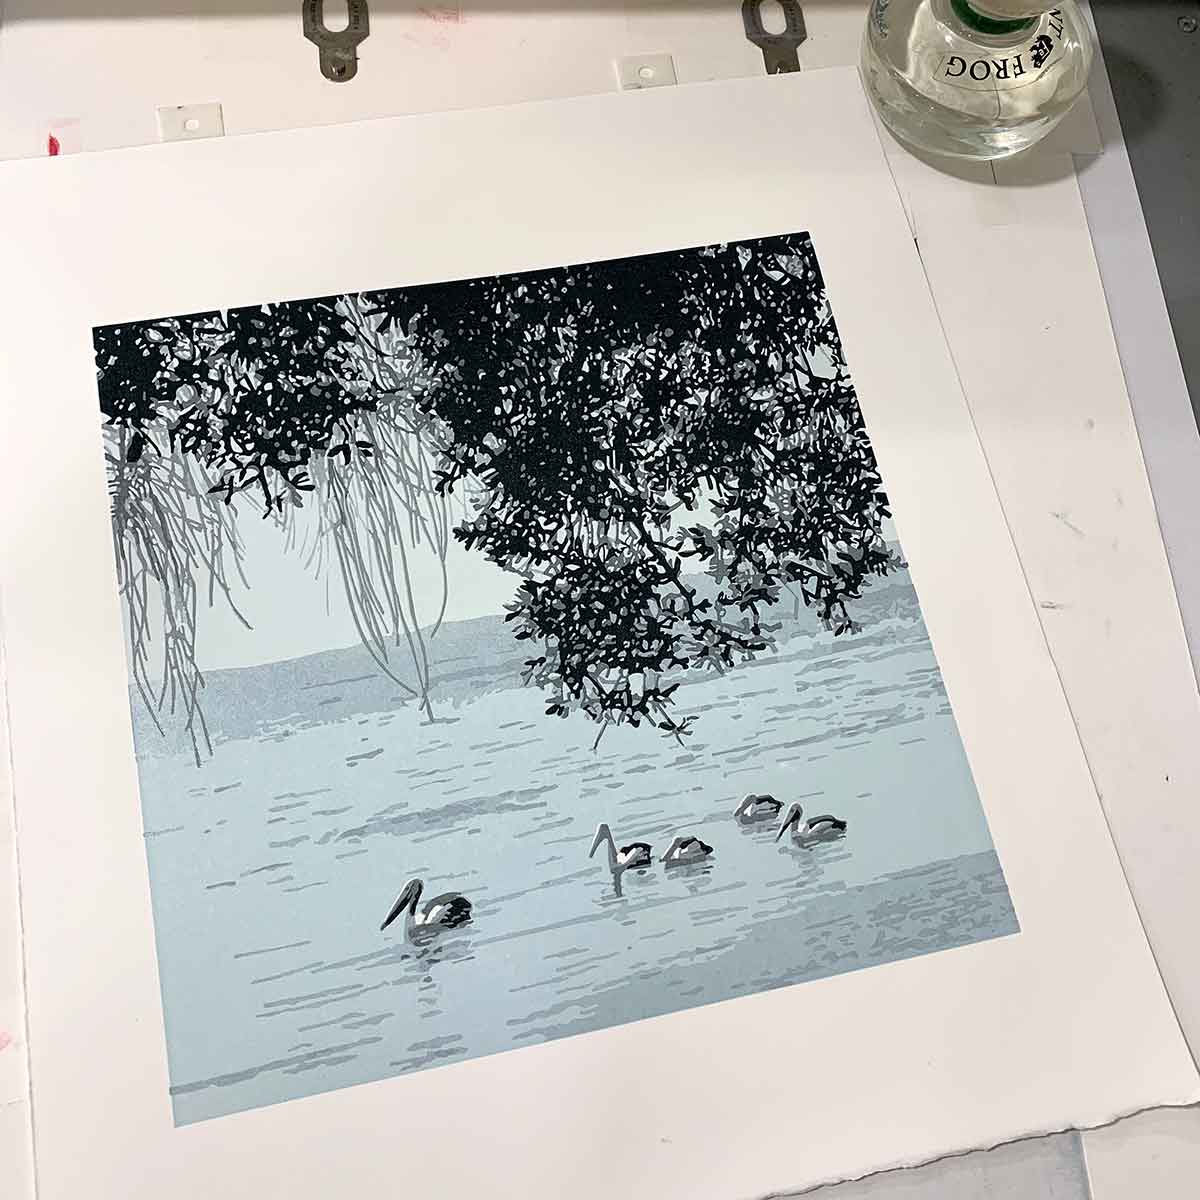
And here she is … 6 layers of carving and printing. I hope you like her as much as I do. I have ended up with a limited edition of 10 prints. If you’re interested in purchasing your own print from the limited edition, click here to view its listing in my online shop.
‘Out for the day’ reduction linocut print technical Information
Print process – reduction linocut print
Edition Size – 10
Colours and layers – 6
Inks – Sakura oil based inks.
Paper – 300gsm Arches 88. Simply delicious and I think my new favourite printmaking paper
Image size – 30cm x 30cm
Tools – Pfeil carving tools and my trusty glass Print Frog barren
Interested in buying one? You can view and buy an unframed print from the limited edition here on my website. They will be available for sale, framed and unframed, from Montville Art Gallery very soon.
Reproduction prints – maybe? I may opt to print a limited edition of archival giclee reproduction prints of this image. I’ll keep you posted.


Very subtle. Absolutely beautiful. Very clever! Any tips on registration? I really struggle with this.
I use the Ternes Burton pins – they’re great. I also have a simple cardboard/sticky-tape registration system that works well. Go a google search for “reduction linocut registration tips” … there are bound to be some really good and simple registration systems shared. I’ve not got mine online yet. Practice, patience and perseverance – the other critical ingredients 🙂
Thanks for sharing this, it will become useful as I progress up my learning curve.
Hi Belinda, I’m glad you found the it helpful 🙂 I’ll be getting a post about my latest reduction linocut, “The long way home”, finished in the next few days.
Fantastic work! Glad that I found your site.
Hi Debra, me too 🙂 I hope you find some useful and interesting content in here. Are you a printmaker? And what do you work with? cheers, Kim 🙂
Wow love this process, its really cool.
Thanks Carol. Have you ha a go at it yourself?