

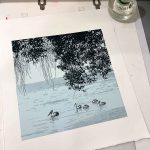
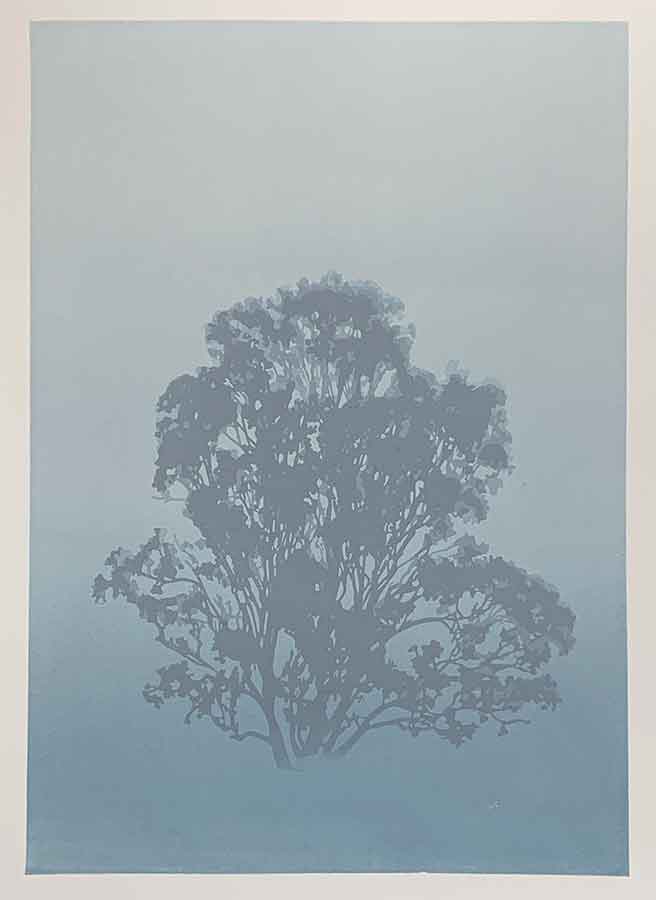
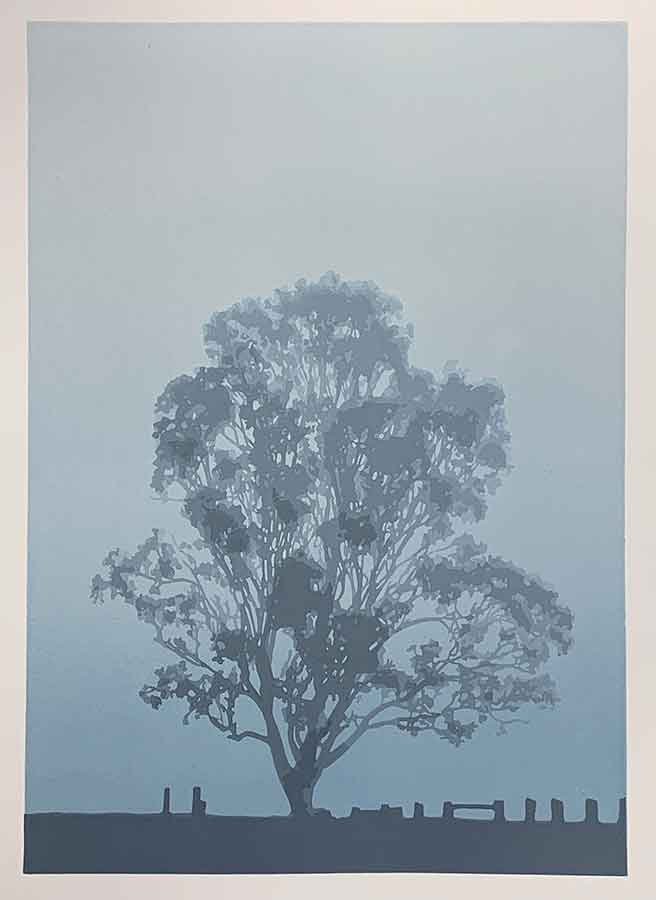
Still – a new Reduction Linocut
The older I get, the more I like to rise with the sun, or even before she starts her day. And from where I live, it feels like the world is starting fresh every time she rises.
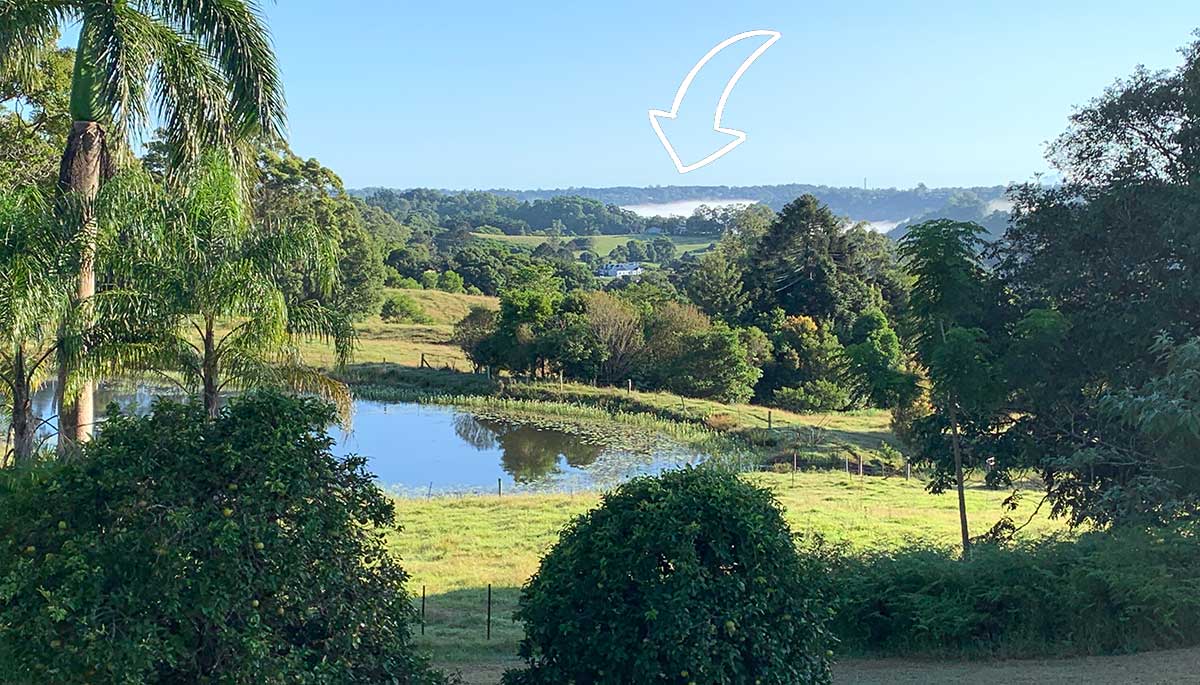
I am fortunate to live somewhere where I have a lot of open space around me, and enjoy a stunning view from my studio. Part of that view is looking over the top of a valley that is home to our local dam, Baroon Pocket Dam. Depending on the time of year and humidity, the valley can be filled with a low fog, hovering above the water, while above the valley is awakening with beautiful blue skies. If I’m up early enough I can see the fog rising from within that valley.
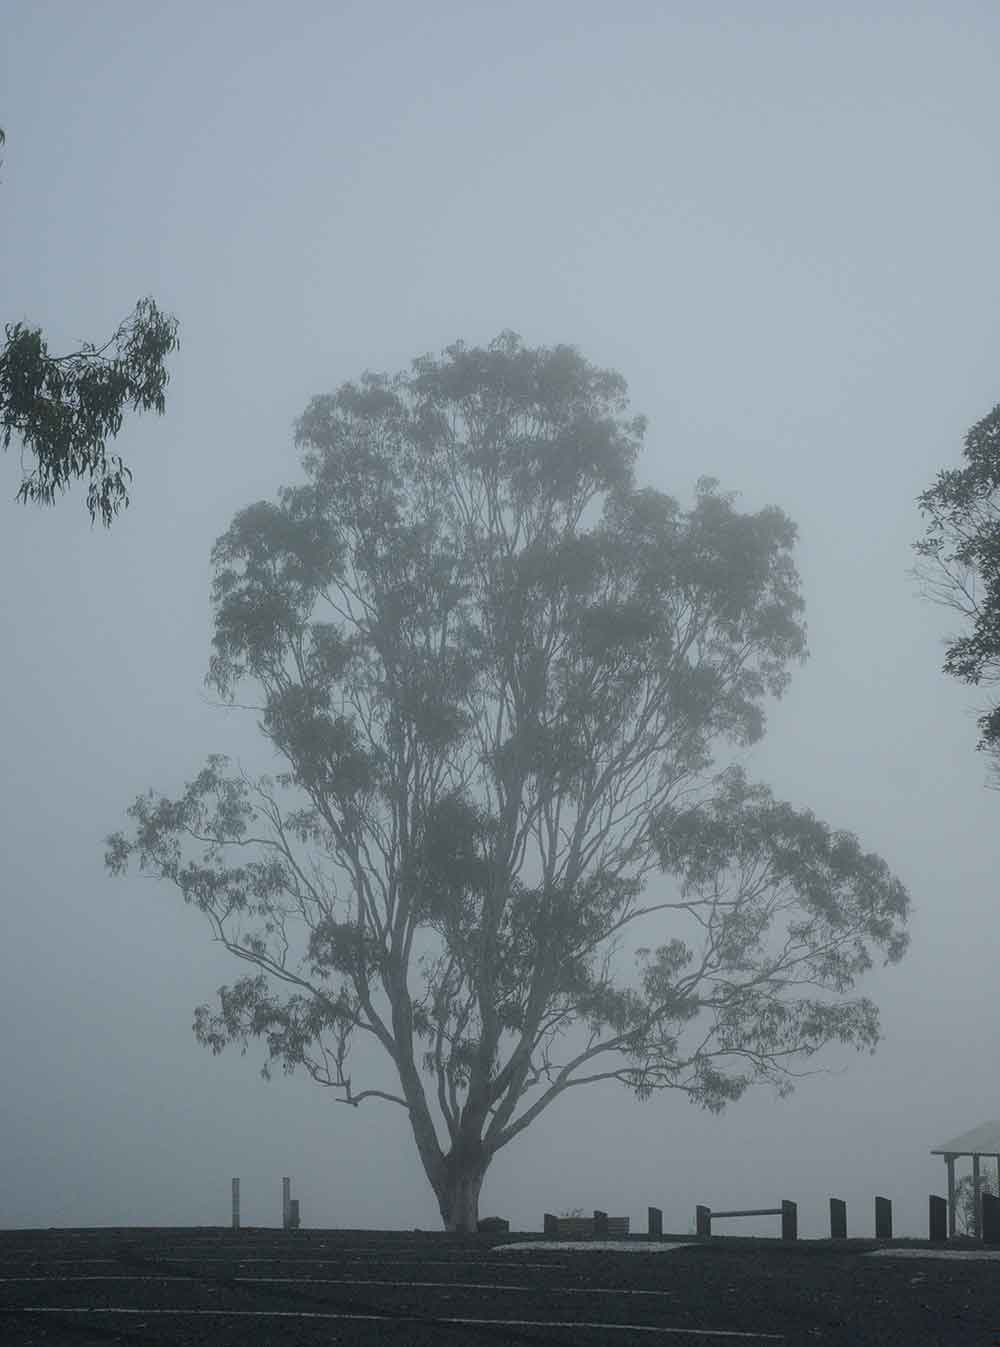
One morning a few weeks ago I finally took myself down the winding valley road and to the dam. What a contrast … I left the bold blue skies promising a glorious clear day to venture in to a misty world, quiet and cold. I could hear rain … it was the tall eucalyptus letting go their morning dew on the broad leafed macaranga leaves underneath. Loud and deliberate.
I had taken my camera with me, and I didn’t miss the opportunity to capture the ethereal mood of the trees around me. And from that morning venture, I present to you ‘Still’, a new reduction linocut print.
How the layers unfolded
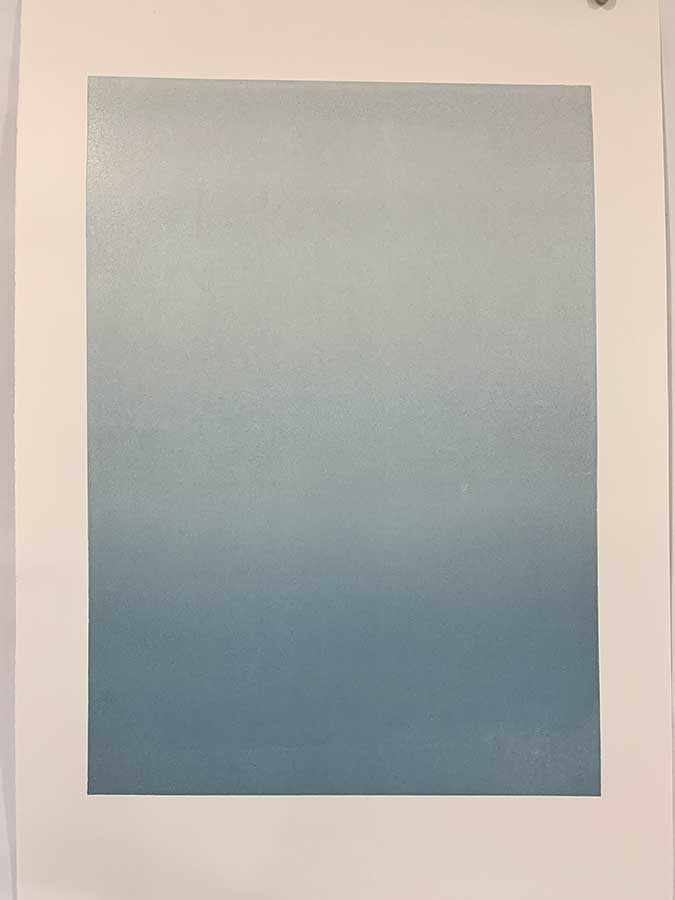
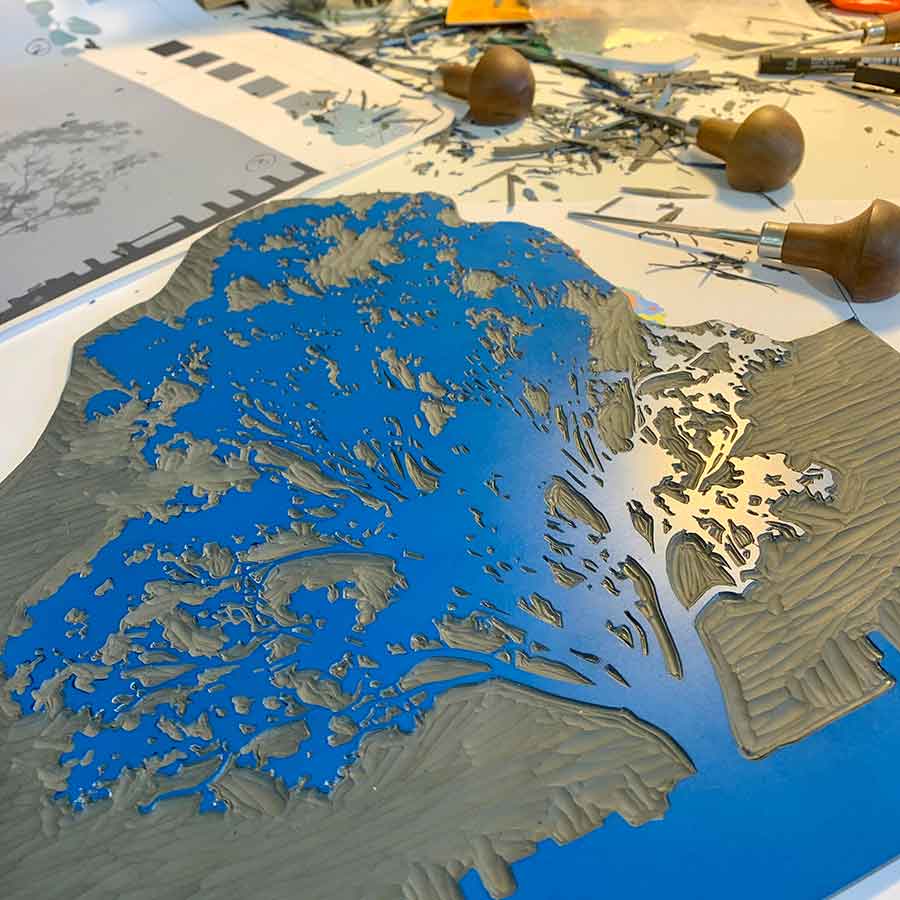
There was no ‘white’* on this print, so no carving as the first colour and layer went down. This reduction linocut was going to reveal itself with layers of solid, flat colour.
*to clarify – if I want any ‘white’ areas in the print, I carve what will be white before I print the first colour. This reveals the paper as ‘white’, and can not be covered by any ink on subsequent layers.
Getting started with Layer 1

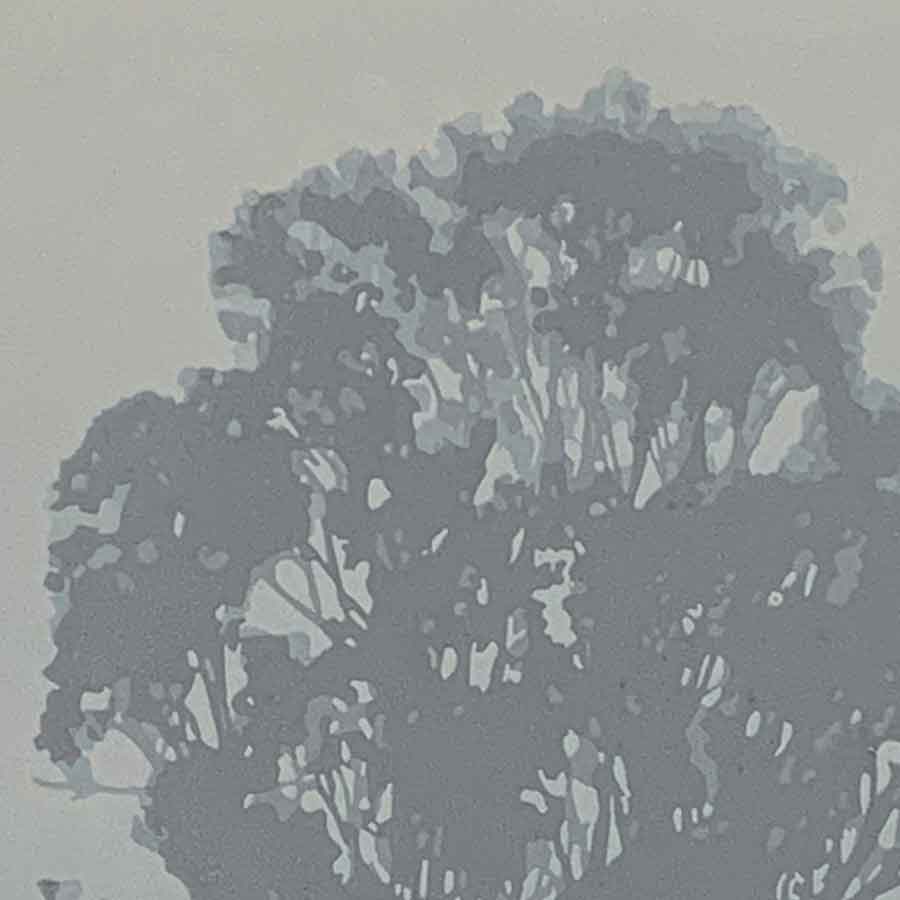
This print followed a similar vein to my After the rain and You are here reduction linocut prints… working with an almost monochrome colour palette, exploring subtle shifts in colour and tone; my favourite colour palette to work with. My plan was for the colour and tonal variations to work to tell the story of the image; to express its mood and atmosphere.
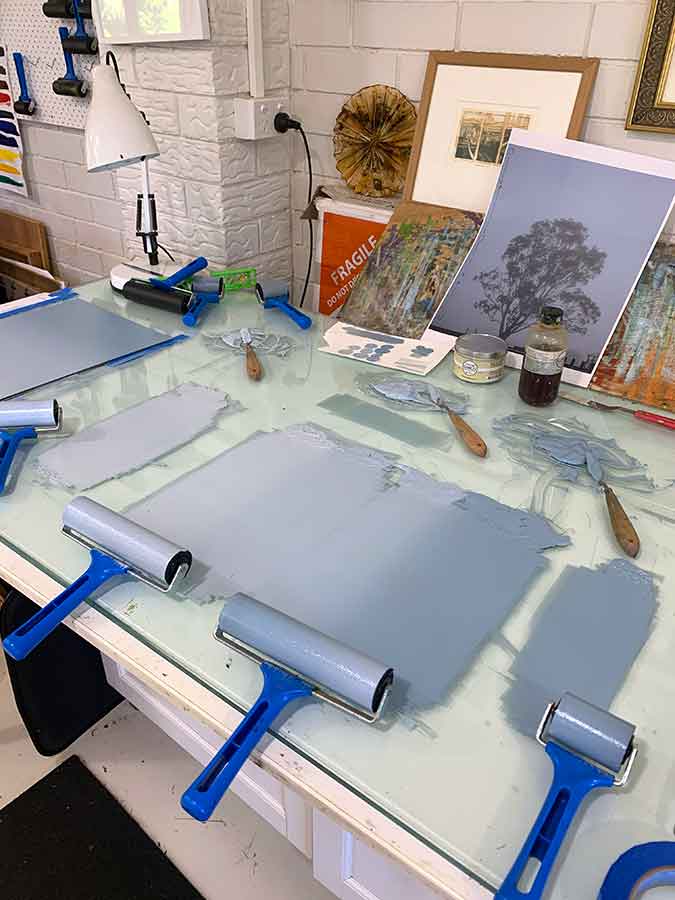
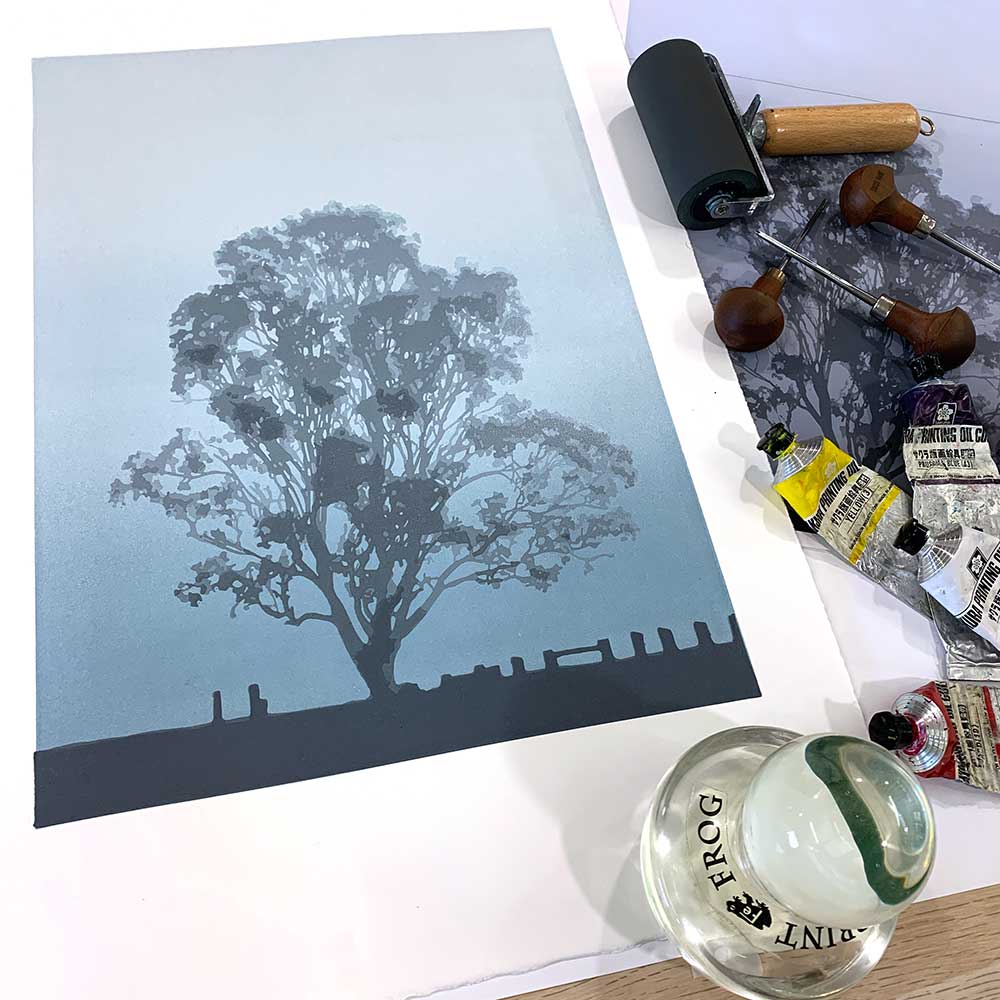
My first challenge … this print is approximately 42cm high and I wanted a relatively seamless blend from bottom to top, to give the feel of the lifting fog. Fantasies of a large 42cm brayer were abound, but alas I made do with 4 brayers or varying sizes to do the same job. I have a large collection of brayers, most of them used in workshops. And in that collection are a few different types of brayers. I use different brayers for different prints. I settled on my blue-handled soft brayers for this layer. 4 of them. And as this layer had no carved elements, I ran it through my press.
Each layer from here on was printed by hand using my glass Print Frog baren, and two Japanese barens. As with the brayers, I use different barens for different carved surfaces. And another something I really enjoyed about this print was that the hand printing wasn’t as physical as some of my prints.
Layer 2

With all the upheaval and discombobulation of COVID-19, I’m playing a cat-and-mouse game with sleep. So, I’ve been using my sleepless nights to my advantage and carving. And with the general slowing down of life in the wake of mandated isolation and restrictions, I am finally feeling my own self slowing down.
It took me 6 hours to get most the way through carving the 2nd layer. And I really enjoyed it. 6 hours feels like 2 when I’m carving in the still and silence of the night. Just me and the scritchy scratchy critters scurrying around the studio and in the roof above me 😲 I took my time to enjoy the feel of the blade cutting through the lino; enjoying the structure of the carved lines as they revealed themselves.
The end result of my linocut prints may well be 2D printed-on-paper images, but it is very much a 3D sculptural experience to realise the final prints.
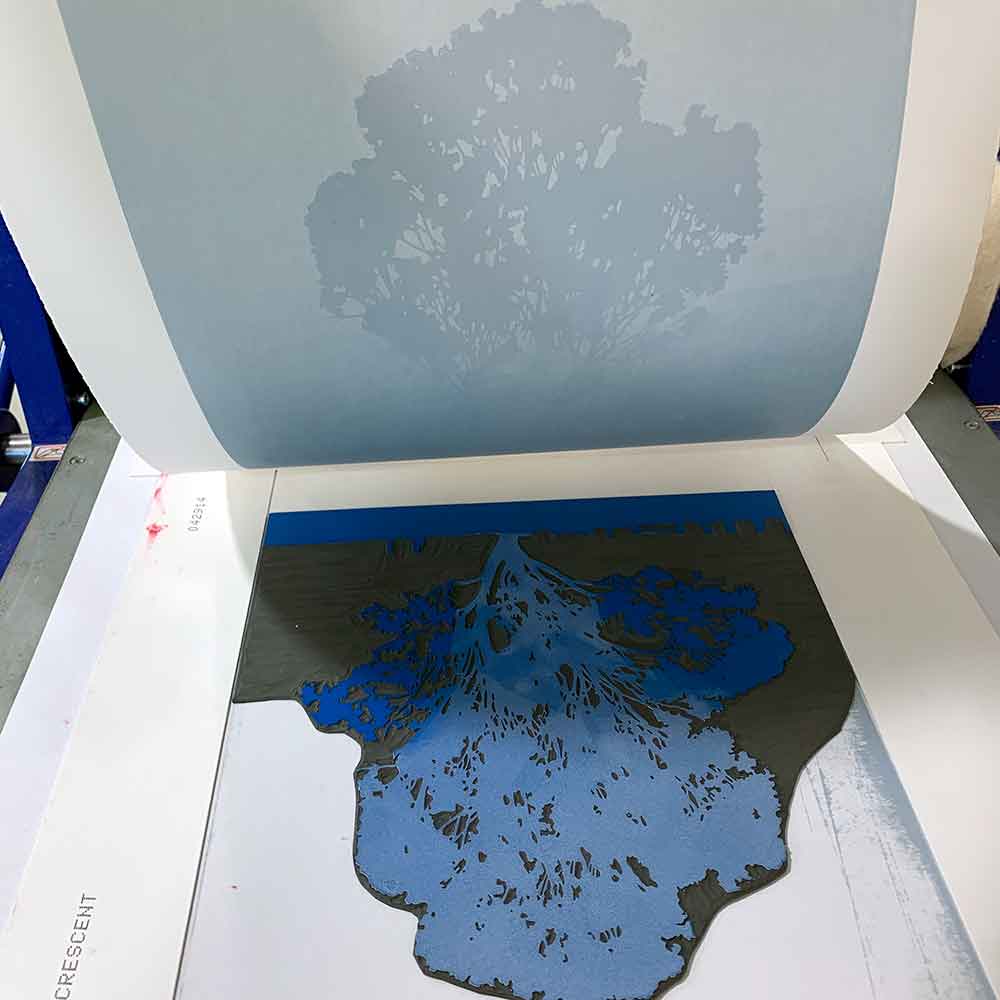
Layers 3, 4 and 5

And so continues to process of carving and inking and printing and carving and inking and printing and carving and inking and printing; all from the same block.
I was really enjoying this print. The carving was cathartic. The inking delicious. And the delight I felt as I peeled back each sheet from the block after each printed impression, revealing the depth and detail of the tree, was a real treat.
I felt so calm and relaxed and at peace when I met this tree. And that feeling came back to me as I was carving and printing. When deciding an image or story for each print, I often look for a moment and a memory of respite and calm in the natural world around me. Then when I’m printing the image I hope to really step back into that memory and feeling. And there in is the therapeutic relief I enjoy with my arts practice. I was acutely aware that I was achieving that with this print.


As I printed, I blotted each layer with tissue paper. This works to remove excess ink and help speed up the drying time. I previously used newsprint to blot ink between layers, but have recently switched to acid-free tissue paper. The newsprint still works just fine, but I find with the tissue paper I can remove ink selectively and I have the added bonus of printed tissue papers to play with later (plus no blackened hands from rubbing the papers). I don’t throw these tissue papers away. I’m not sure yet what I will do with them, but the collection is growing. I’m thinking they may weave their way into an artist book sometime soon. Watch this space!
Layers 6 and 7, then the final 8th layer
I intentionally didn’t print the ground for this print in the earlier layers. It wasn’t necessary, and reduced any potential for miss-registration.
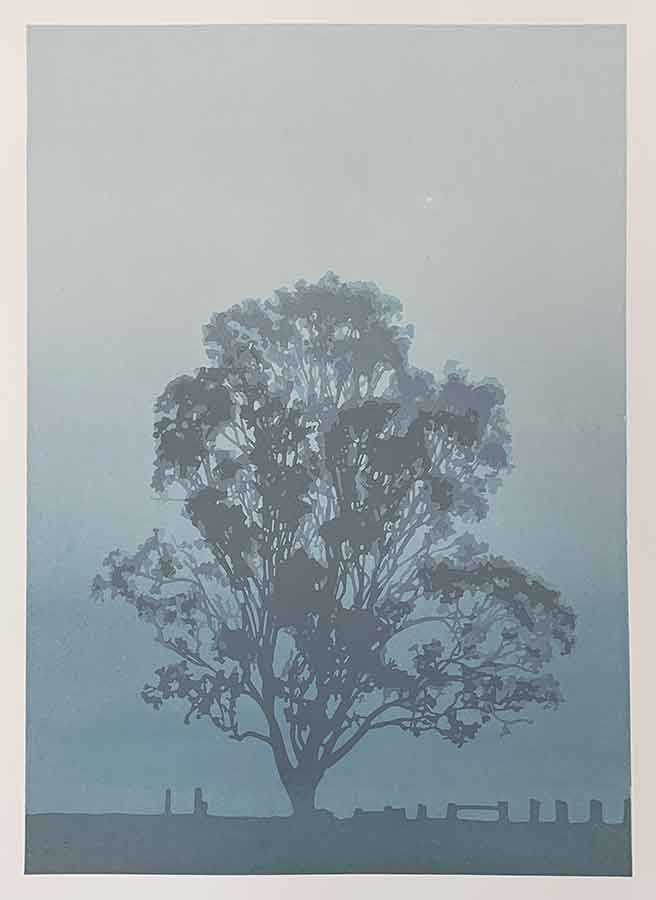
I was enjoying the mystery of the tree floating above the ground. However, it was lovely to see the tree connect to ground level on the 6th layer.
My relationship with a print in progress changes as it prints through its layers and stages. Often I hit a low point or insecurity somewhere in the middle. But with this image, I was enjoying every layer, and loving seeing her come to life in her own way, albeit guided by my carving and inking.
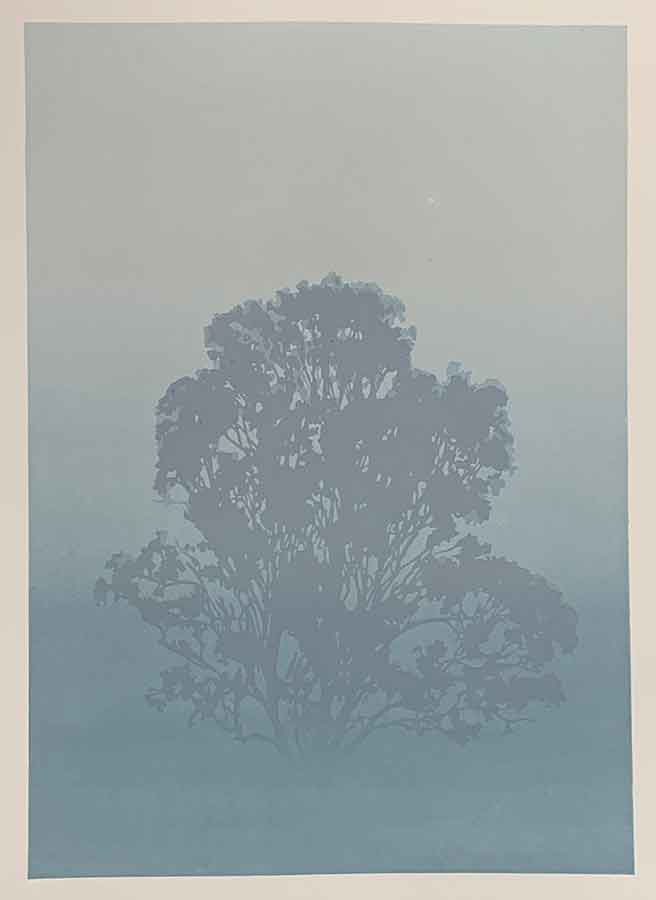
And there she is … 8 layers and a delicious labour of love. I hope you like her as much as I do. I have ended up with a limited edition of 14 prints, 1 artist proof and 1 trial proof. If you’re interested in purchasing your own print from the limited edition, click here to view its listing in my online shop.
‘Still’ reduction linocut print technical Information
Print process – reduction linocut print
Edition Size – limited edition of 12 prints plus one artist proof and one trial proof
Colours and layers – 8
Inks – Sakura oil based inks. Strong pigment, pretty fast drying. I” normally go thorugha tube of white for each print, with little squirst or prussian blue, red, yellow and a smidge of black to mix up all my colours.
Paper – 300gsm Arches 88. Simply delicious and I think my new favourite printmaking paper
Image size – 30cm x 42cm
Tools – Pfeil carving tools and my trusty glass Print Frog barren
Interested in buying one? You can view and buy an unframed print from the limited edition here on my website. They will be available for sale, framed and unframed, from Montville Art Gallery very soon.
Reproduction prints – maybe? I may opt to print a limited edition of archival giclee reproduction prints of this image. I’ll keep you posted.


Just beautiful as usual Kim – do you use Japanese vinyl all the time? I notice the ‘plate’ material is not mentioned in the ‘technical information’.
Hi Caroline 🙂 yes, I use the Japanese blue/green vinyl 100% of the time for reduction work. Its tough as nails, which is why I like it. And if its a little hard to carve, a good hot water bottle softens it nicely. I am planning some big banksia flowers in the near future and may have to switch to silkcut due to the size I want to work at. We’ll see. x
Beautiful work and love the narrative that went with the process it was as if the tree has been given another life a new image that can travel and tell its story and spread its beauty far and wide. Well done.
Thank you Therese x I have a bit of a pull to print a companion for that tree 🙂