

Gel Plate Printing Tip – printing a white silhouette
How do you print a white silhouette with a coloured background when printing with gelatin plates? Here I share my process with you …
Gel plate printing, aka gelli printing, aka gelatin plate printing, is one of life’s simple pleasures. I, quite simply, can’t get enough of it. It’s spontaneous, fun and immensely satisfying. And, like just about any other art form, there are so many different ways to approach the medium.
My approach is to build up thin layers of colour, using plant matter to create my image. Weeds are my favourite plant material to use – they provide a vast variety of shape and size, and have strong vein structures. And, yes, they grow in abundance at my house!
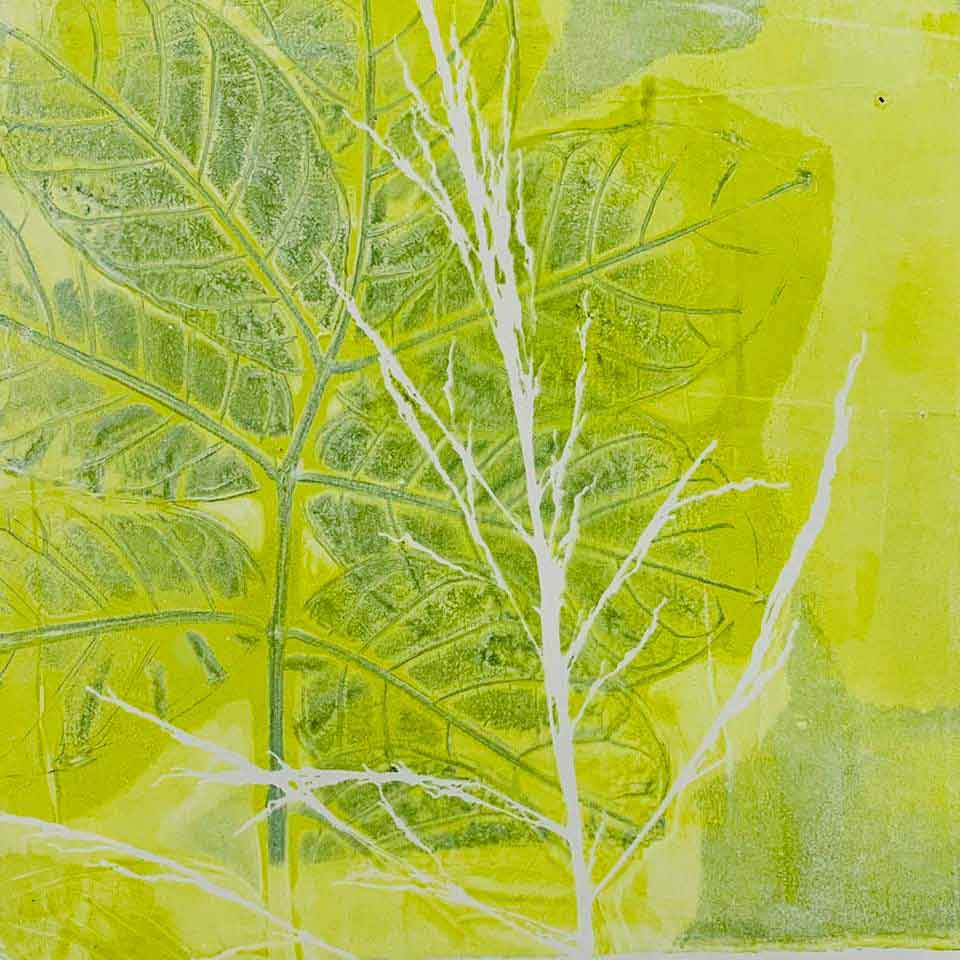
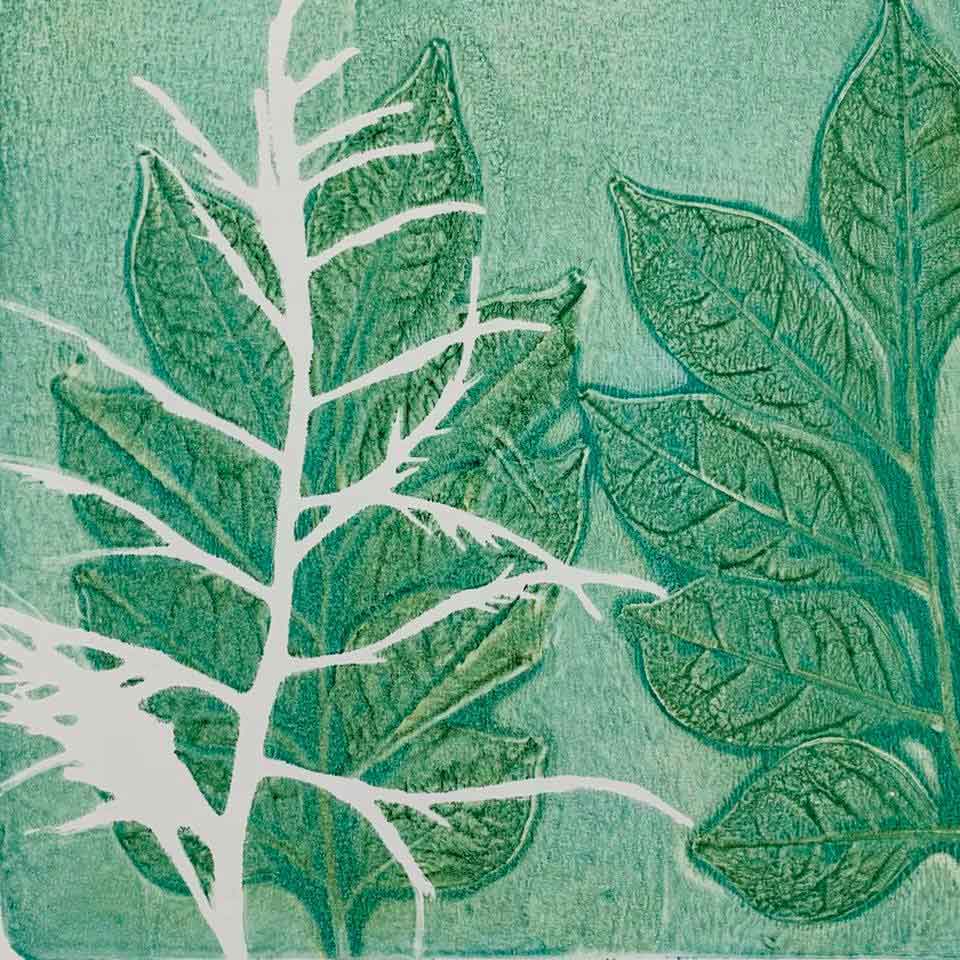
In this article I’m sharing the steps I use to create a white silhouette effect from a gel plate that already has colour and detail impressed onto the plate. Below are 3 example of the process, created in some time-out play time yesterday …


Lets Get Gel Plate Printing
You will need:
- A gelatin plate – either a commercial Gel Plate or Gelli Plate, or have a go at making your own. I’m using the commercial 6″x6″ Gel Press plate in this demonstration, but you can make your own very easily. I have a recipe here.
- paint or ink in your colour of choice
- a Brayer (aka roller)
- 2x sheets of paper
- mark making elements (eg plants, stamps, stencils). For this example I am using plant matter.
Step 1. Ink your gel plate
I’ve inked my gel plate with an even layer of prussian blue paint.
Mix it up a bit and introduce a 2nd colour to the plate before you roll the paint out, or only roll the paint over some of the gel plate. You can get some great results when you play around with different applications of paint to the surface of the gel plate.

Step 2. Place your ‘mark’ on the plate
By ‘mark’ I mean leaf matter, stamp, stencil – what ever it is that you want to ‘print’ as the background behind your white silhouette.
I love to use plant materials, and generally weeds. In this example I’ve used the leaves from a cobblers peg plant. In a world focused on sustainability – I have a very sustainable supply of this plant in my garden 😉

Step 3. Make an impression
Now make your first print. But this printed impression isn’t part of the final print. Rather it’s used as more of a blotting sheet to create the ‘ghost print’ layer.
The real purpose of this print is to create an impression of the leaf shape and vein structure on to the surface of the gel plate.
I rub the paper over the leaves, firm, but not so firm in the uncovered parts of the gel plate (the area with no leaf covering). I don’t want to remove too much paint from these uncovered areas at this stage.
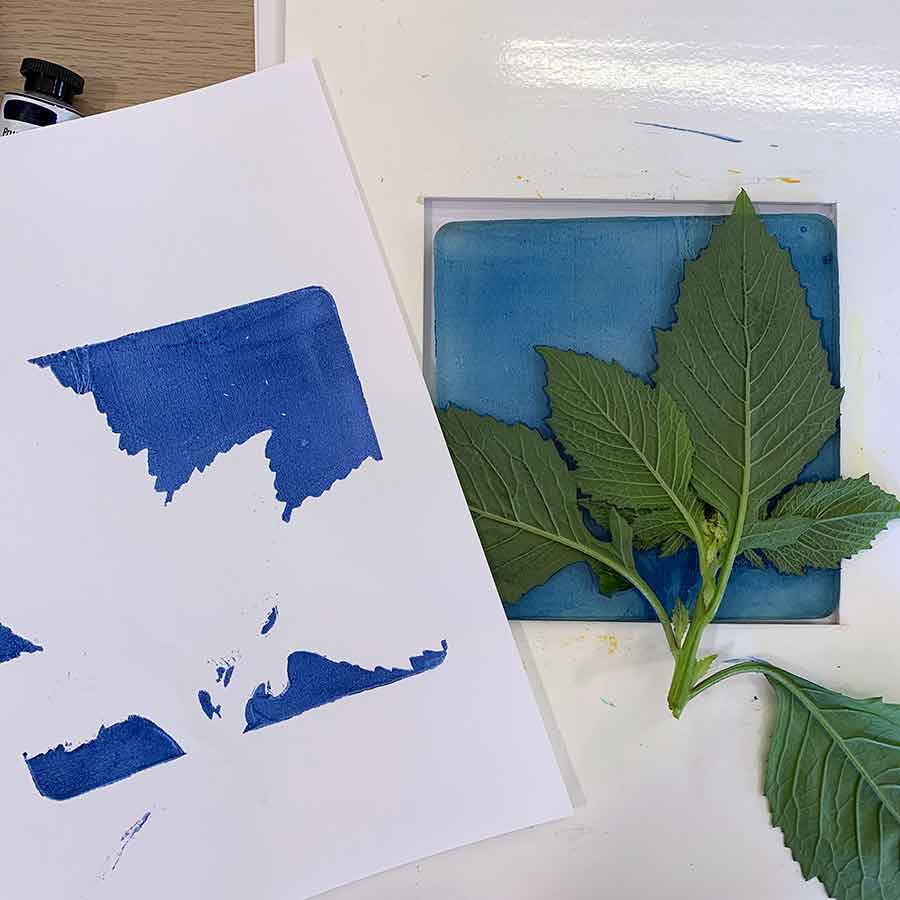
The two pictures shown for this step show:
- the printed impression next to the plate, you can the paint has transferred to the paper, but I pressed lightly enough so as to leave enough paint on the surface of the plate for the next and final print.
- plant removed from the plate revealing the impression left by the leaves and vein structures, ready for the next step.

Step 4. Place your white silhouette
Now place the item that will form the white silhouette on to the surface of gel plate.
I like to play with shape contrast – big and small, long and short, thick and thin. The contrast creates interest on the final printed piece.
In this example I’ve laid some very thin roadside grass on the gel plate.

Step 5. Make your final impression
Grab your 2nd sheet of paper and place it over the gel plate. Give it a good, all-round, gentle rub to make your printed impression, then lift from the plate.
Viola!

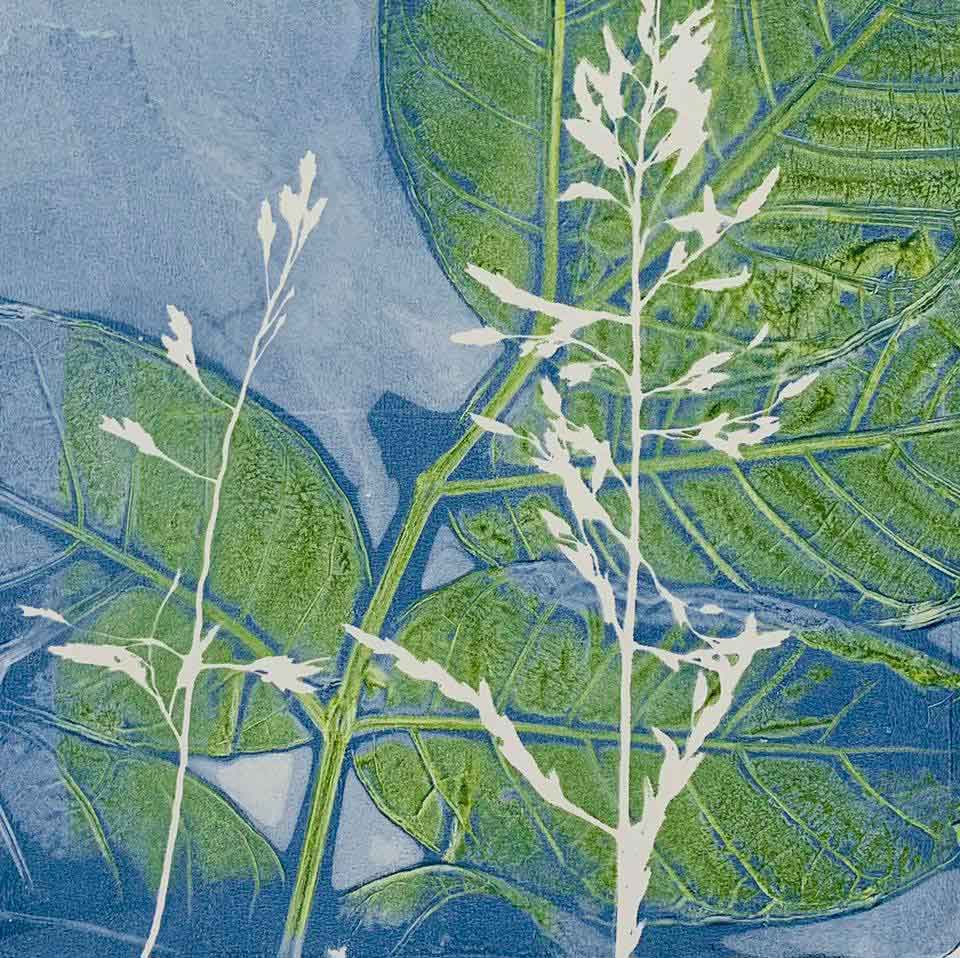
The final image
And here she is … printed.
Mix it up a little – use leaves from a previous print that have paint on them, and face the leaves paint-side-down on the gel plate.
Use the same process with stencils. Print onto music paper of other pre-printed papers.
The ideas and possibilities with this process are unending.

Do you want more Gel Plate Printing?
I have launched an online Gelatin Plate Monoprint workshop, where I demonstrate this printing sequence, making a home-made gel plate and how I create the layered botanical gelatin plate prints that I love to print. If you’re interested, click the button below for full workshop details…
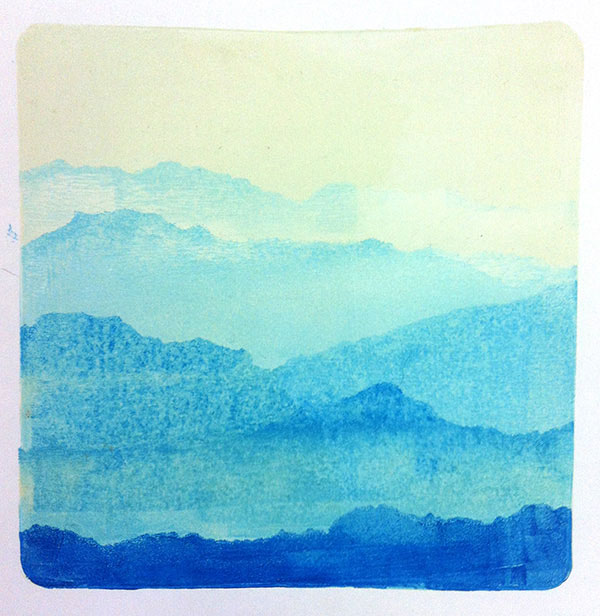
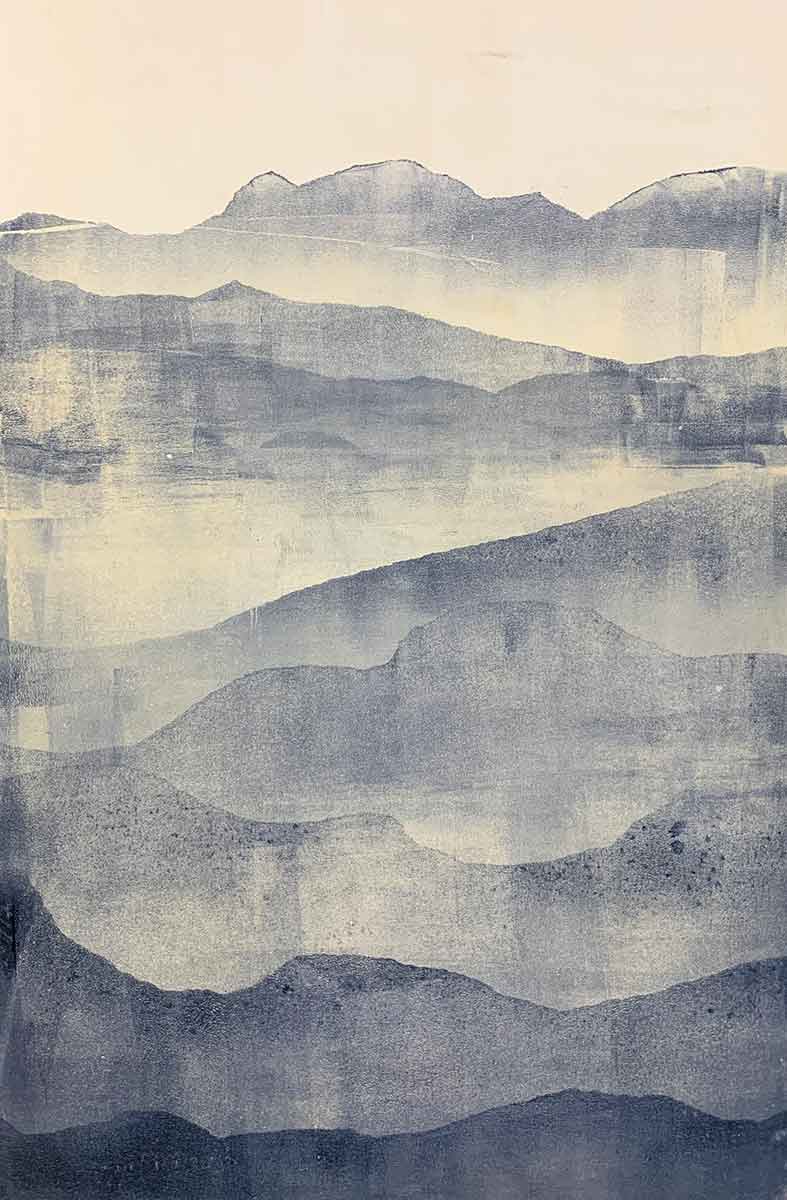
Gel Plate Printing Tip – mountain ranges
This is one of my favourite sequences to print with my gelatin plates. 2 (sometimes 3) paint colours, some torn paper and a brayer. Viola! I love sharing this process in my workshops … and then I love to see students make it their own with their own colour combinations and modify the sequence. Have a go yourself and follow the step-by-step instructions here.

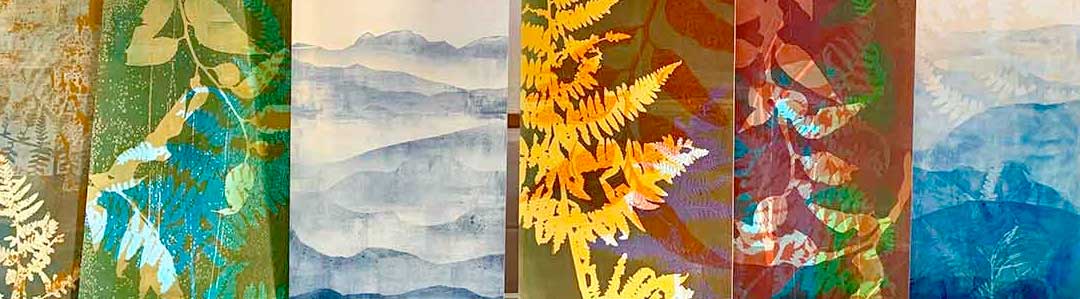
Gel Plate Printing Tip – colour and composition
Do you feel comfortable arranging elements on your gelatin plate to create a satisfying and balanced composition or design?
I share a few tips around composition when printing with gel plates in my workshops. For the most part, I encourage play and experimentation – I believe that ‘doing’ in the process builds confidence and hones intuition. Click here to find out about 3 simple composition tips I share in my workshops, and my thoughts around colour in this process.

Interested in learning more about my approach to Gel Plate Monoprinting?
Printing with gelatin plates, home made or commercially bought, is fun and easy. There are many different approaches you can take, using different paints and inks. If you’re interested in learning my approach, I offer both in-person workshops and an online workshop.
In my workshops I demonstrate and share with you how I create my layered prints using botanical materials. And that demonstrating this post’s process, and how I make my DIY gelatin plates. I’d love to share this all with you.


Thanks so much Kim for generously sharing all these tips and ideas -so helpful. Your work is so beautiful! I am just starting playing with a gellinplate today anfmd this has opened a world of possibilities!
Hi Gabrielle, so glad you enjoyed the article! The process is is such a wonderful process to play with and get lost in. Enjoy it!!! Kim 🙂
Brilliant….many thanks, I’,m about to take my dog out, we’ll be vegetation hunting!!!
Hi Anne, very excitement!! I have never been able to look at plant material the same after I started gel plate printing. Nearly every plant specimen is a consideration for a gel print! Have fun printing. cheers, Kim 🙂
Hav e just made my !st gelli plate, Yippee cant wait to give it a try. Patience is a virtue, I will have to leard . Will let you know how it goes.
Thank you for sharing.
YAY Ann-Jane! You will have soooo much fun. I made a fresh plate last weekend, and filmed me making it. I’m putting together a bunch of videos around gelatin plate monoprinting to do some online workshops. Very excitement. Please share what you print! I love to see what other people create with this process. It is easy, versatile and sooo much fun. 🙂
Oh, I enjoyed looking at your process and your results so simple so unique.
Thank you 🙂 it IS such a simple process, with endless possibilities. I hope you print yourself. Not just look. It is a beautiful process to work with.
Hello, I really love what you do. I would like to experiment with your technique. Could you tell me what brand of ink do you use? What paper? I live in France.
Thank you for sharing. Véronique
Hi Véronique, thank you for your comment 🙂 I used acrylic paints for my gel plate prints – mainly Golden Open Acrylics. Their slow drying times and heavily pigmented colours make them magical to work with. As for paper – I use different printmaking papers depending on what I want to do with the prints once they are finished. I used a quality cartridge paper for the prints in this post. Stonehenge and Zerkall are two papers I use a lot. I’m in Australia, and I suspect our paper choices may not be a great as yours in Europe. I think you can use just about any paper – texture, weight and colour will have an impact on the final print. Play and experiment. Viva la printmakign !! 🙂
I like how you break down this process – Thanks for sharing 🙂
Thanks Ali. It’s such a deceptively simple process – once you see the steps you can see how simple it is, but looking at it beforehand can be tricky. I had a look at your website – beautiful work. I’ll go and spend some time in there. I also love love love making artist books. Something I now have the space to invest more time into it. 🙂
Beautiful. Thanx for this x
You’re very welcome! Have fun printing. Its such a fun approach to the process 🙂
Where And when are your workshops?
Hi Dee, I’m based in Australia. Are you? Or are you overseas? I’m in Maleny, just north of Brisbane. My next workshop is in September, then that will be it for this year. This page has dates for upcoming workshops.
Loving your work and finding the tutorials really work ,am having great fun and success with layered botanical prints making cards wrapping paper and prints ,would love to come up next year (post covid hopefully ) !for a workshop
Hi Chris, I’m so happy you found this helpful 🙂 And here’s hoping that 2022 is finally the beginning of a ‘post covid’ era. Fingers crossed! I have my gel plate monoprinting workshop online now, if you’re interested. I will be posting more advanced techniques in a ‘Beyond the Basics’ extension toward the end of this year. Things are not great down south – I hope you’re safe and healthy. If you’re in lockdown – enjoy more printing time 🙂
Many thanks for sharing Kim! It will make it much easier to have a play when I get myself sorted!
Thanks Roz. It could be fun to combine this with some cyanotype too 🙂
Fantastic explanation and illustrations of your “white silhouette’ process, Kim. Thank you for your generosity.
Thanks Alison. I’m glad it makes sense. If and when you have a go at this in your own time, I’d love to see the end results! Viva la printmaking 🙂