

Gelatin Plate Printmaking Recipe

Monoprinting with gelatin plates is a helluva-lotta fun! The softness of the gelatin plates allows you to capture and print great detail in your artwork. When to comes to printing with gelatin plates, you have 2 options – either make your own, or buy them. I use both options! Below I share with you the gelatin plate recipe I like to use.
For a long time the only option was to make your own. They are easy to make, but depending on the ingredients used, had a limited life. The addition of glyercerin to the recipe seems to have solved that problem.
For those of us who would rather buy something ready-made, along came Gelli Arts and Gel Press…
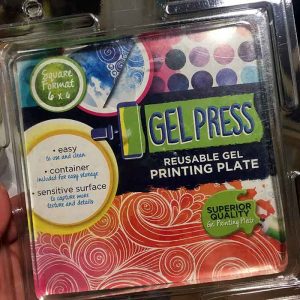 Gelli Arts produced a “non-perishable printing plate that had the same sensitive surface as gelatin; a plate that could be stored at room temperature [in the] studio; a plate that would always be ready for printing; and importantly, a plate made of non-toxic materials.“
I run Gelatin Plate Printmaking workshops, and in these workshops we use the commercially produced Gelli Art plates. I have a home made plate on hand to show you, and we talk about how to make your own gelatin plates at home; and below is the recipe I use.
I like the convenience of the commercial Gelli Art plates but they can be expensive (ranging from AU $30-$85+ depending on the size). Having said that, when looked after, they will last you years. Making you own gelatin plates means you can create your own large plates, or make one large and cut them into smaller plates. You can pour the mixture into any flat-bottomed tray, dish or bowl; creating plates of all sorts of shapes and sizes. My recommendation is to aim for a thickness of approx 8-10mm.
In my printmaking arts practice, I like to use both my own home-made gelatin plates and purchased Gelli Art and Gel Press plates.
The Gelatin Plate Recipe
Ingredients
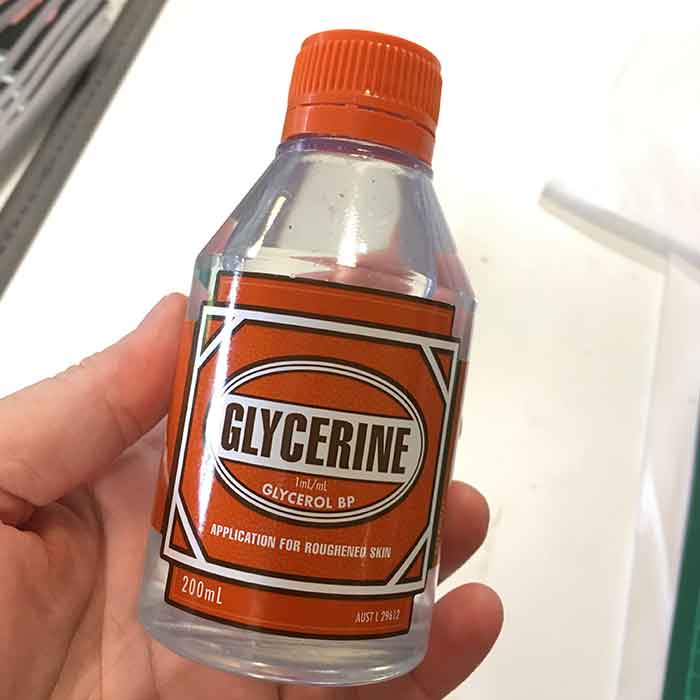
- 375 ml glycerin – I buy 2x 200ml bottles, using 1 and 3/4 of the bottles, keeping the other 1/4 for my next plate
- 1/2 cup cold water
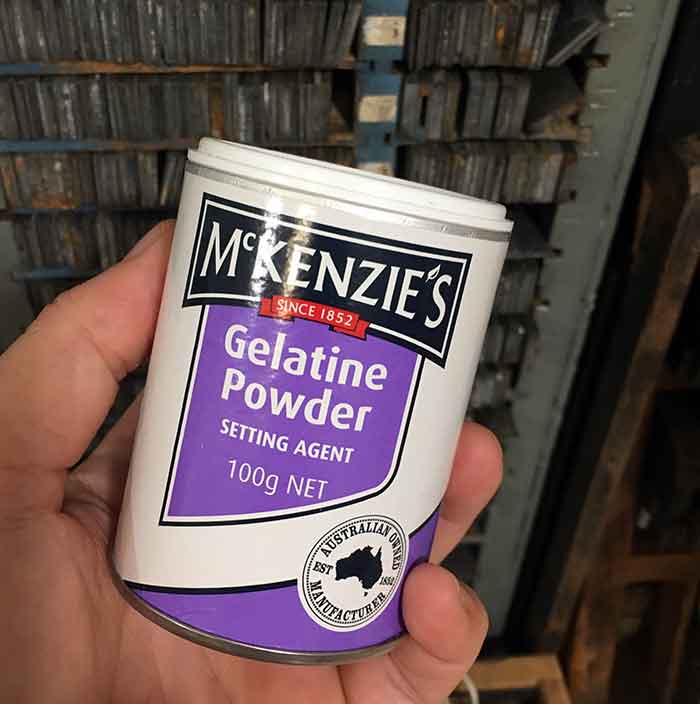
- 115 grams powdered gelatin – I buy 2x 100gm McKenzie’s tins, keeping the excess for my next plate
- 1 and 1/2 cups rapidly boiling water


Utensils
- large mixing bowl
- rubber spatula
- measuring cup
- 22cmx 33cm biscuit tray. You could use any shape tray or dish, as long as you end up with approx 1cm thickness of gelatin mix for the plate
- spirit level – to check the tray is level
- strips of cardboard to level the tray (if needed)
- newspaper strips to remove surface bubbles
Lets get making…
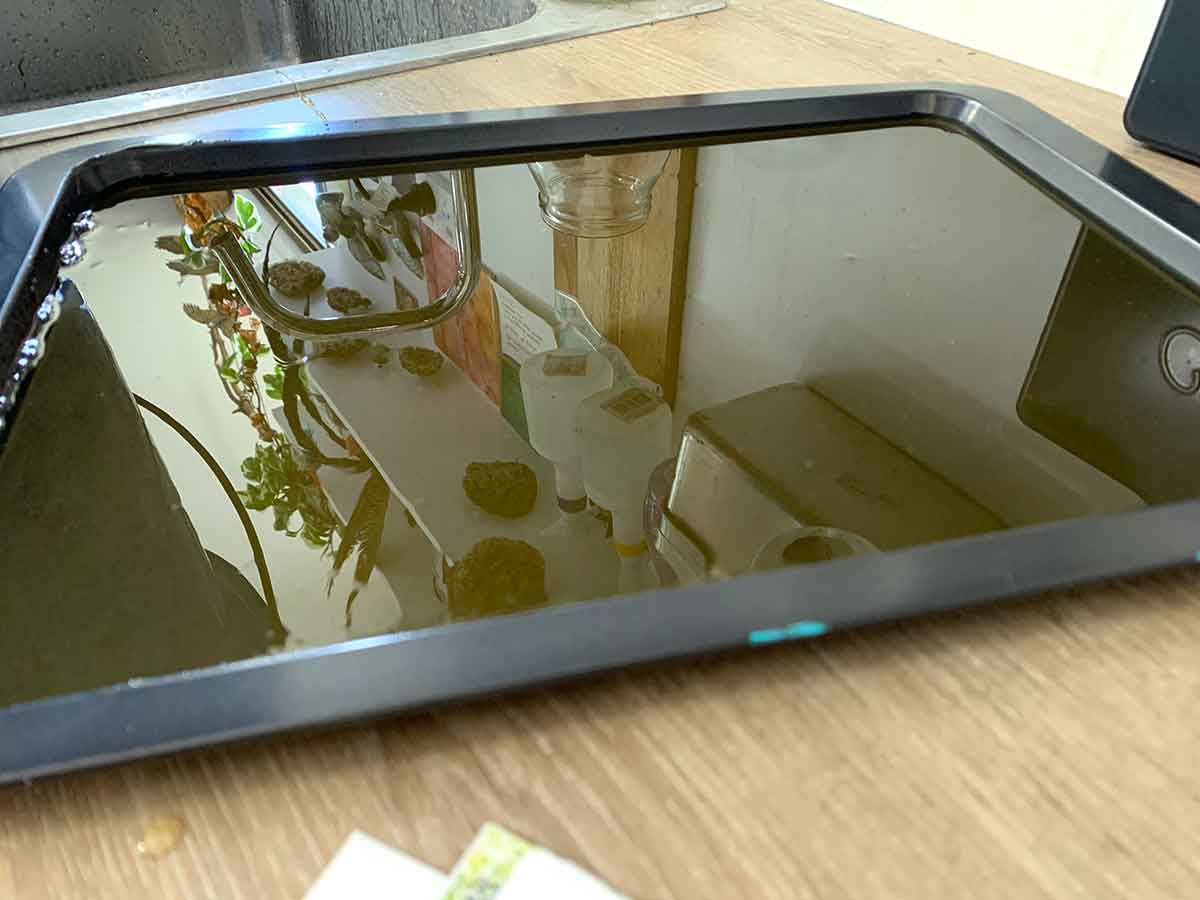
- Get all ingredients and utensils ready before you get started. Once you start, the gelatin reacts pretty quickly, so the better prepared you are, the easier the process is. This includes checking that your tray is level on the bench, ready to receive the mixture as soon as its ready. Use your spirit level and strips of cardboard to level the tray on your bench, making sure that it will be a safe place to leave the tray while the mixture sets (approx 1-2 hours).
- Place 1/2 cup cold water in a bowl.
- Pour half of the glycerin liquid into the water. I buy 2x 200ml bottles of glycerin, using 1 and 3/4 bottles for this recipe, so I pour all of the first bottle into the bowl at this stage.
- Using the spatula, stir to mix thoroughly, but mix slowly. This is important so as to not add bubbles into the mixture.
- Once thoroughly mixed, sprinkle all the gelatin powder into the water/glycerin mix.
- Using the spatula, mix and squish the mixture to remove all lumps and clumps of gelatin, maintaining a slow mixing (and squishing) motion to reduce the addition of bubbles.
- Once you have removed all of the lumps, add the rapidly boiling water and continue to stir, slowly, until all the gelatin crystals have dissolved.
- Once all the gelatin crystals have dissolved, add the remaining 175ml of glycerin. I pour in 3/4 of the 2nd bottle, saving the rest for my next plate.
- Slowly stir to thoroughly blend all ingredients. It is still important to maintain the slow stirring so you don’t introduce additional bubbles.
- Once all of the ingredients have been blended, pour the mixed liquid into the tray – slowly and carefully to avoid spilling.
- You will see some bubbles on the surface of your poured mixture. There may be a few, or there may be many.
- Use the newspaper strips to skim bubbles off the surface of your gelatin mix – slowly drag a strip of newspaper across the surface of your gelatin mixture.
- Leave the tray to set on the bench top. DO NOT move the tray until the mixture has set. Within 1-2 hours it will normally set enough to then move the tray to the fridge.
- Once set, place the tray in the fridge for the final ‘setting’. This will normally take 3-4 hours. I like to leave it overnight so that the plate shrinks a little in the tray, making it easier to remove it from the tray.
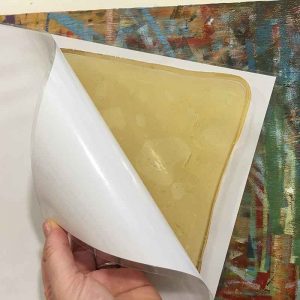
- Once set, remove the gelatin plate from the tray and it is ready to use!
- When not in use, place the gelatin plate between 2x sheets of acetate or stiff/hard plastic. This will protect the surface of the plate.
Do you want more Gel Plate Printing?
I have launched an online Gelatin Plate Monoprint workshop, where I demonstrate making this gel plate recipe plus how I create the layered botanical gelatin plate prints that I love to print. If you’re interested, click the button below for full workshop details…
Storing and Caring for your Gelatin Plate
Once the plate has set you can lift it out of the tray and start using it.
The plate does not need to be stored in the fridge. If you do keep it in the fridge, it will continue to shrink. Refer below to see how much shrinkage can happen after a few days in the fridge.
I keep mine stored between 2 sheets of acetate/plastic. Any plastic no thinner than a laminated piece of paper will do the trick. Thin flimsy plastic (like plastic wrap or the plastic of plastic sleeves) will not protect the plate from impression marks.
Make sure, when you store your plate, that there is no foreign matter between the plate and the plastic covering. I may we create a permanent indentation on your gelatin plate.
Given the sensitivity of the material, some minor imperfections may not show up in prints, while others will be hard or impossible to avoid.
Comments and Troubleshooting
Gelatin plates really are VERY easy to make. Follow the instructions carefully and you should end up with a perfect gelatin plate to start printing with.
Having said there, there are some hiccups that can happen. I’ve made notes below with common problems as well as some additional tips.
Bloom Strength and firm vs soft gel plates
If you make a gel plate and find that it is too soft to print with, or not holding its shape when you remove it from the mould, it could be that the gelatin you have used as a low ‘Bloom strength’ value.
‘Bloom strength’ refers to how strong the gelatin is after it has bloomed and set. The higher the ‘Bloom value’, the firmer the gel will set, and the better the quality of the gelatin product.
Most supermarket gelatin doesn’t state the Bloom strength of the gelatin. The product I like to use, McKenzie’s Gelatine Powder, has a Bloom strength of 210-230. The scale runs from 50 to 325, with 125-225 being a medium Bloom strength.
If you’re having problems with your plate setting firm, see if you can find out the Bloom strength of the gelatin you have used, increase the amount of gelatin, or look for an alternative brans. You can read a bit more about Bloom strength here.
One Recipe – Two (or more) Plates
You can pour the mixture it into smaller trays or moulds to make multiple smaller plates. I teach gelatin plate monoprinting in high schools and many of the schools opt to make their own plates. This recipe will divide well to make two or three plates. Kylie Stapylton from Wavel State High School made 20+ plates for her year 12 students. She poured each recipe mixture into two containers to make many smaller plates. By doing this she created an ingenious solution to mould and store the plates. They set perfectly in the container and stacked for safe plate storage.


Gelatin Lumps
This is what can happen if you don’t squish out all of the lumps while you are slowly blending your gelatin, glycerine and water mixture. These lumps WILL appear on your printed pieces – they will add imperfections to the surface of the plate.
Mixing the liquid can take 5-10 minutes. Take your time to carefully squish all the gelatin lumps that formed when you poured the powdered gelatin into the water-glycerine mix. A slow motion with the spatula will do the trick. You could try to remove stubborn lumps when you pour the mixture into the tray, or move them to one end of the plate and cut that away when the pate has set; but it is best of you can remove them while mixing your ingredients.

Surface Bubbles
This is when you realise how important it was to mix at each stage SLOWLY … if you mix the ingredients too fast you can introduce extra bubbles into the mixture. Some bubbles will occur naturally, but you want to work to keep this to a minimum.
Once you have poured the mixed ingredients into the tray, scraping the bubbles off the surface of the plate is easy, but the fewer bubbles there, the better the result. Too many bubbles can create a scum on the surface.
Simply drag a strip of newspaper across the surface of liquid once you have poured it into the tray. The liquid is thick and sticky, making it pretty easy to lift the bubbles from the surface. If you have too many bubbles or a scum on the surface, scrape them to one of of the plate, then when set the plate has set you can simply cut that section of the plate away.

Plate Shrinkage
From my experience, the plate will ONLY shrink if you leave it in the fridge. I like to leave it in overnight once the gelatin mixture has set. It really only needs about 4 hours for its final setting before its ready to work. If you leave it in the fridge overnight the plate will shrink a little in the tray. I left one plate in the fridge for 4 days (it was the spare fridge and I had forgotten about it). It shrunk a good 20mm in each direction. That wasn’t a problem, but good to have seen how much it can shrink in the fridge. I’ve not had any shrinkage issues when the plate is left out of the fridge.
Melting the plate and starting again
If you find that you have too many lumps in your finished home made gelatin plate, you want to reshape it in a different mould, or it has split or become damaged with use, simply melt it down in the microwave or over the stove and repour it.
It’s very simple. Click here for 5 quick steps to melt and re-pour your plate to get printing again.


Commercial Gelli Plates
The commercially produced gelli plates are clear and soft. They are a sensitive surface to work with, soft and able to retail much of the detail of any item placed on top of it. If you hold the plate it is floppy, but retains its shape perfectly. While the surface can quite robust, it is important to remember that it is still quite sensitive. I tell my students to treat it as you would your own skin – it can scratch and mark if not used carefully.

Homemade Gelatin Plates
Home made gelatin plates, using my gelatin plate recipe, will have a yellow tinge to them. They are a little floppier than the commercial plates, but work just as well. I have found that they don’t hold their shape as perfectly as the commercial plates, bit doesn’t worry me. You can experiment yourself with the gelatin:water/glycerine ratios to make a stiffer plate if you like. If you do experiment with the gelatin plate recipe above, please share below what you did and how your plate turned out.
Want to learn more about gelatin plate printmaking?
Printing with gelatin plates, home made or commercially bought, is fun and easy. There are many different approaches you can take, using different paints and inks. If you’re interested in learning my approach, I offer both in-person workshops and an online workshop.
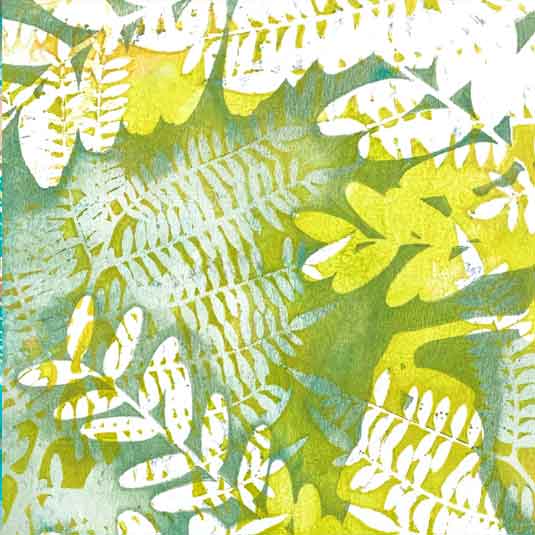
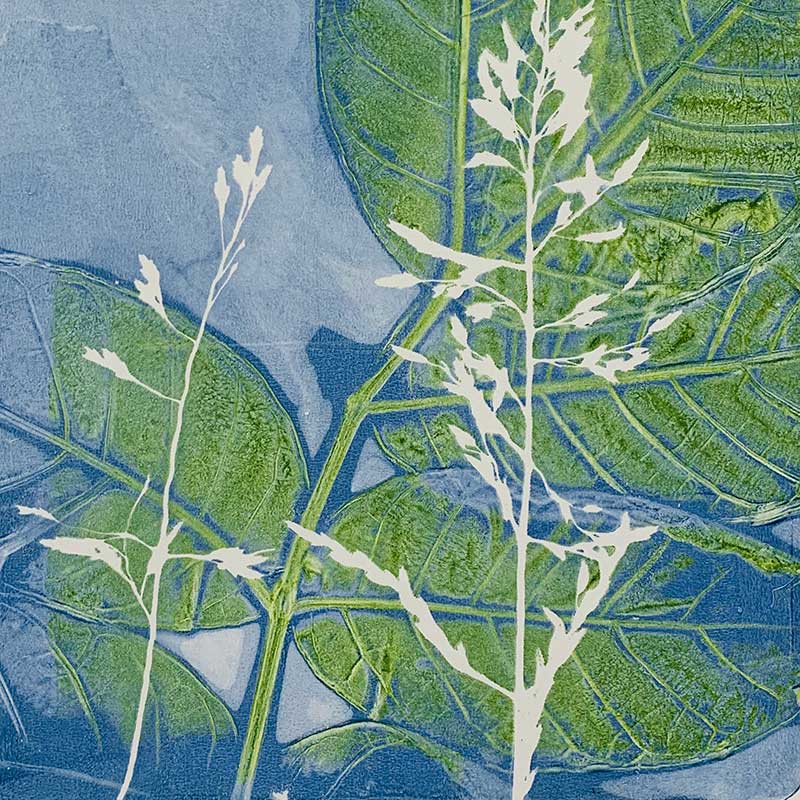
In my workshops I demonstrate and share with you how I create my layered prints using botanical materials. My online workshop has a video lesson dedicated to making your own plate, from start to finish. In my in-person workshop I show you my homemade plate and we talk about making your own DIY gelatin plates. I’d love to share this with you.

Gelatin plate printmaking tips
Watch this space – I’ll be adding tips and ‘how to …’ articles over time.
Tip 1 – Gel Plate Printing – printing a white silhouette
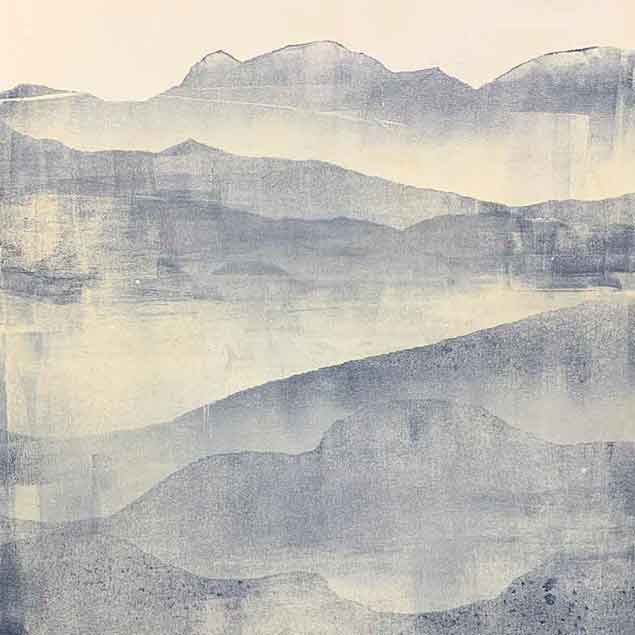
Tip 2 – Gel Plate Printing – printing mountains
Tip 3 – Gel Plate Printing – colour and composition


-
[…] Gelatin Plate Printmaking Recipe […]
[…] Members are asked to bring their own gelli plate, either a commercial or homemade one which doesn’t need to be stored in the fridge. If you would like to make your own gelatin plate Kim Herringe has a recipe here. […]
[…] This is another good blog for making your own plates. […]
[…] Bring your own gelli plate, or make one which doesn’t need to be stored in the fridge using the following recipe https://kimherringe.com.au/printmaking/gelatin-plate-printmaking-recipe/ […]


Hi there! Thank you so much for this recipe! I tried it and it worked pretty well 🙌🏼 I am wanting to make a larger plate about A3 size. Problem is I can’t find a tray big enough! I was thinking of using a large storage container but then I have the problem of refrigerating it. So my question is, does it definitely need to be placed in the fridge or could I leave it for a longer to set outside of the fridge? Or could I remove it from the container after it’s set for 1-2 hours and then put it in the fridge??
Hi Monica, no, the plate doesn’t have to go into the fridge. I put mine in simply to shrink the plate in the tray to make it a little easier to remove. I’m guessing the fridge dries it out a bit, evaporating some water, hence shrinking it. It will work just the same not putting it in the fridge. cheers, Kim 🙂
Hi Kim. This is amazing, thank you! I’m currently mass producing them in pencil boxes for easy storage and transport as I am a mobile art teacher. My first 3 batches went well, I used Knox for my gelatin. After using what I had in that box, I invested in a large jar from the ‘zon. However, my next batch fell apart when I removed them from the trays after setting overnight in the fridge; they just didn’t have the durability my first batches did. I’m hoping you might have some insight or advice!
Hi Mr Brad and the Art Dude. Hmmm. I don’t know that the Knox brand, and I’m guessing the “zon” is Amazon?? Its possible the ‘bloom strength” of the zon product is too low, meaning the gelatin won’t set. My first thought it to increase the amount of gelatin. Make a small batch and try doubling the gelatin quantity. I wrote about “bloom strength” late last year. Until then, I didnt know that it existed. Have a read here – https://kimherringe.com.au/gel-plate-monoprinting/gelatin-bloom-strength/
If you haven’t already tried this – melt down the falling-apart plates (https://kimherringe.com.au/gel-plate-monoprinting/how-to-melt-and-re-pour-a-homemade-gelatin-printing-plate/) add more gelatin and repour them. Hopefully you can salvage the materails you’ve already used. I’d love to hear how you go!! Good luck 🙂 cheers, Kim
Oh yay! Some Australian instructions! I wish I found this earlier. YouTube recipes are generally US and hard to translate into our products. Anyway, mine is going well. How do you clean yours? Also, something that annoys me is that when I put a blob of paint on the plate, when I roll it out with the brayer the original blob area stays clear with no paint on it.
Hi SM 🙂 I clean my plate while printing with baby wipes. If there are stains or stubborn paint or debris on the plate I’ll also use a little baby oil. As for that blob – I know what you’re talking about! I find it happens with different paint types. Some types of acrylic it doesn’t happen, others it does. Its possibly to do with the ‘filler’ in the paint. When it happens to me, I work around it. It either becomes part of the print, or I’m able to eventually roll paint over it. Enjoy your printing !! Kim 🙂
Hi Kim, Thanks so much for your generous sharing of hard won knowledge ! I’ve just bought ingredients for my first gel plate making effort. Reading the gelatine label (McKenzie’s 100g powder that you use), I see they say NOT to boil as this will: ‘destroy the gelatine’s setting ability’. Just wondering how crucial the boiling water is and could I instead dissolve the gelatine first (following directions on the packet) before adding to the glycerine/ water mix; maybe use half of the water for the gelatine and half for the glycerine ? All the best in printmaking.
Hi Jock, Ive not actually read the McKenzie’s instructions. But, I pour the boiling water from the kettle into a measuring container, then in to my bowl with the gelatin, so its off the boil by that point, but still very hot. I’ve not had a problem with the setting of the gelatin, so I’m assuming that the time from boiling point to when it’s poured into the bowl must be enough to safely set the gelatin. Thank you for commenting! It gives me an idea for experimentation. cheers, Kim 🙂
Hi Kim, thanks so much for your reply, I’m about to start my first brew !
Thank you so much for this post, it is really helpful. I have been looking for gelatine online but it keeps mentioning bloom strength. Any ideas?
Hi Louise, thank you for reading my post, and THANK YOU for the question. I had not heard the term “bloom strength” before, so went looking. Fascinating, and probably the answer to some people problems when making the plate and it isn’t setting as expected. In gelatin, the higher the ‘bloom’ number’ the stronger the gel. The ‘bloom strength’ determines the texture of the recipe you are using it for.
What country are you living in? I have only ever used McKenzie’s Gelatine Powder to make my plates, I’n in Australia. I’ve never had a problem with that product. I have suspected that different ingredient brands could be creating different plate results, and this will explain why, with regard to the gelatin. My suggestion is that you use what is readily available to you. If you find that the plate doesn’t set, then you may need to source a different brand of gelatin, or use more of what you have to counteract the difference (but I can’t give you any idea about how much).
I found this article on the KitchenAid website which is interesting – HOW TO BLOOM GELATIN POWDER AND SHEETS. Below is a copy/paste from that page specifically about ‘bloom strength’:
The bloom strength of gelatin refers to its firmness or softness once it is bloomed. The bloom strength eventually determines the texture of the recipe you are using it for.
Bloom strengths are typically measured on a scale of 30 to 325, and gelatin is often referred to as having a low bloom (50-125), medium bloom (125-225) or high bloom (225-325). Most gelatins sold in grocery stores do not have the bloom strength listed, but you can typically assume that they are of a medium bloom.
Thanks Kim.
I am in the UK and I was looking online for gelatine. I have purchased some Dr Oetker, little packs but there is no mention of bloom strength on these. The brand states ‘sets perfectly’ so let’s wait and see. However, a web search says “European, store-bought gelatin (e.g. Dr. Oetker) is usually platinum strength, with a 250 bloom”. Here in the UK we also have the option of Leaf Gelatine and Powdered Gelatine, although I think that makes more of a difference if it’s culinary as that seems to affect taste and texture (possibly might make a smoother plate, who knows?)
A quick search for the brand you use brings up
“An important element in determining the quality of gelatine is the firmness or strength of the set gel. This is characterized by the “Bloom” value. The higher the Bloom number, the stiffer the gelatine and, in general, the more expensive it will be.
McKenzie’s Gelatine Powder and McKenzie’s Gelatine Leaves are both PLATINUM STRENGTH. Gelatine Powder has a bloom strength of 210-230 and McKenzie’s Gelatine Leaves has a bloom strength of 220-260.
As for the online selection in the UK that is when it gets mind boggling….5000 odd results on eBay for gelatine as an example. I guess if buying online you would be looking for a bloom strength of a between 210 – 250?
I am also going to hunt out some agar agar, a vegan setting agent to see what that delivers too. My friend and I are going to have a plate making session, we will keep you up dated with our plate results.
Thanks again for the reply.
Hi Louise, you beat me to it. I’ve done some research this afternoon and turned it into a blog article. You can read it here, but it pretty much repeats what you’ve written above. I’ll add info about bloom strength to this post too, for other interested plate-makers. Re leaf vs powdered gelatin – use powdered for the gel plates. Yes, please keep me updated. I would love to know how you go with the agar agar. cheers, Kim 🙂
Hey! I had some trouble getting my plate out, hence lots of rips 🙁 do you know how I could get the plate out easier?
Hi Deanne, that’s tricky to answer without seeing what you’re working with. What did you pour the mixture into? Once set, it should peel out of the tray/dish effortlessly. You may need to work it a little to release the sides, but once started, it should just peel away. If its ripping it may be that the mixture isn’t thick enough with gelatin. Are you abel to double check the amounts you used? you could try melting it down and adding more gelatin, then resetting it. I hope that help. cheers, Kim
Hello Kim,
Thanks for all this detailed information, but I have a question.
After looking at a number of DIY jelly plate recipes I noticed that some of them incorporate alcohol. what is the benefit or purpose of using alcohol
Hi Adrian, I’ve not used alcohol in my recipe, so I am not 100% sure. I think they are doing it to inhibit mould. I’ve never had a problem with mould on my DIY plates, and I live in a very damp and humid area. For me, I just store my place in a cool dry shelf, and other than the 3 ingredients listed above, I don’t need anything else. cheers, Kim
Great website and great info, thank you. I also have a gel arts plate and a homemade plate. I am storing both plates separately in plastic containers without any paper covering them. Is that okay? Also, if I did need hard plastic to protect the bottom and top would laminated card stock work for storage purposes? Thanks.
Hi Joe, yes, laminated card stock will work perfectly. As long as the surface that lays on the top of the gel plate is smooth, perfect. I have use a large sheet of laminated paper when I didn’t have anything else big enough for my home made plate. I store my commercial gel plates in the plastic clam shell packaging they come in. I use paper to draw out some impressions in the plate every so often. I store my big 16″x24″ plate between sheets of paper. It is important to cover them to keep dust off, and other debris from settling on the plate. I hope that helps. cheers, Kim
Hi,
I’m Ashivta in India – a really hot country! 🙂 and have just made my first homemade gelly plate, using a recipe from a Gelli printer on YouTube, i think the proportions are pretty much the same as yours, Kim. And yes it came out perfectly, but a little thick! I’ve got some lovely prints off it using cake stencils, cake texture plates, and other found objects. It’s an addictive art form. Right now its winter and I fear the summer may damage my plate, but I have no fear reading this blog as well as a video from the original video I followed I know I can remold the plate.
What I’m having trouble with is image transfer – and I dont know if it is because of the homemade Gelli plate or the type of prints or ink. If you Kim or anyone has had success with the homemade plate please share any tips or tricks.
Hi Ashvita, image transfer is easy if you get the right combination of plate, paper and printed material. The magic of the process is the printed material you are wanting to transfer has to resist the paint you are using on your gel plate. They are 3 different variables. I don’t do much image transfer, so I can’t offer any tips, however Drew Steinbrecher share some great tips on his Instagram account – https://www.instagram.com/drewsteinbrecher/ He posted recently with some good tips – https://www.instagram.com/reel/C4YWUxuxxSV/?utm_source=ig_web_copy_link&igsh=MzRlODBiNWFlZA== I hope that helps. cheers, Kim 🙂
Do you need to oil your tray to prevent the geliplate sticking?
Hi Eleanor, I use a non-stick tray, so no oil needed. I’ve not made the plate in anything else so I can’t confirm with any authority that you do or don’t with a non-stick surface, but I would err on the site the you don’t need to. I hope that helps. cheers, Kim
Hi, thanks for sharing your process/recipe! I can’t wait to try! Are you using vegetable glycerin? I’m
Hi Kristen, I think so. The one I use has ‘Glycerol BP’ on the label. From what I have been able to find out, it is derived from vegetable oil. cheers, Kim 🙂
Substitute one quarter cup alcohol for same amount of water and your plate will never get moldy.
thanks for that. What do you use for your alcohol? I’ve not had a mould issue, and I live in a very mould prone area, but I know other people do.
Hello. I need some troubleshooting advise, please?
I made a 12×12″ plate, but it remains brittle and breaks up in very small pieces when I even only attempt to get it out of the container it set in. Any advise or idea what the cause may be? Thank you.
Recipe I used (made this before discovering this webpage): 24 Tablespoons gelatin powder, 400ml glycerine, 200ml boiling water, 400ml cold water, stirred and then microwaved 1 min three times till it was nice and clear. Poured into square plastic container of 26,5 x 26,5 cm and left to set (no bubbles on surface).
PS: I did make some small gelli plates long ago that are still perfect condition and strong during handling, but cannot remember if I then added alcohol – I see some people add it to the recipe – don’t know the purpose of the alcohol? Does it make the plate stronger?
Hi Amanda, I’m not sure how to help you. I have only ever made my own plate with this recipe and I’m not sure how your tablespoon measures convert to the grams that I use for the gelatin powder. If the plate is too brittle it suggests to me that there is either too much gelatin powder or not enough water. I also don’t use a microwave, so I’m not sure how that impacts the end result. As for the use of alcohol – I have never needed to use that in my recipe. I’ve heard of people using it to keep mould away, but I’ve not had a mould issue with my plate either, and I live in a very mould-prevalent area. I’m sorry I’m not much help for you here. cheers, Kim
Hi, I’m excited to try this, your prints are lovely. When I was gathering the ingredients I realized I made a mistake and ordered propylene glycol instead of glycerin. This is probably a silly question so sorry, but, do you know if this will work in the same way?
Hi Ruby, I wish I had an answer for you, but I don’t. I don’t understand the chemical specifics of each ingredient. I just did a google search for “is propylene glycol the same as glycerin” which turned up some interesting information. I may work, but it may not. I have never tried it so can’t give you an guidance here I’m sorry. If you do try it, I’d love to hear how you go with it. cheers, Kim 🙂
HI! I love your art and your teaching too.
I didn’t succeed with the gelatin plate, I followed the recipe, used a scale, but it came out too soft, breaking when trying to get it out of the tray. I melted it and tried again and it didn’t work. Is there a way to make it harder? Maybe add more gelatin? Thanks in advance
Hi Maggie, hmmm ?? Definitely try adding more gelatin. It’s tricky to answer this one – consider making it again but triple check the measurements? It sounds obvious, but did make it ones and I messed up my ratios when measuring and it was disastrous. I’ve not had an issue with the plate being too thin before. What gelatin are you using? cheers, Kim
Hi Kim, I got my first commercial plate late last year from a newly made printmaker friend who was selling up gear before moving across the country to Tassie. Loved it but was keen for something bigger. Ive jjust made my first gel plate during our 5th day of 40C in Western Australia. Thankfully not that hot inside with the aircon on. I used a very old baking tray, a little battered and stained but it still did the trick. Followed your recipe amounts. I will have to make more through as I bought lots of extra Gelatin “ just in case” I left the gel to set for two hours then put it into the fridge over night. Plate lifted very easily from the tray. Yay! Looking forward to printing on it later today.
I found I couldn’t get rid of all the Gelatin lumps until I started adding the boiling water at the end, then thanks to lots of squishing with a metal spoon and the water heat I finally got rid of pretty much all of them.
Hi Kerry, yay you for making it! keep it in a cool place inside and it should handle the heat ok. If you’re worried you can store it in the fridge – but it will probably continue to shrink little-bit-by-little-bit. Re the lumps – yes, I get them too. I gently and slowly squish mine. You can sieve through some muslin or cheese cloth, btu I feel that you’d lose gelatin doing that. You could add extra to compensate. Enjoy your plates 🙂
Looks like you published this a few years ago, so I’m not sure if anyone will see this.
A Double batch of your recipe made one half-sheet baking tray-size plate approximately 13″ x 18″, a 6″ round plate, a 3″x5″ plate, and a 4″x6″ plate.
I had little issue with bubbles until I poured, and even then it was minimal. As I dragged the newspaper across the surface trying to eliminate the few bubbles I had, I quickly realized that if I didn’t pull the newspaper all the way to the end and up the side, it made more bubbles AND foam, which indeed happened. Was that what you meant, to pull the newspaper all the way up the side of the mould? I don’t see how else that could work, as just dragging the newspaper seemed to break the bubbles up so they formed foam.
I also made only a prefunctory attempt at leveling, and only the larger piece. Sitting on my kitchen counter, my baking sheet wasn’t more than approximately 1/16 of an inch out of level, but I’m not sure what difference a very slight tilt will make to my prints once it’s set up anyway. the extremely slight amount of foamy-ness around a couple of the edges are bothering me way more as I wait for these to set up.
Thanks so much for your spirit of experimentation, and your generous willingness to share your insights. During this pandemic, when many of us are turning to art to soothe and regulate, generous artists like you are a light in the darkness. Much gratitude to you!
Hi Ann, I’m thrilled you found the recipe and got making.
Re newspaper skimming – Yes – it is a perfect pandemic respite. Yes – you need to drag the newspaper to the edge of the tray. I wipe to the edge then off the side.
Re foam – if the foam has set into a square/rectanglar plate shape you can trim it off. Or melt the plate down and re-pour it. Just be mindful that you’ll lose a little water with each melt so the re-pour will be a little stiffer than the previous. It will still print though 🙂
Re a plate tilt – it will still print totally ok, you’ll just be working on a slight angle.
Enjoy your printing. It really is fabulous creative respite – I work with it with that intention often. xx
I’ve only been to obtain 100 gelatine and 100ml glycerine.
My head will not do the maths, could you help?
I guess I’ll just have a really small one….
Hi Caroline, yes, it will make a small plate 🙂 Approx 1/4 size of the original recipe.
I’ve worked out some numbers below:
…..
Starting with 100ml of glycerine I worked out:
– change 375ml of glycerine to 100ml;
– convert 115g of gelatine powder to 31g;
– convert 1/2 cup cold water to approx 33ml;
– then when you’re ready for the boiling water, convert 1.5 cups to approx 100ml.
…..
I’ve not made the recipe with these ingredient proportions, so can’t 100% vouch for it. I’d love to see yours turns out – please share how it goes. Cheers, Kim
Hi Kim, yesterday we had our first go at making gel plates. Both of them ended up being cloudy not clear.
All we could come up with was that the kitchen was too warm. Do you think this could make them cloudy? Do we need to make them in a cold room or outside? We are in Tasmania so yesterday was a bit fresh outside.
The person who was showing us how to make them has made several and they were all clear. We used both the products/brands you suggested.
We’re stumped! Cheers from Hobart
Hi Steph, I have made my gel plates at the height of a Queensland summer, so I don’t think the room temperature should have any impact. Cloudy or not – the end print result should still be the same. Have you had a go at printing with your plates? It would be interesting to compare of there is a difference between the printed results from your plates vs your friend.
Hi. I have made gel plates with alcohol and without. My problem is that neither of them will lift
distress ink and artist quality acrylic paints bead up on the brayer and lift off the plate so the prints are not smooth.
My brayer is the Dina Wakely brayer made for gelli printing and I find the cheap student acrylic
paints work best. I have been tempted to buy the commercial plate to try and get the results I see
others get, but it is very expensive here in South Africa. Golden Paints are frightfully expensive.
Hi Sandy, I’ve not made gel plates with alcohol so can’t talk to that. I’ve also not used distress inks in my work so cant offer any advice specific to distress inks – other than I have found that some paints work better on the commercial plates than the home made plate. There will be something in the chemistry make up of the plates and how the react with different paint and ink pigments. I don’t know that brand of brayer – if the paint is beading on the brayer it would indicate to me that there may be an oil of film on it, resisting the paint. What brand of paint are you using? I have seen beading on the gel plates themselves – this can happen on a new plate and/or with some pigments brands and tends to stop after a few printed layers from the plate. I use exclusively Golden OPEN and Jo Sonja’s acrylics. They give me the results that I want, so I stick with with. Different paints, dependong on their ingredients, will give different results on the plates, home made or commercial. If there are specific results that you have seen others achieve, ask them what paints they are using. I have found that it is the paint type that can make all the difference when you are wanting a specific result. I’m not sure if I have been of any help or not. I hope som, even just a little. Keep printing – it is such a wonderful process – you will find your own way with it the more you do 🙂
Hello Kim, Thank you for generously sharing your tips and videos. Very informative.
I have tried making several gel plates and have had success printing from them, however I have had great difficulty getting the plate to initially release from the pan. I have tried trays made from different materials (ie glass, plastic, metal); releasing edges with a knife; gently warming in a pan of warm water etc to no avail. Has anyone else experienced this difficulty? Any tips, tricks, suggestions?
Thanking you in advance!
Hi Carole, when I make my own plates – once the gel has set, I place it in the fridge overnight. The plate will shrink a little inside the tray, making it easier to lift out. The longer you leave the plate in the tray the more it will shrink. Sometimes placing it in the fridge for just a few hours is enough to pull the edges in a little. Next time you make your own gel plate, put it in the fridge and check it after a few hours. If its not easy to pick up an edge to lift it out, leave it in longer. I hope that helps!! Kim 🙂
Hi Kim
I am a potter and printmaker and am trying to combine my love of both . So far I have had some success on bone dry unfired clay and fired unglazed clay but very little on raw clay slabs due primarily to beading up. Fairy soap and acrylic extender have both worked to some extent but not enough. Thickening the media in different ways also helps.
I am using a commercial Gelliplate
Do you know if your homemade version, with or without glycerin is more friendly to watercolour or gouache which are the closest other “paints” to what I am using
Hi Tony, I mostly work with this process on paper so I’m not sure how helpful I’ll be. I have used my gel plates to print onto bisque and bone dry clay too – but not raw clay – and more mark marking than printing any specific image. Commercial vs home-made plate shouldn’t make any difference to the process. I’ve not tried to print onto raw clay – I suspect the surface texture and moisture of the raw clay itself will impact how the pigment is transferred from the gel plate to the clay. How are you applying your pigment to the plate? Have you had a go at using a silk-screen to get your image on to the gel plate before transferring to your clay? Shawna Pincus https://www.instagram.com/pinkkisspottery/ does that beautifully. If you’ve not already tried that, it MIGHT help by creating an even distribution of pigment on the plate ready to transfer to the clay?
Thank you for such an informative tutorial! I’m wondering if a homemade gelli plate could be made in a bowl, leaving a convex surface to print a rounded interior surface like a handmade bowl. Have you ever heard of anything like that? Also, do gelli plates stick together? I was thinking I could paint the design on a flat gelli plate and then “lift” it with a rounded gelli form to transfer to the interior of a bowl. My brain is likely to explode with the possibilities!
Hi Steph, I’ve never done that made a galtin plate in a bowl as such, always a flat tray to achieve a flat surface – but absolutely no reason why not, so give it a try! Ive also not tested sticking them together, and I only have one homemade gelatin plate in the studio at the moment, but I presume that they wouldn’t stick together, especially if you have paint on the surface that you are trying to transfer. Very exciting ideas you’re thinking about!! I’d love to see the finished prints 🙂
Hi Kim,
You mentioned that quick drying acrylics can be a potential issue. Given that I have level 1 (student) paints, I may run into this issue when I make my gelli plate. Have you heard of people adding in retarder to slow drying time to prevent the paint from sticking to the brayer? Will it need to be mixed in prior to placing paint on plate? Will it affect drying time on paper and thus cause further issue on the plate or brayer? Hello from Canada. 🙂
Hi Jaime, retarder can be a huge help. Definitely try the paints as you have them first – they’re not always a problem. If you’re not happy with how they’re working, add some retarder. I haven’t used the retarder medium much, but when I have Ive added it to the plate and mixed with the paint on the plate with my brayer. And Ive not noticed any issues with the paint on the paper either. I am doing a demonstration this week and will be using the student grade paints on this homemade plate. I bought some retarder today to mix with the paint. I did a test on the weekend and the paint was drying faster on the plate than I wanted it to. I prefer to not let the paint dry on my plate as it helps me get the thin translucent layers that I like to work with. That said, you can get some neat effects when the paint does dry – you can lift dry paint of the plate with the paper. I hope that helps 🙂 And G’day back from Australia 🙂
.. hello again, and might it work to add a little water when melting plates to Re-mould them if the original plates are a little thick .. too much gelatine. TI A
hello again 🙂 I suspect it would. Again. I’ve not don’t that either. I have got 4 re-pours from one plate – and I kind of like the changed consistency of the plate with each repour. But I would feel confident that if you added a LITTLE water before you melted it down, then mixed slowly and thoroughly, it would be ok. But you would only need a very small amount of water.
I find useful damping (just a little bit) the plate with a sprayer with plain water when using thicker or fast drying colours.
thank you for the tip Chiara 🙂 cheers, Kim
Hi Kim
Do I have to use beef or pork gelatine? Can I use agar agar instead? I’m not vegan but would prefer to avoid animal products if possible. Thanks Jo
Hi Jo, I have to be honest and say that I don’t know. I have used 2x different brands of gelatine. One I know is bovine based and the other I’m not sure about. You could give it a go with agar but at a reduced quantity, using a smaller pan (or saucepan) to set the mix in and see how it holds up. I would guess it should work, but as Ive not done it myself, it would only be a guess. If you go give it a go, please please let me know. I would love to hear. cheers, Kim 🙂
Hey Kim, love your work! Do you know if anyone experimented with agar so far? Would love to know about the results since I would also favor a plant based solution for DIY gelli plates. Best Anna
Hi Anna, I’m sorry but I don’t know. I have been asked before but not tried it myself at this stage. There is bound to be someone who has. If and when I do I will absolutely share about it online. Maybe early in the new year?? cheers, Kim
Hey Kim
Im wondering what the measurements are for your ‘biscuit tray’ you mention about the recipe size in the comments. I need to convert it to a US pan/tray size to be prepared for the pour. Thank you.
Hi Lucinda, the measurement of the tray I use is approx 9″x13″ and maybe 1/3″deep. You can also use a saucepan, lasagna dish – anything that will contain the liquid. And you want to to pour to approx 1/3″ of an inch thick. I hope that helps! I will add the US measurements soon to the post. cheers, Kim 🙂
Hi Kim, I’ve used your plate recipe many times and had fabulous results. I made one today and I am flummoxed. This plate has set fine but it is an opaque creamy colour. The ingredients were within their use by dates. The only difference that I can think of is that the humidity was extremely high when I made it. Any ideas?
Hi Shona, I think a few people have ended up with cloudy looking plates, but I’ve no idea why this happens. I’ve not experienced it. I’m not sure if it is a particular brand of one of the ingredients or something else. I don’t think humidity should make any difference as you’re working with boiling water early on in the process. I don’t think the colour of the plate will make any difference to how the it works. Is it still firm to wobble but soft to capture the details of what you place on the paint on the plate? cheers, Kim
Hi. I have my plate setting on the bench as I type. It looks like it’s ok.
How do you clean it please to get the ink/paint off.
Sorry i just read above to use baby wipes/oil to clean up.
I’ve read about these moulding and mildewing….have you experienced this at all? How do you store them when you don’t use it please,
Thank you for the very easy and comprehensive instructions.
Hi Karen. Cleaning is easy – I use baby wipes as I work and when I’m ready to pack up. I just baby wipe over the plate and store in back in its tray with a sheet of acetate (hard plastic sheet) on top – making sure it has completely dried before I put it away. The baby oil is good if the plate has started to stain. The stains generally won’t transfer through on any prints, they may just look unsightly. The baby oil will remove the stain, and refresh the plate a little. As for mould – I live is a pretty damp area. We can get persistent rain for a few months at a time, and I have never had an issue with mould on my homemade or commercially bought gelatin plates. If is did then I see it as having 3 options – 1/ hopefully just be able to wash it off with water or wipe it off with a baby wipe/baby oil or 2/ cut it away if its just on the edges, or 3/ cut out the mouldy bits, cut the rest of the gel plate up, then melt down and repour. The longest I kept one homemade plate was 18 months, and never had a mould issue. I stored it in a cool dry place, in its tray. The only reason I destroyed it was because I used it as a demonstration plate and was intentionally rough with it when handling. I wanted to see how far I could push the plate with rough handling. I never got any mould on that one. I hope that helps. cheers, Kim 🙂
This is a really helpful post. When I made my own gelatin plate I found it was quite easily damaged when I made prints. Also I love your prints with leaves. Ceri xx
Hi Ceri, so glad you found this useful 🙂 I managed to have my first home made gel plate for 18months before I had to melt it down. I handled it very rough, on purpose. It got a few splits but I could work around them. Then I cut it up, melted it and repoured it. Thank you for yoru feedback. Viva la gelatin plate printing 🙂
I love your work! Perhaps using gelatin sheets will provide the clear finish of commercial plates. They’re typically used by professional bakers and are crystal clear. Much love. Dana.
Thanks Dana 🙂 I have only ever used the powdered gelatin, and have read that the recipe doesn’t work with the gelatin sheets. I haven’t tried the gelatin sheets so I can’t vouch either way for that. I suspect that the commercial gelli plates don’t use gelatin at all. I have read that they’re not silicone, but I’m not sure what they are. I have a range of sizes in the commercial gelli plates and have been using them exclusively for most of this year.
Hello Kim, tkank you for all these tips!!!
It’s amazing and it works. My first gelly is regenerated 😉
Hi Margot, you are so very welcome !! Enjoy !! Gel plate monoprinting is full of soooooo many possibilities 🙂
Thank you for this recipe, I made one today and done a couple of prints so far. What is the best way to clean the plate off?
So far I am loving the results
Hi Margaret, yay! More gelatin plate printers!! When I’m printing with the plate I use baby wipes to clean the paint between layers, and the brayer/roller too. You could use a soft cloth and water – that would work perfectly. If the plate stains, the stain won’t transfer in a print – it just discolours the gelatin plate. But you can use mineral oil (ie baby oil) to remove the stain. I use the cheapest baby oil I can buy and it cleans the plate up beautifully. Go forth and print! Cheers, Kim
That is a full and comprehensive response Kim. Thank you. Yes I think you are right. Drying too quickly is the problem.
I cannot get Golden Open acrylics locally but I can send for some and will do that.
Have you ever used Akua Printing Inks? These do not dry at all until they are on the paper.
Previously I tried many types of paint and ink including oil paint (worked well) but now I am now anxious to not mess up my plate which I obviously did before!
Thank you again
Brenda
Hi Brenda, so glad we’re getting to the bottom of the problem. I have used Akua inks – about 8 years ago. I didn’t like them, but I was using them for printing collagraphs. Hand’t thought to try them with the gelatin plates. Definitely give them a go if you have them on hand. Re messing up your plate – a mineral oil (like baby oil) will remove any staining on the plate. I find that stains don’t print on subsequent prints, but I like to work on a clean plate so I clean them down with mineral oil as and when they stain. Good luck with the golden open paints. I think you’re going to love them! cheers, Kim
Hi again Kim, many thanks for that! I did melt down and re mix, I let it set again overnight and it has come out beautifully! I like that it is a bit stiffer and the only feedback is that the plate was a little thinner than before due to a bit of mixture lost through re pouring into different vessels when melting and I guess water loss. all in all, very happy! Thanks so much and keep up the beautiful work! Bron
YAY YOU! So happy its worked out for you. Go forth and print!
Hi there,
I’m new to gel ate printings
I’ve made a plate and noticed the image transfers come out ok but the paint won’t dry … do you think it’s hot to do with the fact it’s made of glycerine and it being a humectant and maybe that’s making the paint not dry ? I can leave it for 2hrs and I can still leave finger prints in the paint when I come back . live in South Africa
Hi Stephanie, I don’t do much image transfer, so I can’t offer any tips, however Drew Steinbrecher share some great tips on his Instagram account – https://www.instagram.com/drewsteinbrecher/ Image transfer is easy if you get the right combination of plate, paper and printed material. The magic of the process is the printed material you are wanting to transfer has to resist the paint you are using on your gel plate. They are 3 different variables. You need to be using a heavy-bodied acrylic paint. I use mostly Golden OPEN acrylic, and that is too ‘open’ or slow drying for image transfer. I hope this helps?? Good luck finding your solution. cheers, Kim
Thank you Kim for responding. On the new plate I have found liquid acrylics work well but small bottles of craft paint (don’t have the make on hand) seem to continue to be picked up by the roller. I m using a soft roller. How hard do you recommend rolling?
Thanks
Brenda
Hi Brenda, it may be the paint that is the problem. Some acrylic paints dry almost as soon as you put them on the plate – even when using new home-made plates and fresh-out-of-the-packet commercial Gelli plates. I use Golden Open acrylics. They are designed to stay ‘open’ longer with a slower drying time. I can roll really thin layers of paint on the plate and take several minutes to ‘think’ about the layer and it still prints perfectly. I have played with Matisse Structure and Jo Sonja paints. Both dry faster that the Golden Open, but at different rates, I assume dependent on the different pigments. I have found that the cheaper the paint the less successful it is on the Gelli and homemade gelatin plates. As for rollers – I use both hard- and soft-rollers. You don’t need much pressure at all to roll the paints on the plate. The gelatin provides such a soft surface and is super-receptive to anything on its surface. I’m not sure how helpful I’ve been, but I suspect the paints are the problem. Do you have access to Golden paints where you are in NZ? If you could get hold of one colour to have a play and see if it reacts differently for you, that will help solve the problem. I buy mine from The Sydney Art Store online. cheers, Kim
After remaking my gelli plate several times I have found that the surface nolonger is as receptive to
paint of any kind. As I roll the paint on the surface it comes off onto the roller.
Has anyone else experienced this? I have now abandoned my 3 old plates and making a new one but would like to avoid this happening.
Any ideas?
Thanks.
Hi Brenda, I have only re–made plates once. A friend has done it several times with no issue. what paint are you using? cheers, Kim
Hi Kim,
my plate looked beautiful…. until I had to take it out of the pan! I was peeling it out and it tore a little and then it got bigger until I just decided to cut it up and melt it and repour it. It’s currently sitting on my counter setting up until I put it in the fridge overnight. I think it was too soft, how can I fix that? Also what is the best way to clean my plate?? Thanks much, Z
Hi Zoey, I’ve found that if my plate ended up too soft it was because I wasn’t paying close enough attention to the water:gelatin ratio. Another reason could be that the gelatin wasn’t dissolved enough in the water mixture. I have found that when I melt it down and repour, some of the water has evaporated so it should be a little stiffer once it has set. Also, you don’t ‘need’ to set the plate in the fridge. I just do that to let it shrink down a little in the pan. As for cleaning – if you are cleaning while using, between paint or ink layers – I use baby wipes. You could use a soft rag and water. If the plate is stained, then a mineral oil is the best. I use Baby Oil. The cheapest one I can buy. That will remove most stains from the plate. I’m not too worried by stains. It is the plate that is stained and I’ve not found that the stains transfer to the paper when printing. I hope that helps you!! Let me know how you go. cheers, Kim
i see some veideo on youtube that clean gelli plates with ordinary transparent tape. it is so efficint against dried paints that seems hard to clean by tissue paper and water or alcohol…
some masking tapes may be so strong as difficult to remove from gelli surface and not suitable.
i live in iran, and glad to found your pages kiiim!
your page so informative for me.
brst regarded…
ali.
Hi Zoey, have you tried cleaning your plate with baby oil? Or any mineral oil (not vegetable oil)? I have heard of people using tape to clean their plates. Personally I won’t do that as I’m concerned I’ll damage the surface of my plate. I have been able to remove stubborn dried paint with baby oil, sometimes leaving it on the plate a short while before wiping clean. Thanks for sharing 🙂 cheers, Kim
Hi Kym, many thanks for this wonderful site! I am new to this type of printing but am intrigued with the artworks produced using this method. I made my first gel plate last night using your recipe (Thanks so much for the conversions!) I left in the fridge over night as you suggested and it has set beautifully. Hardly any bubbles and came out of the pan nicely. Very very happy until I realised the centre was lighter and softer in colour, my gut feeling is that i was TOO gentle and perhaps did not mix through well enough, i think the clearer area in the middle is mainly glycerine.. my question is, can you melt down and re pour a new mould if you have already used the plate? I’m keen to give it a go today to see if it performs properly but don,t want to if it means I cant re pour (even though considerably cheaper, the ingredients were still pretty expensive) Also, what is the best way to clean the plate after printing? Thanks so much for your time, I LOVE your artwork! Very inspiring. Cheers, Bron
Hi Bronte, YES melt it down, give is a good slow mix and stir then repour. I cut mine into approx 2cm x 2cm pieces then microwave for 20-30 seconds on a medium heat. I can’t remember exactly, but give it a few shorts bursts until you can see it has all melted. When you repour and it resets it will be a little stiffer as water evaporates out a little. That should hopefully fix the problem. Let me know how you go. cheers, Kim
Hi my geli plate from last year has gone mouldy. Is there any problem in adding essential oils eg tea tree to try to stop mould growth? Will it still set ok? Would that work? Has anyone else had this problem???
Hi K, I haven’t had a mould problem, but have had a problem with it melting when left in a hot cupboard. If it were me I’d probably cut or scrape the mould off, then melt the gel plate down and re-mould. How do you store your plate? I keep mine between 2x sheets of acetate. I live in a warm wet climate so mould is a real problem here, but I haven’t had a problem with the plates.
The recipe I found used rubbing alcohol in order to prevent mould.
Hi Lisa, that’s interesting. I’ve never used rubbing alcohol in the recipe, and I’ve not had a problem with mould. I wipe the plate clean after each use, generally with a baby wipe and water then leave to air dry. I store my homemade gal plate in a tray and leave dry in a cupboard. I live in a pretty damp area and haven’t had any mould issue on my homemade gel plates. That said, if I did then the rubbing alcohol could be a good option to remove it. Of it could be cut out, the mouldy bits removed, or the gel plate could be cut up, melted down and re-poured.
Hi Kim,
Thanks for the recipe! I have used it for printing workshops with kids and they love it! My problem is that all the plates I made turned to liquid and I have tried to reset them but even after heating up, re-pouring and setting over night in the fridge they are still not setting. Do you have any ideas what might be going on? Is there an ingredient I could add more of to remedy this?
Any help would be appreciated!
Thanks!
Hi Alexa, yay for sharing the process with kids. It is such a versatile printing process, and sooooo much fun. You shouldn’t have to set the plates in the fridge, it should set easily on a bench, away from heat. What climate are you in? The homemade plates are sensitive to heat. If you are sure that the gelatin:water:glycerine amounts are correct, then the only thing I could think of is the type of glycerine or gelatine you’re using. Make sure it is powdered gelatine, not the gelatin leaves/sheets. My plate starts to set quickly after I pour it and leave it on the bench. I put it in the fridge after a few hours to shrink it in the tray a little (making it easier to remove and replace). Are you multiplying the ingredients when making multiple plates? I’ve not done that, but have plans to. Because of how fast it starts to set, but the time to scrape scum off the surface, my plan is to use as many people to make batches as the number of batches I need – I am wanting to make a very large plate – and we can pour into the tray at the same time. I’m not sure if I have been helpful or not, but I’d love to hear how you go with it. cheers, Kim
Hi Ellaina,
Is the temperature in celcius or fahrenheit?
Hi Kim,
I was wondering if you managed to do magazines transfers with the homemade gelli plate ?
Thank you
Hi Anne, I have to admit that I haven’t tried that. I have worked with magazine tranfers on the commercial gelli plates but not the homemade. I imagine it will still work – but with less or more of a ‘reaction’. Give it a go! And I’d love to hear how you go. It may be an idea to try pages from different magazines – they will be commercially printed at different places and there may be a difference in the inks they use and their reaction with the gelatin plate.
Thanks so much for sharing this Kim. Worked well and I have made 3 plates using this recipe. I love that it is Australian. and appreciate all the time you have put into this very generous post.
Thanks Linda! Thrilled it worked for you!! Viva la gelatin plate printing!
dear kim – what can I do if my diy-plate is tooooo soft? melt it again and put in more gelatine ?
petra
Hi Schöller, my first thought is to melt it down and re-pour it without adding more gelatin. I’ve found that water evaporates with each melt, so it gets a little stiffer. I guess it depends on how soft it is. If you think its too soft and flimsy, maybe melt half and mix with a fresh batch mix, but only use half of the ingredients for the new batch, with some added gelatin. Does that make sense? Good luck. I’d love to hear how you go with it.
Hi Kim, thank you for your recipe! I’m in Katherine NT where it is usually 38 degrees (32 in the dry!) and just wondering if you have noticed whether hot weather affects the plates, will they melt ? I’m still prepared to give them ago but may not always have a fridge handy!
Hi Mandy, yes, hot weather will affect it – but if you can store it in a cool dry place (like a cupboard) it may be ok. I’d make one and see how you go with it. I had some of mine stored in an outside cupboard that gets full sun in the morning. I had used them in the afternoon and they seemed ok – it wasn’t until I wanted one in the morning that I could see how much the heat was affecting the plate. It was as if the outer layer was melting a bit. Bit it was probably 10-15+ hotter int he cupboard than outside when the sun was on it. I’d love to hear how you go with it in the heat if you do make one.
Adding sugar helps in warm climates. I saw an online recipe on YouTube.
Hi Many, that’s really interesting. thank you. Can you share how it helps? Or share the YouTube link? cheers, Kim
My gelatine would not dissolve without microwave intervention. It’s not the one in your recipe as I am in the UK. I used plain beef gelatin ( pooh gosh!) I found it easier to skim froth with newspaper and then push the bubbles to the side with a sharp knife and pop them. I hope it will be ok! I will let you know! I am quite excited.
Frustrating for you that you had to dissolve the gelatin in the microwave. When you get the chance, try a different brand and see if that’s easier to work with. I like the idea of popping the bubbles. I have thought about leaving them on the plate … I think they’d make some interesting marks in the gelatin print. I’d love to see some of you finished prints!
Hi Kim,
Thanks for the great article. I’m hooked on gel printing as well and have the commercial plates in a variety of sizes but really want one that’s at least as big as an A3 or even A1 which is why I’m going to have a go at diying my own.
How large of a surface does your recipe cover? I’ve made my forms (out of plexiglass in the sizes that I need and don’t want to run out of ingredients half way through). I think because my forms are so large I’m going to aim for a depth of about 2cm… What do you think- do I need to double, triple, quadruple or more) your recipe?
Best,
Anne
Hi Anne, I have found an A3 sized Gelli plate. They’re not cheap but I’m finding the effect between the commercial and home made plates different. I like both, but for the work I’m doing at the moment I’m preferring the commercial plate. I’ve also though about making a plate the size of my work desk. I am wanting to create some wall hanging gel prints and debating between trying to print them from one plate or printing several smaller plates in the space.
As for the recipe – it makes enough to fill a standard biscuit tray, approx 10mm thick. To go A3 you would need 1.5x – 2x the amount. To go A1, probably 4x, maybe 6x if you want to increase the thickness. I’ve been thinking about how to go about it. The home made mix, once mixed, is very sticky and does start to set quite quickly once poured into the tray or pan. I would recommend have 1 or 2 people to help – each mixing the batch as per the recipe, then working together to pour into the tray. Have a go at making it as per the recipe first, then you’ll get a better feel for it.
If you do make a big one, I’d love to see the end result! Of both the plate and prints!!!! Go forth and print !! 🙂
Have been so keen to start with this and just tried my first attempt at making a gelli plate 😀😂🤣 didn’t have the right quantities of ingredients, so had to resize the recipe. Then put the final glycerin in before the boiling water so mucho lumps! Then had to strain the mixture twice to remove the lumps. And now have a rather scummy looking surface 🤔😂🤣 however we will see how it sets. Think the day is too hot as well. Maybe I should stop being a cheapskate and just buy one… will keep you posted
Hi Katie, yay for giving it a go! Have a go at melting it down in the microwave and re-pour – see if that sorts the surface scum. Or – can you use the ‘bottom’ of the plate as the surface. Nothing to say you can’t use the bottom side as the print side. Very much looking forward to seeing what you print !!!!
I have made gelli plates before using recipes similar to yours and found them to be a bit too jelly-like and damage easily. I set out to make something a bit more rubbery and durable and I have just made exactly what I was after!
I measured 2 cups of glycerine and then added roughly 120g of gelatine powder.
I tried dissolving the gelatine directly in the glycerine by heating it gradually in the microwave 20 seconds at a time and stiring. It wasnt quite dissolving so I added small amounts of boiling water and stirring until the gelatine was dissolved. I poured the mix into some muffin cases and a large loaf tin to a depth of 1 – 1.5 cm and put this in the fridge. Within 2hrs I touched the surface of one and it was really good firm and rubbery. I took them all out of the molds and the gelli plates are perfect. They are firm and easy to handle, like the plastic polymer version. But the surface is bouncy with give. The surface feels like a plastic polymer, I cut the loaf tin size plate into 3 pieces because I wanted small stamping plates. The geli plate was very firm but I cut it easily with a very sharp knife and firm pressure.
I am so excited by the results it is exactly what I was after. I thought I would share this, in case anyone else was after the same thing.
Thank you for the information Liz! I had one ‘fail’ with making my gelli plates, but I’ve found my recipe works pretty well. If I leave the plate in the fridge for a few days it seems to ‘set’ the jelly better and its a pretty robust plate to work with. Reducing the amount of water can help too.
What amount of water did you add to the mix?
Thanks.
Hi Tess, can you see the water amounts in the Ingredients? Its 1/2 cup cold water and 1.5 cups boiling water, but please refer to the mixing directions as to when to use the cold vs hot water. cheers, Kim 🙂
Bonjour Kim
Est il possible de dire combien de mL ou de gramme fait une tasse . En France on n’utilise pas la tasse comme mesure … et pour moi une tasse peut être petite moyenne ou grande …
je serais si contente d’essayer votre recette . Elle me donne envie d’aller faire des atelier gratuits dans la bi bibliothèque de mon village !!!
Merci
Hi Isa, 250ml makes one cup of water. 🙂
Oh no! My plate split?! I rolled my transfer on, left the layer to dry and came back and it had split. Any ideas???
Thanks for the recipe xxx
Hi Jessica, no! Ive not encountered that before. What exactly do you mean by ‘split’? Is it like a tear? Did it ‘split’ while you left the transfer on top to dry, not applying any pressure to the plate? You could cut the plate up, melt and repour in. I’ve just written about how to do that – kimherringe.com.au/gel-plate-monoprinting/how-to-melt-and-re-pour-a-homemade-gelatin-printing-plate
Home made gelli plates are great. When mine gets worn, I put it in the microwave in a Pyrex jug, melt it down, and repour it into my systema container and make a nice new plate. Very effective.
I melted one of mine down the first time a few weeks ago. I found that it changed the overall feel of the plate, I guess with reduced water maybe, but I loved working with it.
Thank you Kim, best recipe for us Australians ever. Loved that you showed what can go wrong as well.
Thanks Megan! I think its important to share the mistakes. We all make them, so by sharing we can all learn from them.
Hello thanks for sharing your technique, I used your instructions & recipe yesterday to make them for the first time!
The issue with my plates is the surface is slightly bumpy (so the side that was touching the bottom of the dish – I presume this is the side you’re meant to print from?). Im guessing this may be from gelatin crystals that were not completely dissolved and have sunk to the bottom?
The side which was facing upwards is completely smooth but unfortunately I didn’t get all the air bubbles off so I couldn’t use that side either.
Should I re melt? Help greatly appreciated thank you! Rosie x
Hi Rosie, I use the top side of the plate. You can use either, but yes, if there is a texture in the dish you use, it will add a texture to the underside of the plate. Have you tried using the top side of the plate, regardless of air bubbles? You may find they add an interesting mark to your prints. Or no mark at all depending how big they are and how you print from the plate. Yes, you can melt it down and repour it. If you have undissolved crystals in the mix, strain the melted mixture through some muslin or cheese cloth as you pour it into the tray. You may need to add a little water first. Kim x
Help Kim I live in Brisbane Queensland, made a lovely gelli pad, so proud took it outside to have a ‘play’ and it MELTED! It was a sunny day. COOKED IT AGAIN BUT VERY FLOPPY NOT HARD ENOUGH ADDED MORE GELATINE, SHOULD i add more glycerin?
Hi Maureen, the homemade plates don’t like heat, especially if it experiences direct sunlight. I melted one of mine in a cupboard a few years ago – the morning sun hit the cupboard for a few hours and it made a gelatinous mess everywhere! The homemade plate should be ok to use on warm days when inside, but I would steer clear of Brisbane summer sunny days outside. When melting and re-pouring the plate, I find that the mix becomes LESS floppy as some of the water evaporates. Therefore I would normally add a little water to make it more floppy. Did you use my recipe to make the plate? If yes – you may need to double check the ingredient ratios you used – and that may have contributed to it melting. Or not, what are the ingredients and ratios that you used to make the plate? cheers, Kim
Thankyou Kim for clear instructions. Many of the overseas recipes use packets of gelatin that are hard to assess exact weight. Gives me confidence to play with the medium.
Hi Annie, so glad this is useful for you! Oh do play. Its such a fun medium to work with. So many possibilities, and the plate is so easy to make. My next step is to melt down one of the plates with chunky gelatin bits (I didn’t squish them all out when making the last plate) and reset it. I’l also going to have a go at making circular plates, and other odd shapes. You just need a container with a flat bottom – really you’re limited only by your imagination.
Hello Kim,
Thank you for sharing your gelli plate recipe. I use a commercial one but they are a bit expensive and would like to try making one for myself. Do you have suggestions for plant varieties that print well using the gelli plate. The leaves I have used so far did not produce very detailed prints. Yours are lovely!
Nicole
Hi Nicole, I love to use a mix of leaves – hard and soft. If you want to details, I recommend weeds! They usually give the best detail with their veins. Its good to mix the hard and soft leaves for some contrast in shapes on the paper. Jacaranda tree leaves are fun to play with too – lots and lots of little leaves on the stems. My next step with the gelatin plate is to melt down one of the ones with the undissolved blobs of gelatin and have a go at salvaging it. I’ll post about that after I ahve had a go at it.
Hello Kim – thank you for your info about making gelli plates. I melted mine down with no problems, and the new plate is even better than the original, in that it is slightly stiffer.
Hi Ann, so glad you had a go and it worked for you! I also find that with each melt and re-pour it gets a little stiffer. I am guessing that’s because some of the water evaporates in the process. I’m not sure of the chemical reaction happening with the glycerine, so that may be adding to the change too. I know people who have melted and re-poured up to 5 and 6 time with their gel plates, with success. Enjoy!! cheers, Kim 🙂
I have found that when re melting a plate that has dried paint left on it it is easily cleared of those bits by pouring through a sieve with a single layer of kitchen paper in it ,but it does have to bee done when the gelatine mix is pretty hot as of course it stars to set as it cools.
Hi Frances, great discover. Thank you! If you want to clean dried paint without melting the plate, have you tried wiping it with baby oil? I’ve found that to be a really helpful way to remove stubborn paint from the plate. cheers, Kim 🙂
Hi Frances, great discovery. Thank you! If you want to clean dried paint without melting the plate, have you tried wiping it with baby oil? I’ve found that to be a really helpful way to remove stubborn paint from the plate. cheers, Kim 🙂
I’m all set to start making a plate – I’ll post any successes with my printing. Judith Rostron
YAY!! I look forward to seeing your prints 🙂
I just made a large 22″ x 16″ gelli plate out of candle gel wax. It feels just like a purchased gel plate. Under $25 with coupon at Hobby Lobby. They have a gallon bucket of it in stock. Cut up pieces and placed them in a baking dish, 170 degrees in oven for two hours, no bubbles.
Hi Ellaina, I’ve not heard of ‘candle gel wax’ before. I’ll have to see if I can get it in Australia and give it a go. Thanks for sharing !! 🙂
Hola, !! Yo he realizado ayer mi placa de gelatina y salio genial Nunca oi de las de gel de velas. Solamente el gel? lleva glicerina, alcohol o algun otro producto? Gracias!!
Hi Ellaina, I’m so glad the recipe worked for you! I’m not sure what you mean by ‘gel candles’? And I don’t carry the stock I use to make my own plates – I buy it as and when I need it. I generally now use my commercial plates for my own gelli printing, for convenience more than any other reason. cheers, Kim
amiga, sou do brasil e falo portugues.
voce poderia me ajudart com a receita da placa de gel para impressão com o material de cera de vela gel?
Hello, I used translate.google.com to translate what you wrote, so I’m hoping you can do the same for my reply 🙂 Your message translated asking me about printing with the gel candle wax material – is that right? I’m not sure I understand what you mean. Are you able to give me a little more information, of a link so I can see something along the lines of “gel candle wax material”>
Hi Ellaina,
Just wondering if the candle wax gel plates ending up working out ok? Seems like a good idea for a home made gel plate. I’m in Australia and the homemade plates are too problematic with our heat and humidity so I’m trying to find an alternative.
Hi Ellaina,
Is the temperature in celcius or fahrenheit?
Hi there … I appreciate the recipe thanks so much. Have a couple of new plates here although maybe a little too much gelatine. A couple of questions please.
– is the thicker glycerine okay or must use the liquid glycerine.
– if the gelatine is too hard to dissolve can we put in microwave at the last minute to heat up a little? I did that and it seems to have worked.
– and wondering how the wonderful person who made their own mould sealed the sides for a larger plate?
Thanks again so good to be here 🙂
Hello 🙂
> re the glycerine – I have only ever used the liquid glycerine. To be honest I didn’t realise there was a ‘thicker’ one available. By all means give it a go – even in a half quantity batch. I buy my glycerine from the toiletries aisle in the supermarket. I have some Queens food grade that I will try over the Christmas break – its a little cheaper than the other.
> re hard gelatine – do you mean hard and in ‘lumpy bits’ or hard overall? When I get lumpy bits I discard them. You can pour the mixture through a sieve and squish out the lumps if that helps. If you are using the powdered gelatin, it should dissolve in the liquid. It isn’t instant – it does take some slow stirring, which is also why I use boiling water. If the microwave works, then use that! As long as the end result is the same, how you get there isn’t important. I love it that you’re experimenting.
> re the larger mould – I’m not sure. A large tray will do the trick. I have some dough-rising trays used by bakers that I want to use to make a giant plate. Improvise if you can – you just need something to hold liquid long enough for it to set. I find that within an hour to plate has set enough for me to move the tray – but not enough for me to REmove it form the tray. I leave it for at least another 3-4 hours for that, just to make sure it is properly set.
I’m looking at making a large one that won’t fit in the fridge.does it have to be refrigerated
Hi Maree, no, you don’t. I store mine on the shelf in my studio. Keep it in a cool/cool-ish dry place and it will be fine. Keep away from heat. Enjoy your big plate, cheers, Kim 🙂
Hi Wendy,
only found this site now (2 years after your query!)
A friend of mine makes her own forms by using plasticine, on a thick perspex base, to form a retaining wall for the gelatine mix. (The plasticine must be quite thick to prevent leakage.) The result is she has a very organic edge to her prints which I personally love.
Hope this inspires. Keep printing!
Thank you so much for your recipe. I followed it twice now.
My first plate lasted about 4years and finally flibbled its way to a sink death after it went a bit hard.I could have melted it but it was covered in paint.
The second I found my best mix was adding a third to the two water contents, and 500ml glycerine to 200gms of beef gelatine.
I made it in a big flan dish a bit longer than you suggested and finished it in the fridge. In each case my plate was about 2 cms thick. Thank you so very much. It’s all such fun! I make all my collage papers, print fabric and experiment with this fab plate.
Hi Veronica, thank you so much for sharing your recipe variation! It is such a fun process !! 😊🙏💙
Thank you for this follow up! I was wondering about using beef gelatin.
oh how much fun !!! enjoy your workshop xx