

Gel Plate Printing Tip – mountain ranges

One gelatin plate, 2 paint colours, some paper and a brayer … that’s all you need to create a mountain range monotype print.
Gel plate printing, aka gelli printing, aka gelatin plate printing, is one of life’s simple pleasures. It’s spontaneous, fun and immensely satisfying. And, like just about any other art form, there are so many different ways to approach the medium.
While I generally create my monotype prints with plant material, building up layers of colour and texture, I also like to work with torn paper.
In this article I’m sharing the steps I take to print a mountain range. Once you have the basic concept sorted, mix it up by adding organic materials or stencils to each layer of your monotype prints.
Lets Get Gel Plate Printing
You will need:
- A gelatin plate – either a commercial Gel Plate or Gelli Plate, or have a go at making your own. For the monoprints above, I used my super-sized 16″x20″ Gelli Arts plate. For my demonstration below I am using my 6″x6″ Gel Press plate.
- paint or ink – at least 2x colours – one light and the other much darker
- a Brayer (aka roller)
- 1x sheet of paper for your print
- cartridge or bond paper to tear for your mountain ranges
Step 1. Create your mountain range masks
Before I start printing, I tear paper to create the mountain range profile. This sequence works on printing the mountain ranges from the top of the plate to the bottom, printing the most distant mountain profile first, working toward the closest mountain.
My approach is to tear-first-print-later. You can tear-as-you-print. There is no right or wrong.
The size of the gelatin plate I am printing with informs how many ‘mountains’ I print. For this tutorial I am using my 6″x6″ (15cm x 15cm) gelatin plate, looking to incorporate 5 mountain profiles.

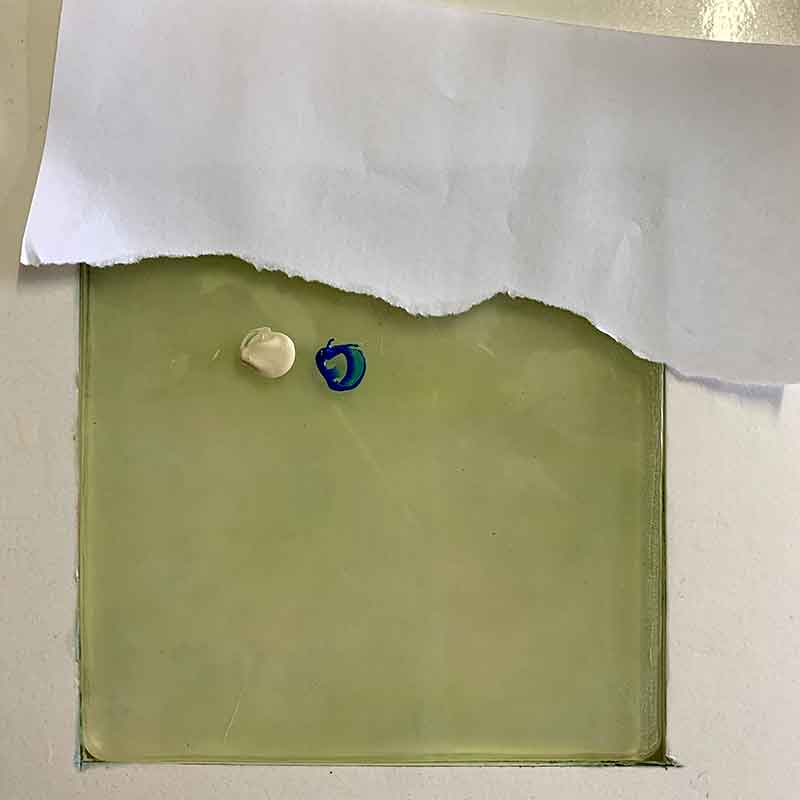
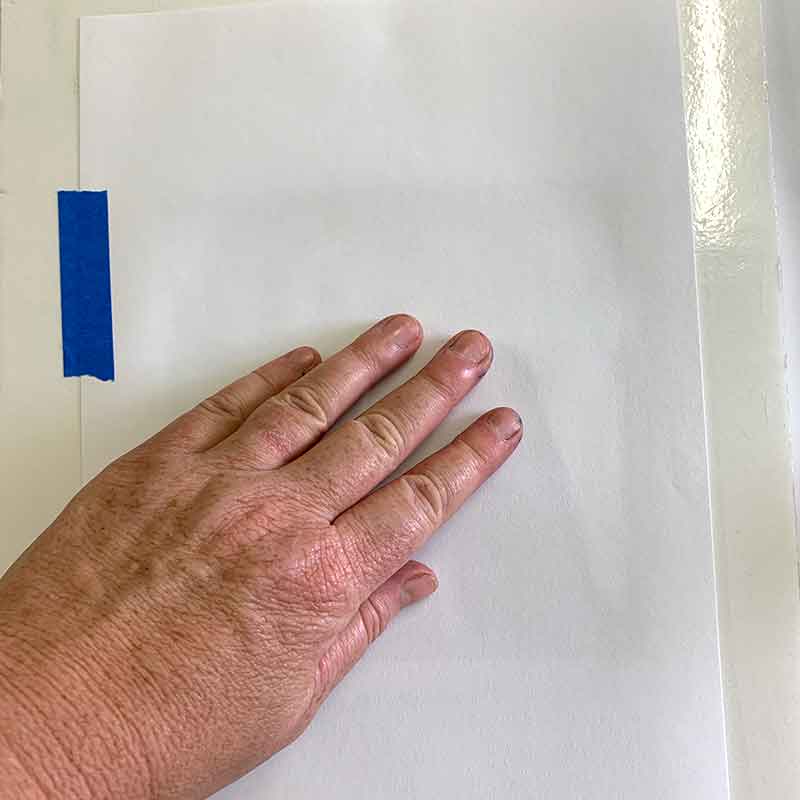
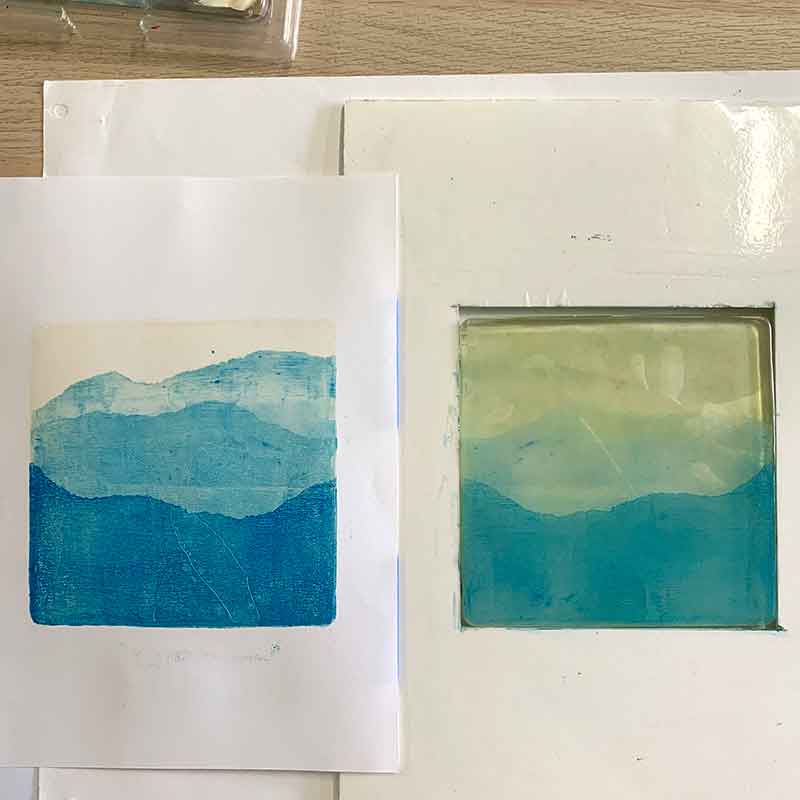
Step 2. Ink the plate and print your first layer
In this example I am using two colours – Titan Buff and Manganese Blue. My first layer is a layer of Titan Buff.
No mask is placed on the plate – rather I cover the whole plate with a thin layer of my first colour, then take an impression on paper.
This first printed layer is the sky.
TIP – hinge your paper with some tape so as you print each subsequent layer, it will register perfectly back on to the gelatin plate.

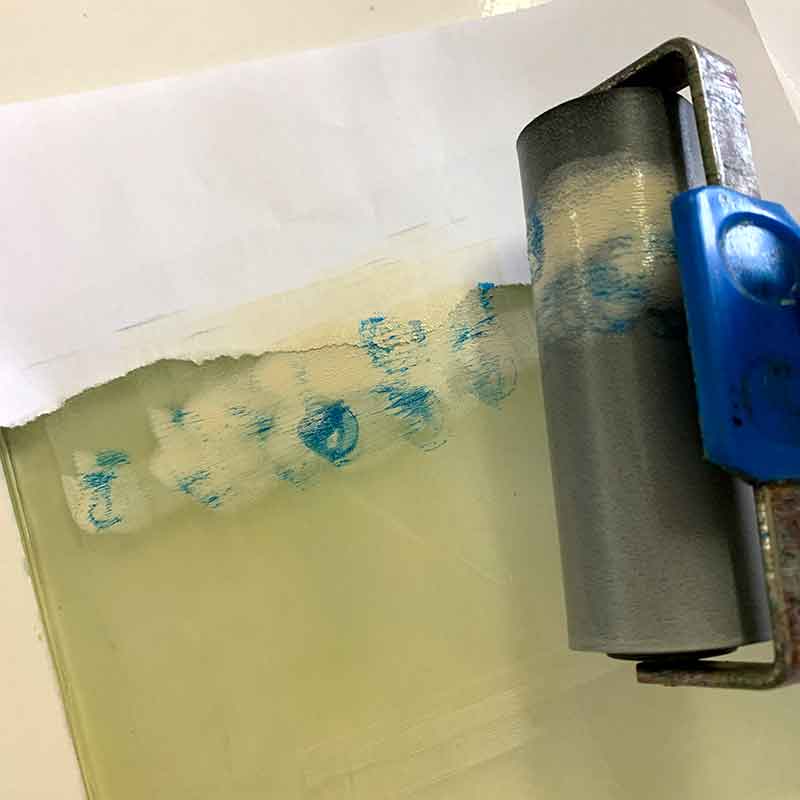
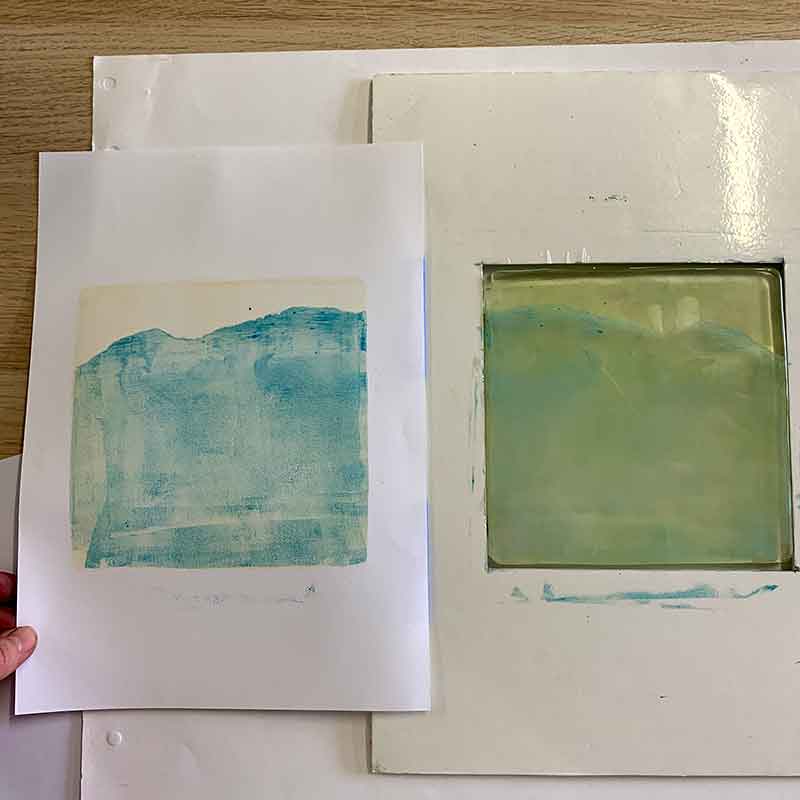
Step 3. Print your first mountain profile
Lay your first piece of torn paper on your gelatin plate. This will mask the sky, creating the profile of the most distant mountain.
Now add paint to the plate that will be the colour of the most distant mountain profile. This would generally be a pale colour, but not as pale as the sky.
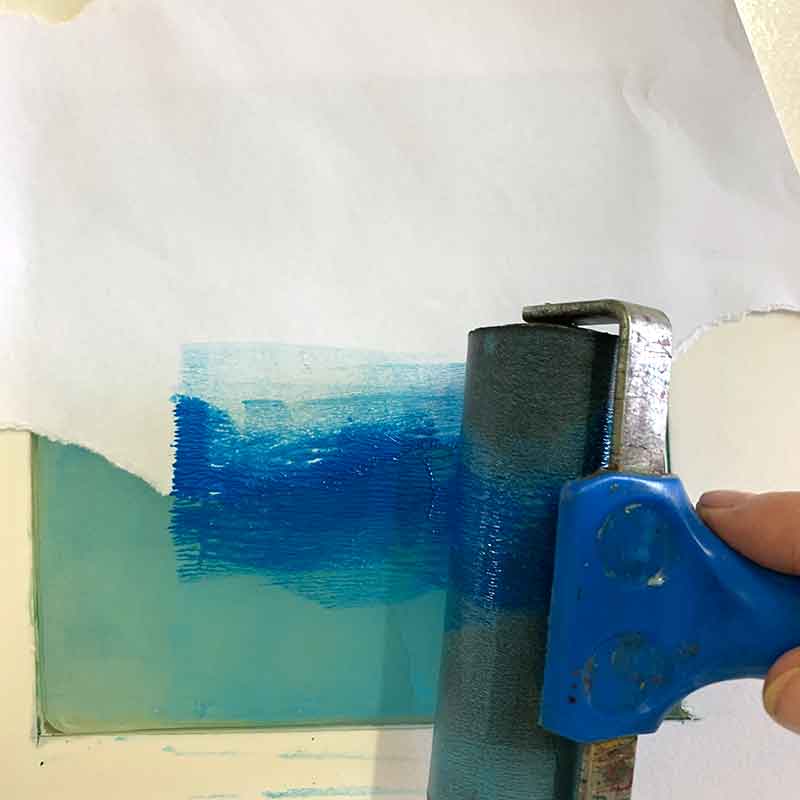
For this process I like to work with just 2 colours, blending the colours on the plate with my brayer, modifying the amount of each colour to mix as I build the mountain range from the faded distance to bold coloured foreground.
Add a small amount of the previous colour (Titan Buff) … a little less than you did for the first layer.
Then add a smidge (smidge … a technical word for a very very small amount) of the second colour (Manganese Blue) to the plate.
With both colours on the plate, use your brayer to mix the colours, rolling the paint across the gelatin plate and paper mask.
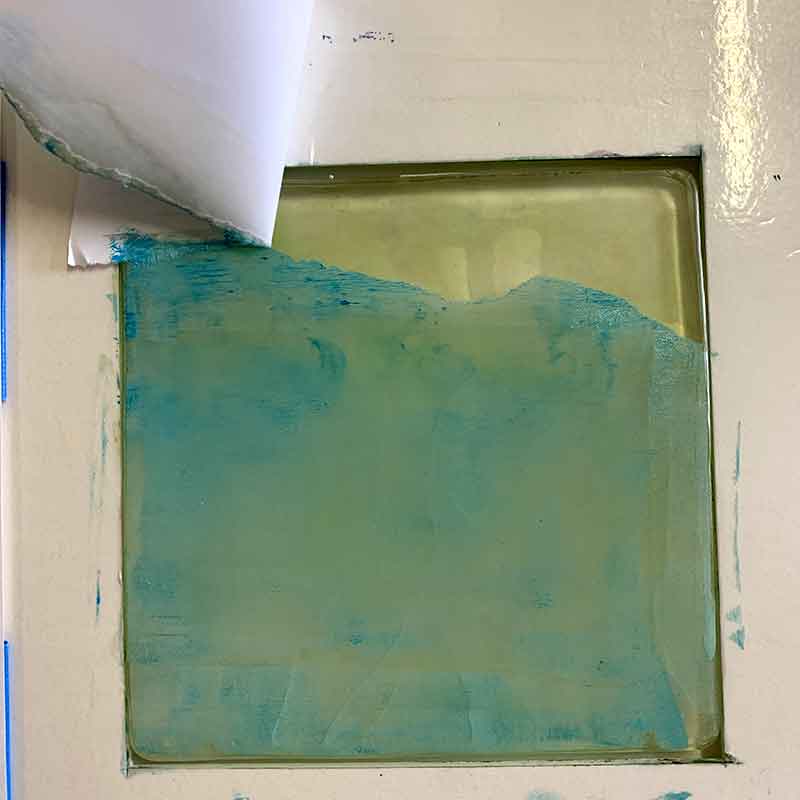
Once you have the ink or paint coverage you’re after, re-place your printed paper over the gelatin plate to take your 2nd impression.

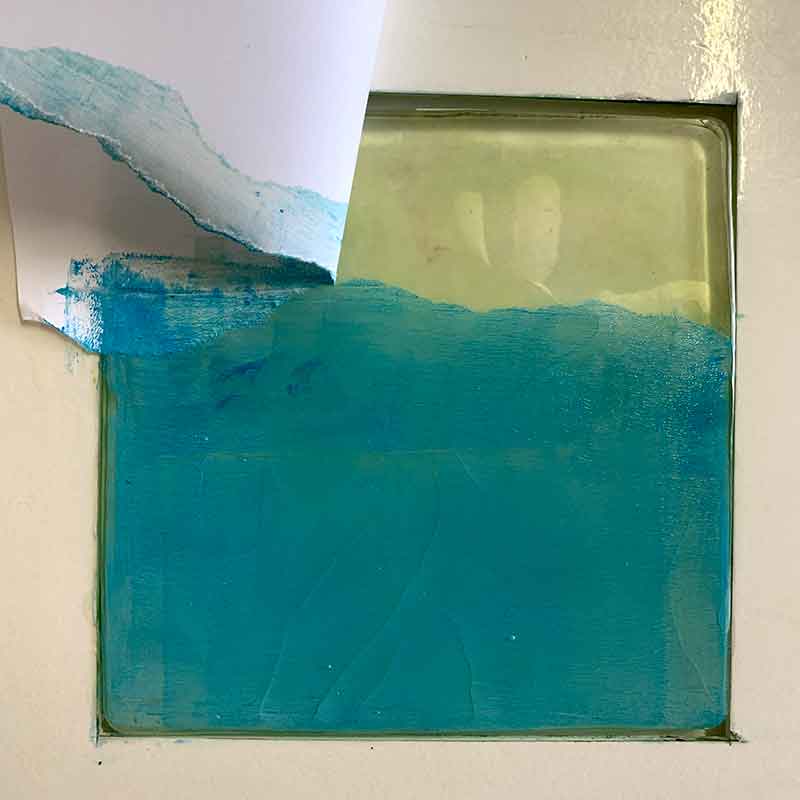
Step 4. Print the 2nd mountain profile
Place the 2nd mountain profile mask on your gelatin plate. You should still be able to see left over paint from the previous layer – this will help you work out where to place this 2nd mask.
Add you paint – if you are using 2 colours, add a little less of the first colour (Titan Buff) than the previous layer, and add a little more of the 2nd colour (Manganese Blue).
Blend the colours on the plate, making sure to roll over the mask.
Remove the mask and place the printing paper over the plate to make the 3rd impression.
TIP – the more you roll your paint on the plate, the smoother and more consistent the layer of colour.
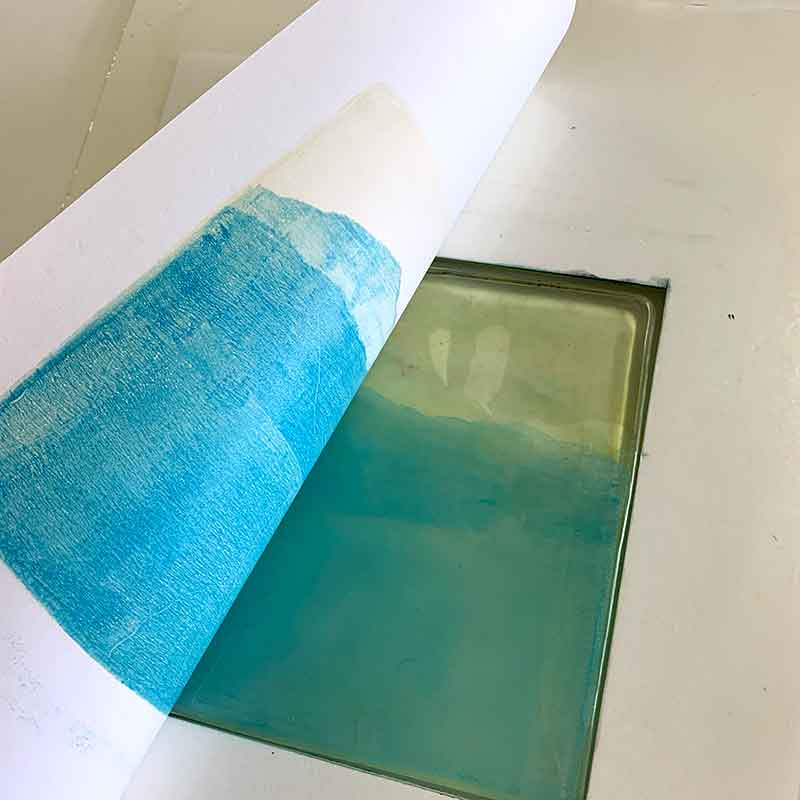
Steps 5 – 6. Print the remaining mountain profiles
Repeat step 4 for each of the next 2 mountain profiles.
Keep adjusting the amount of paint you place on the plate, less of the first colour and more of the 2nd colour as you build up the layers.
Generally the final layer is printed with only the 2nd colour (no mixing with the 1st colour), but sometimes that second colour isn’t enough to pop the foreground mountain so I may introduce a 3rd colour.
The pictures below show the 3rd then 4th printed mountain profile.
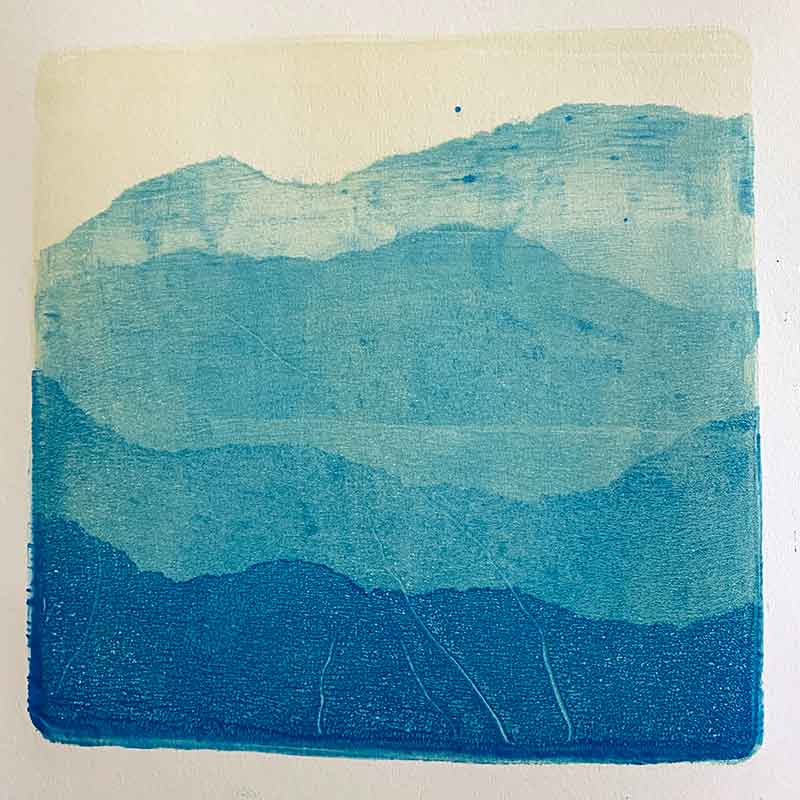
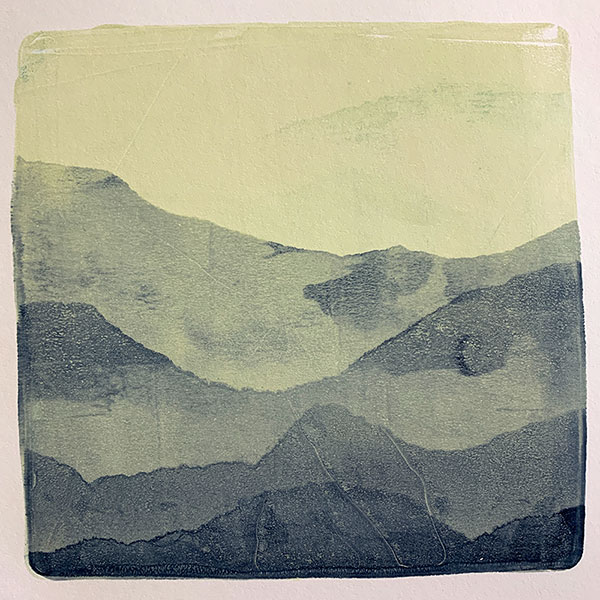
Step 7. The final layer
I felt that I needed to add a 3rd colour to the 5th and final mountain profile.
In this example I had mixed a little more of the 2nd colour into the earlier layers, so there wasn’t enough contrast for the final mountain to pop.
So I added a smidge of Phthalo Blue (Green Shade) to the 5th and final layer.

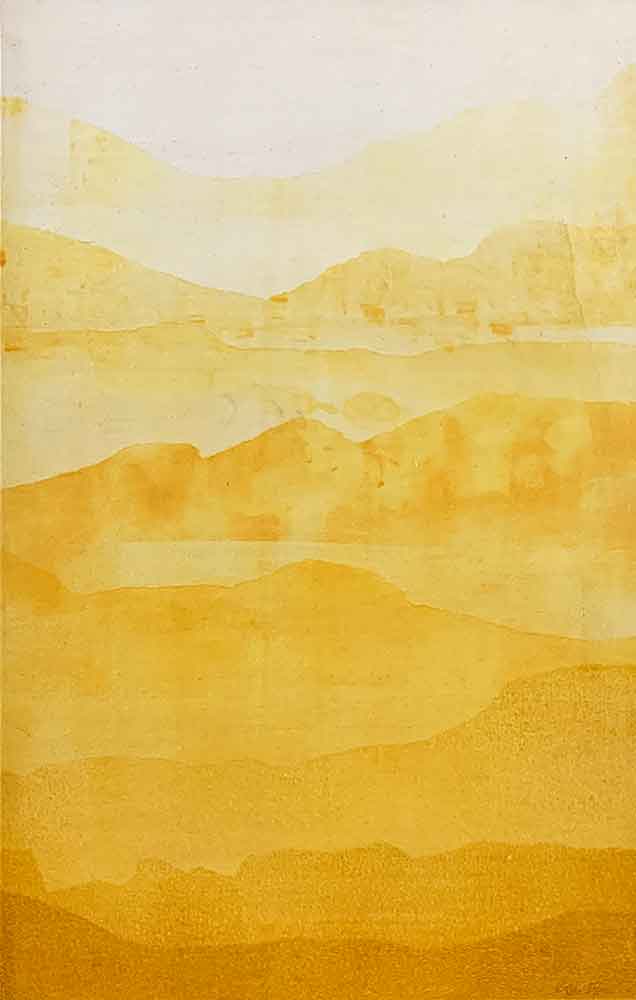
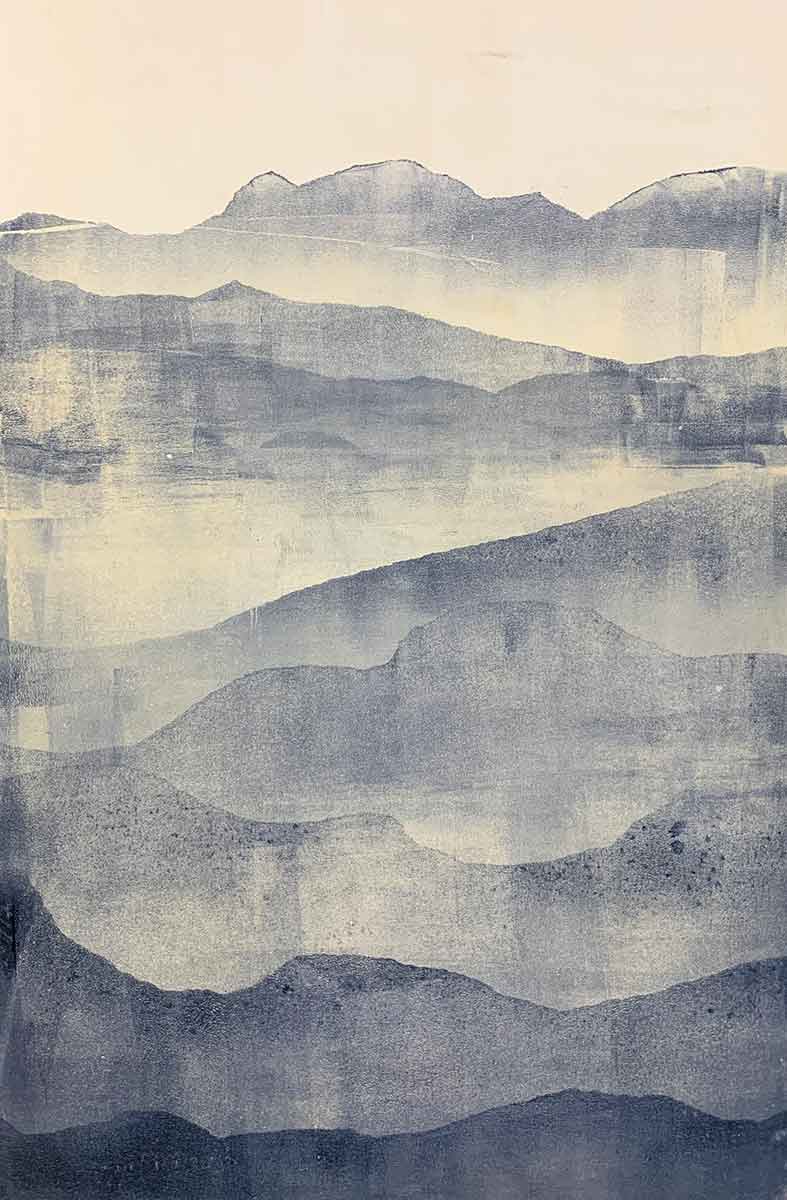
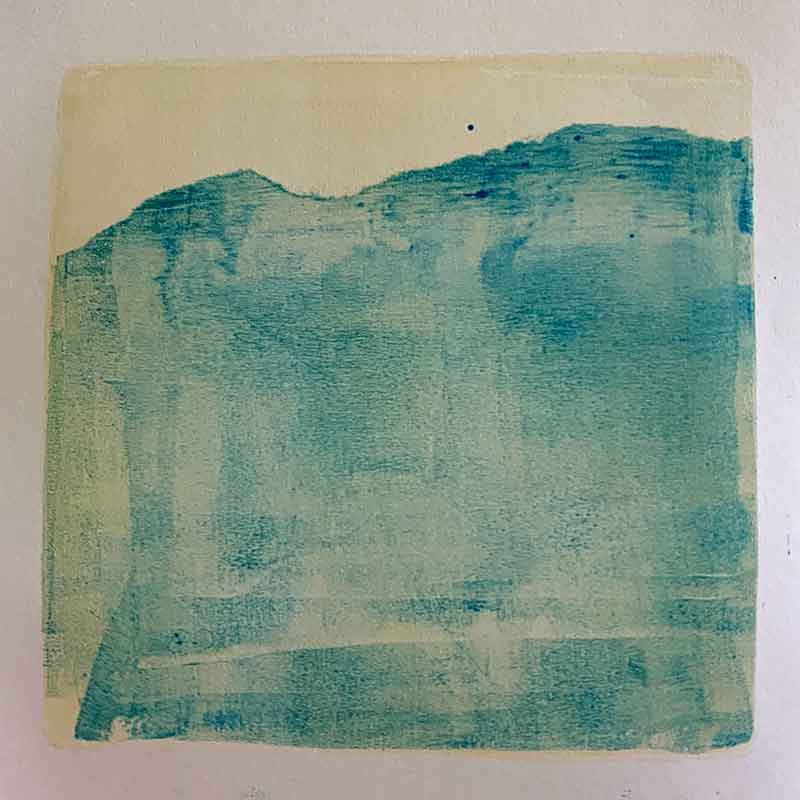
The final image
And here she is … printed.
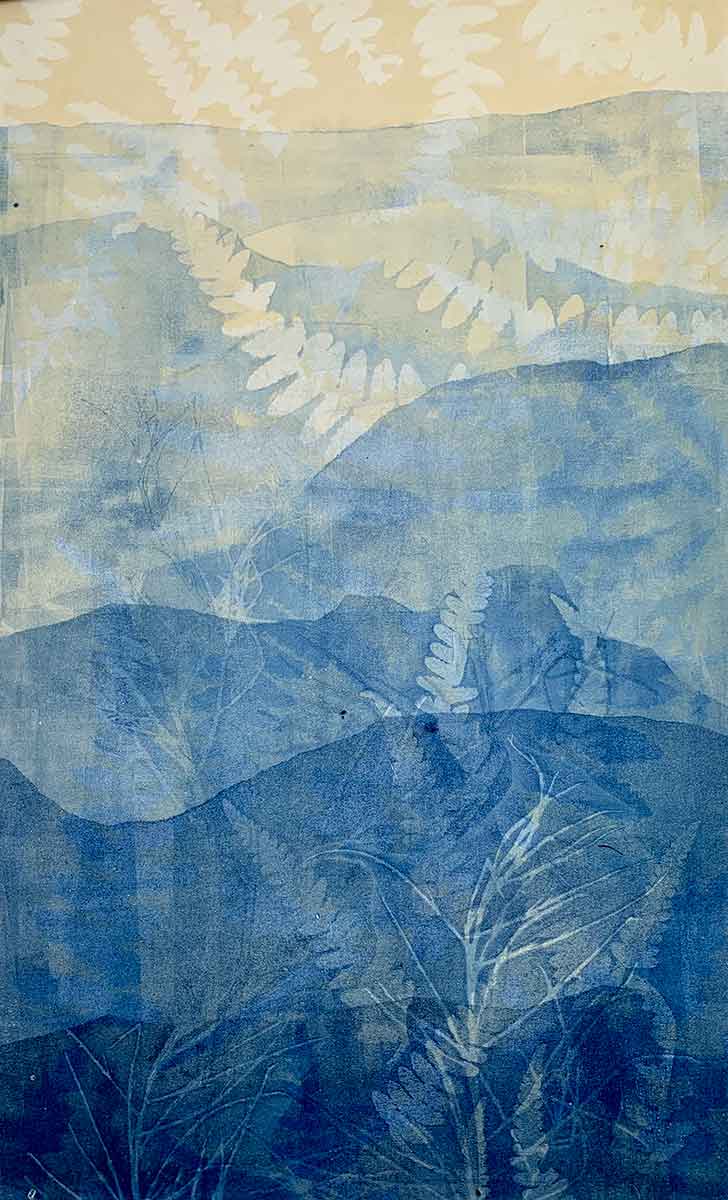
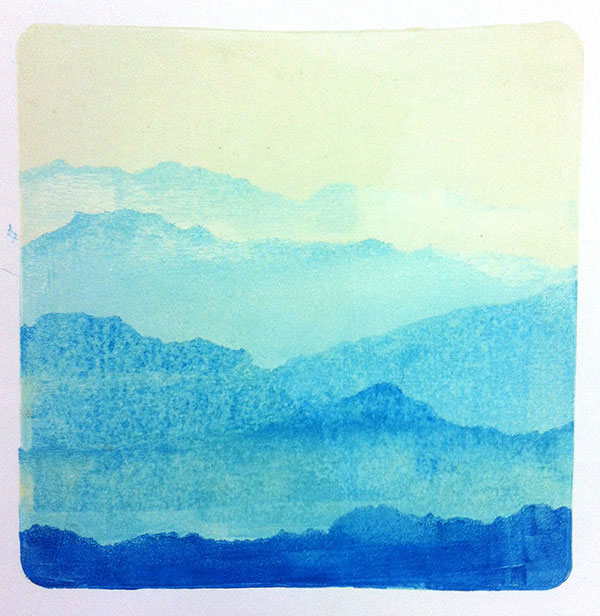
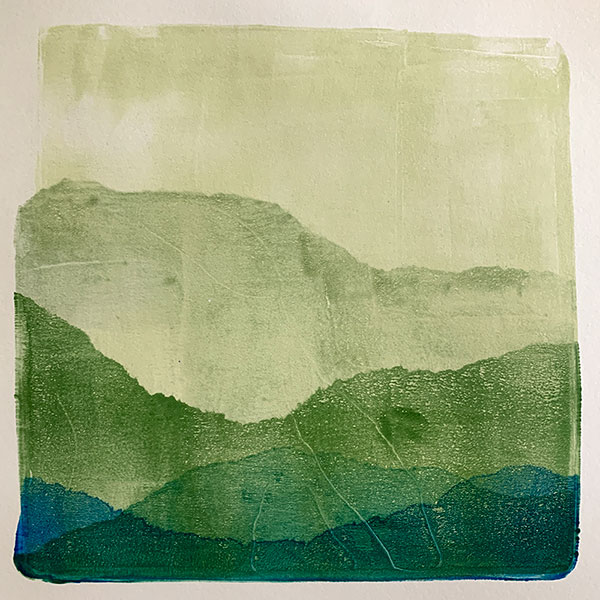
Mix it up a little – once you have the basic concept sorted, add organic materials or stencils to each layer and add dimension to your monotype prints. Use different colours for each layer. Turn the torn paper masks upside-down and see how that changes the whole feel of the image. Use bold colours, contrasting colours, complimentary colours.
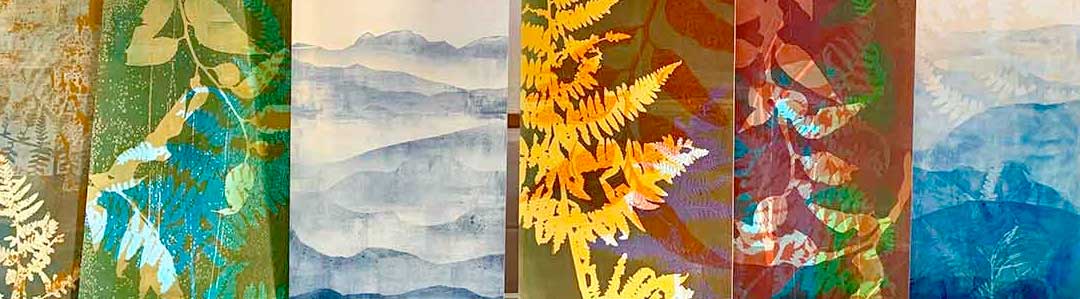
The ideas and possibilities with this process are endless. Below are a few variations of this process, using different colours and adding organic elements to layers.


Do you want more Gel Plate Printing?
I have launched an online Gelatin Plate Monoprint workshop, where I demonstrate this printing sequence, making a home-made gel plate and how I create the layered botanical gelatin plate prints that I love to print. If you’re interested, click the button below for full workshop details…
Gel Plate Printing Tip – colour and composition
Do you feel comfortable arranging elements on your gelatin plate to create a satisfying and balanced composition or design?
I share a few tips around composition when printing with gel plates in my workshops. For the most part, I encourage play and experimentation – I believe that ‘doing’ in the process builds confidence and hones intuition. Click here to find out about 3 simple composition tips I share in my workshops, and my thoughts around colour in this process.

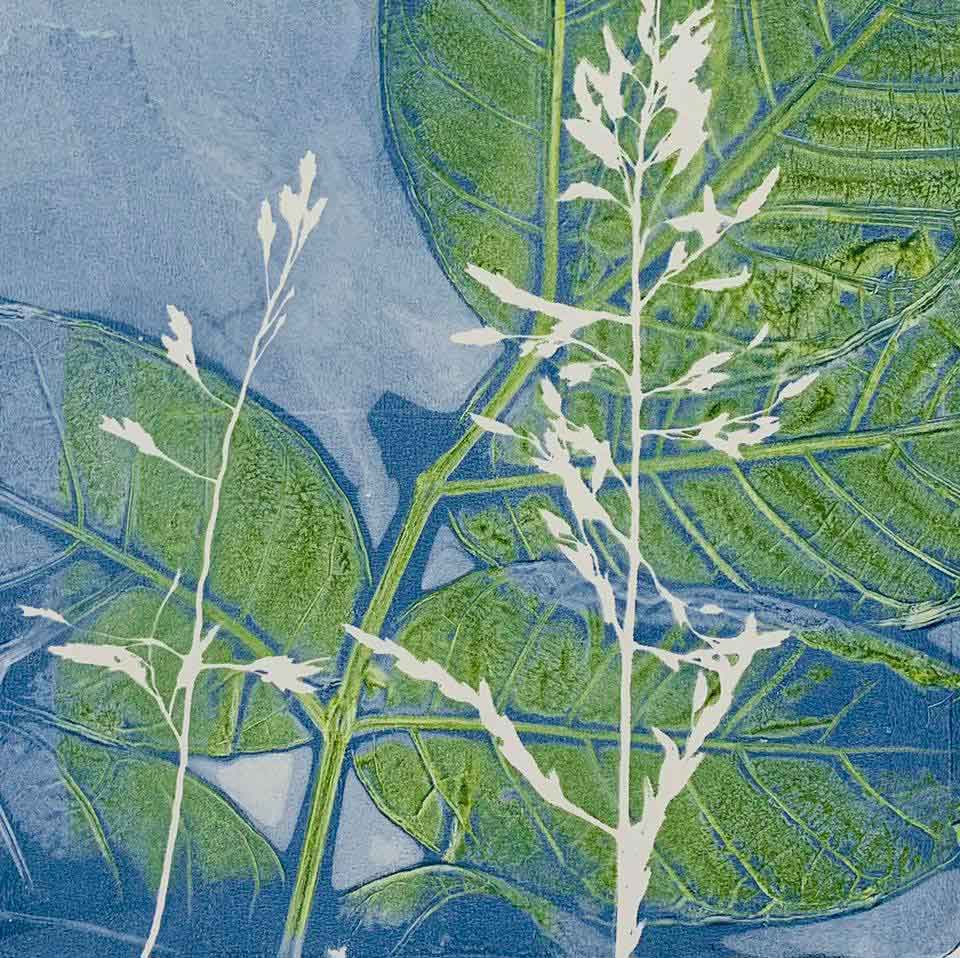
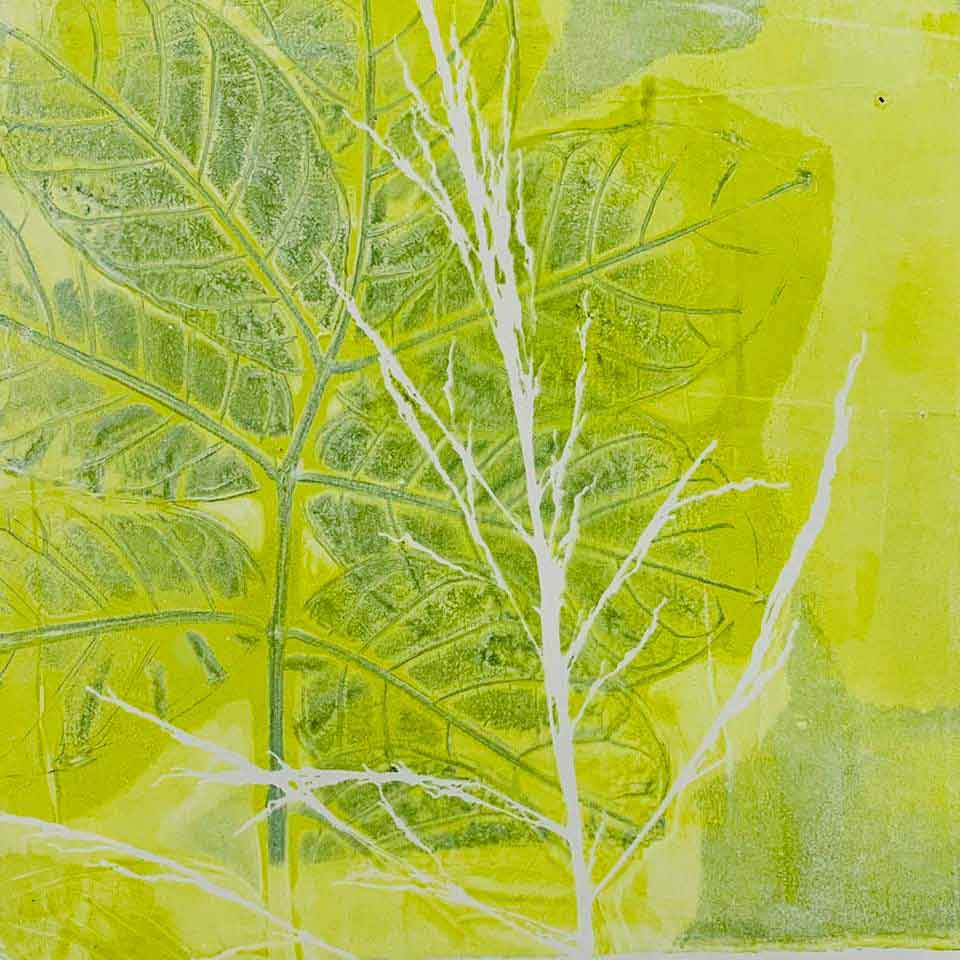
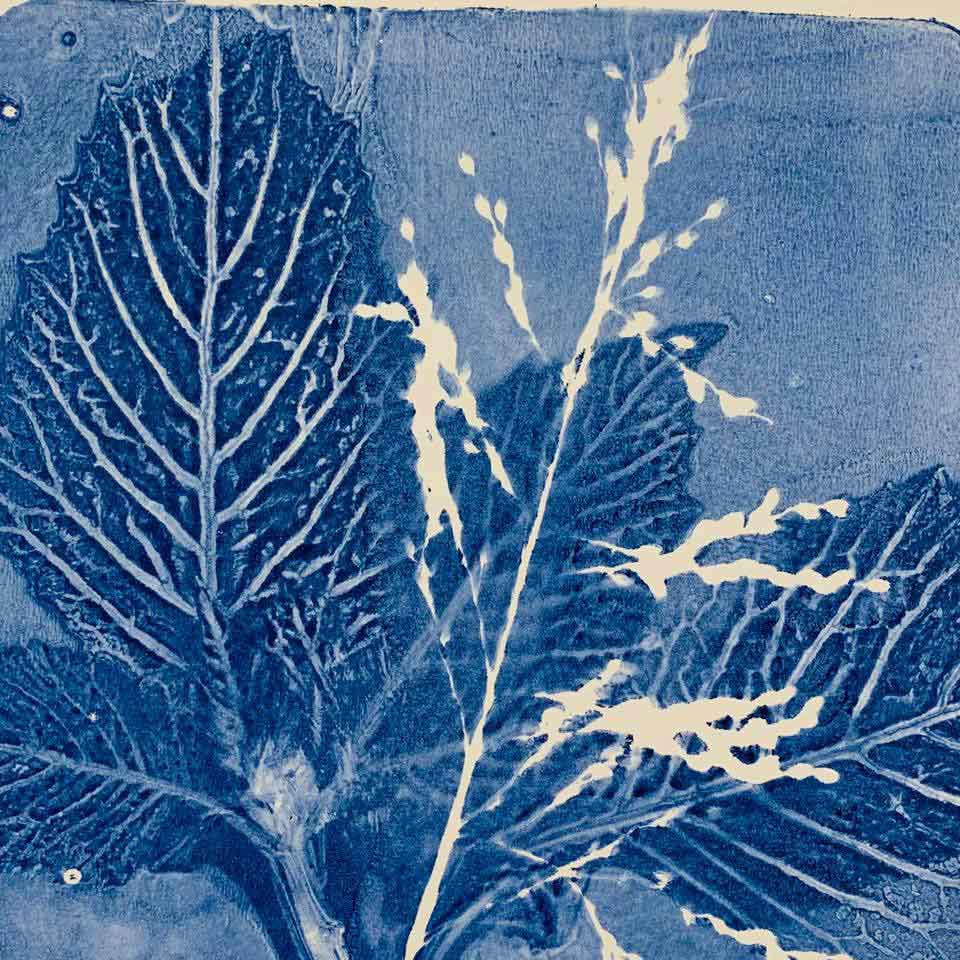
Gel Plate Printing Tip – printing a white silhouette
How do you think I managed the white silhouettes of grass over the printed background leaves in the prints below? I created my first white silhouette by chance when I was in a state of printmaking play. It took my a while to get my head around how I did it when I tried to recreate the effect. Once I thought it through I surprised myself at how simple it was. It’s a deceptively simple process and one I have shared here.


Interested in learning more about my approach to Gel Plate Monoprinting?
Printing with gelatin plates, home made or commercially bought, is fun and easy. There are many different approaches you can take, using different paints and inks. If you’re interested in learning my approach, I offer both in-person workshops and an online workshop.
In my workshops I demonstrate and share with you how I create my layered prints using botanical materials. And that demonstrating this post’s process, and how I make my DIY gelatin plates. I’d love to share this all with you.


Moltes gràcies per compartir el teu art. Tenc moltes ganes de provar-ho.
You are very welcome. Enjoy 🙂
THANK YOU for this cool tutorial. I modified and adjusted it for my lesson today with middle schoolers. They managed to create some interesting effects. Really had them thinking about masking, layering, negative and positive space. Would love to collaborate on other middle school projects if you are game. Thanks again.
Hi Gayle, thanks for your message 🙂 I love hearing about introducing this process to kids. It really works for all ages. Have you had a look at the Gelli arts website? They have a lot of student tutorials on there. There is another sequence I share in my blog – printing a white silhouette. that would be fun for kids too.
I have been on a recent two day course using a gelli plate for the first time. Thank you for your tutorial it was really good and I have just finishing grey and black mountain scene. Really pleased with the outcome. Many many thanks Sue
Hi Sue, I’m thrilled you found me and happy you found the tutorial helpful 🙂 enjoy your gelatin plate printing – once you start its hard to stop! cheers, Kim
This looks so fun! I want to try gelli printing with my students (I am an art teacher). What kind of paint/ink do you recommend? tempera? block printing ink? Thank you!
Hi Elaine, it is fun! I used acrylic paints. You can use inks and paints, artist quality and student grade. Different paints/inks will give different results. Personally I use predominantly Golden OPEN acrylics. They have a slow drying time. Cheaper student acrylics will work, but they will dry quite fast on the plate, so you either need to work fast, or allow the paint to totally dry, apply another layer, then lift the paint off. For working that way, checkout GelliArts – that is how a lot of their work is done – lifting the dry paints/inks from the plate, and you’ll see how they do that in their blog and social media posts. Enjoy!! cheers, Kim 🙂
Thank you Kim. This is so well explained I will try both techniques tomorrow and look for weeds on my daily walk.
Thanks for the feedback carol. I really appreciate that. Have fun!!! It is such a fun and addictive process 🙂
Hallo
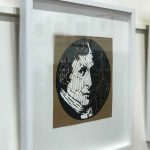
Thank you for sharing these pictures. I have a question: how do you call these frames to dry the pictures? They are perfect!
Hi Martina, thank you. I’m not sure what you mean by “frames to dry the pictures” – are you referencing the black wire stands that have the papers sitting in them? If yes, they are office filing racks. I buy them from a stationery store. They are perfect for drying the prints, especially in workshops and/or small spaces. cheers, Kim
Hi, thank you for all your helpful and creative ideas. I love the magic and wonder you have created. They are beautiful. I am truly inspired and will make every excuse necessary to try them out. Thx!!!
Hi San, you are very welcome. I’d love to see what gel plate prints you create. Post back here if you can. cheers, kim
I’m only just getting into gel printing and this has been enormously useful to help me think about the layers.
Hi Claire, welcome to gelatin plate printing!!! It is such a fun process. Thank you for reading, and please share what you print. I love seeing how people adapt and make it their own. You might also find this useful … its another sequence of layers to create fun results ‘printing a white silhouette‘. cheers, Kim 🙂
Love your work! Which paints do you use and do you use a medium to create more transparent layers?
Hi Juliet, I use almost exclusively the Golden OPEN acrylic paints. With them there is no need to use a medium or retarder to achieve that delicious translucent effect. cheers, Kim 🙂