

3 Little Artist Book Projects
What do you do during that week between Christmas and New Year? Those 7 days of what I call ‘no-mans-land’ … when Santa has climbed down countless chimneys and we wait for that stay-up-past-midnight night to see in the new year.
For me, I love to chillax at home. And I love to spend time in my studio (much like every other day of the year really 🙂 ).
I was struggling with motivation to create new work; I was enjoying some serious go-slow-relaxation time.
But I still wanted to create.
So I set to about a book project.
I love love love folded books – that gorgeous haptic sensation of creasing paper and constructing something interesting with paper. I’ve done a little book binding stitching, and recently saw a gorgeous collection of artist books at Studio West End‘s Open Studio – where many of the books were bound using the single-sheet coptic binding technique. I’d not seen that before, found an online tutorial (thank you Sea Lemon!), and set about enjoying the quiet of the Christmas-New Year week and teaching myself and making.
Below are the three books I made during that Christmas-New Year break…
Book 1 – Gelatin Plate Print Artist Book
I had a large stash of gelatin plate monoprints printed the other weekend during our crazy wet, wild and woolly weather. They were quietly screaming at me for some attention.
During that wet and wild Sunday morning print session I printed about 40 A3-ish sized prints. I had access to limited plant materials, given the crazy weather, but I loved the variety of prints I was able to create with colour and different layering sequences. And I really wanted to find a way to share the prints, without losing them to the dark recesses of a drawer in the studio. You can click here to see some of the prints before they were trimmed and bound into my new book.
Collating them somehow in to a book seemed the perfect platform to give the prints their own focus and create an easy way to share them.
I used my favourite print for the covers, sandwiching a thick piece of card between each piece of trimmed paper from that print. I cut the printed sheet in half, then each of those in half again – and that gave me a sheet for each side of the front and back cover card.
Then, with most of the other prints, I cut each sheet in half, then folded each cut sheet in half, then bound them all together (with the covers) using the single-sheet coptic binding technique.
The book doesn’t have a specific front or back cover – rather, however you pick the book up and start to flick it through works. There is a very subtle order of the prints in the book, but that’s really only known to me. The primary goal is to just enjoy the pages of prints … the colours, textures, marks … as the reader thumbs through the book.
I still have a lot of practice ahead of me to master coptic binding, but I am pretty happy with how this little book came together.
Now I can flick through the book and enjoy the different colour combinations, textures and layers. It has made a great resource to reference back to, and a great collection of prints to share with students in workshops.
Do you like the look of these prints? There are easy to create using a gelatin plate, some paint, plant materials, a roller and some paper. If you’re interested, I teach my approach to this insanely versatile and fun process in a self-paced online workshop. Click here for more info.
Book 2 – Paper Eco-print Artist Book
Its safe to say that the collection of eco-printed papers I have amassed over the past few years is, well … big! The pile is a collection of different papers printed with different plant materials, mordants and dyes. Different sizes. And very different results.
Continuing with my book-making theme, and wanting to refine my single-sheet coptic binding skills … woohoo, another book project was ready to go!
As with the previous book, I picked my favourite prints from the stash, and glued them to some thick card for the covers. And similar to the previous book, I couldn’t decide which I preferred as front or back cover, so the book can be read from either end.
Most of the papers in the pile are of a landscape orientation, so that dictated the size and shape of the book. I loosely ordered the pages in the order the papers were printed, so you can see a progression of technique through the prints.
I love the different paper widths and changes in colour and detail on the pages. As with the gelatin plate monoprint book, the more you look, the more you see. The rusty papers. Subtle and surprising pops of colour. Printed leaf impressions and delicious resist prints. So much lusciousness on each and every page. Eco-printing really is a magical process.
When it comes to gelatin plate printing (or rather the way that I approach it), there isn’t much difference in materials to create the prints. Layering, sequencing and colours yes, but overall, its a similar approach with a small pool of paint/botanical/paper resources for each print.
However … when it comes to eco-printing, there are quite a few variables that can influence the end results.
My current dilemma is whether or not I should make notes on the prints as to plant materials, mordants, papers and other conditions that worked to create each print. The logical, methodical and practical part of my brain is screaming “YES!” at me. The rest of my brain is quietly and calmly saying “shhhh, no”and enjoying the mystery of the process. I’m still undecided. I’ll ponder that one a few more months.
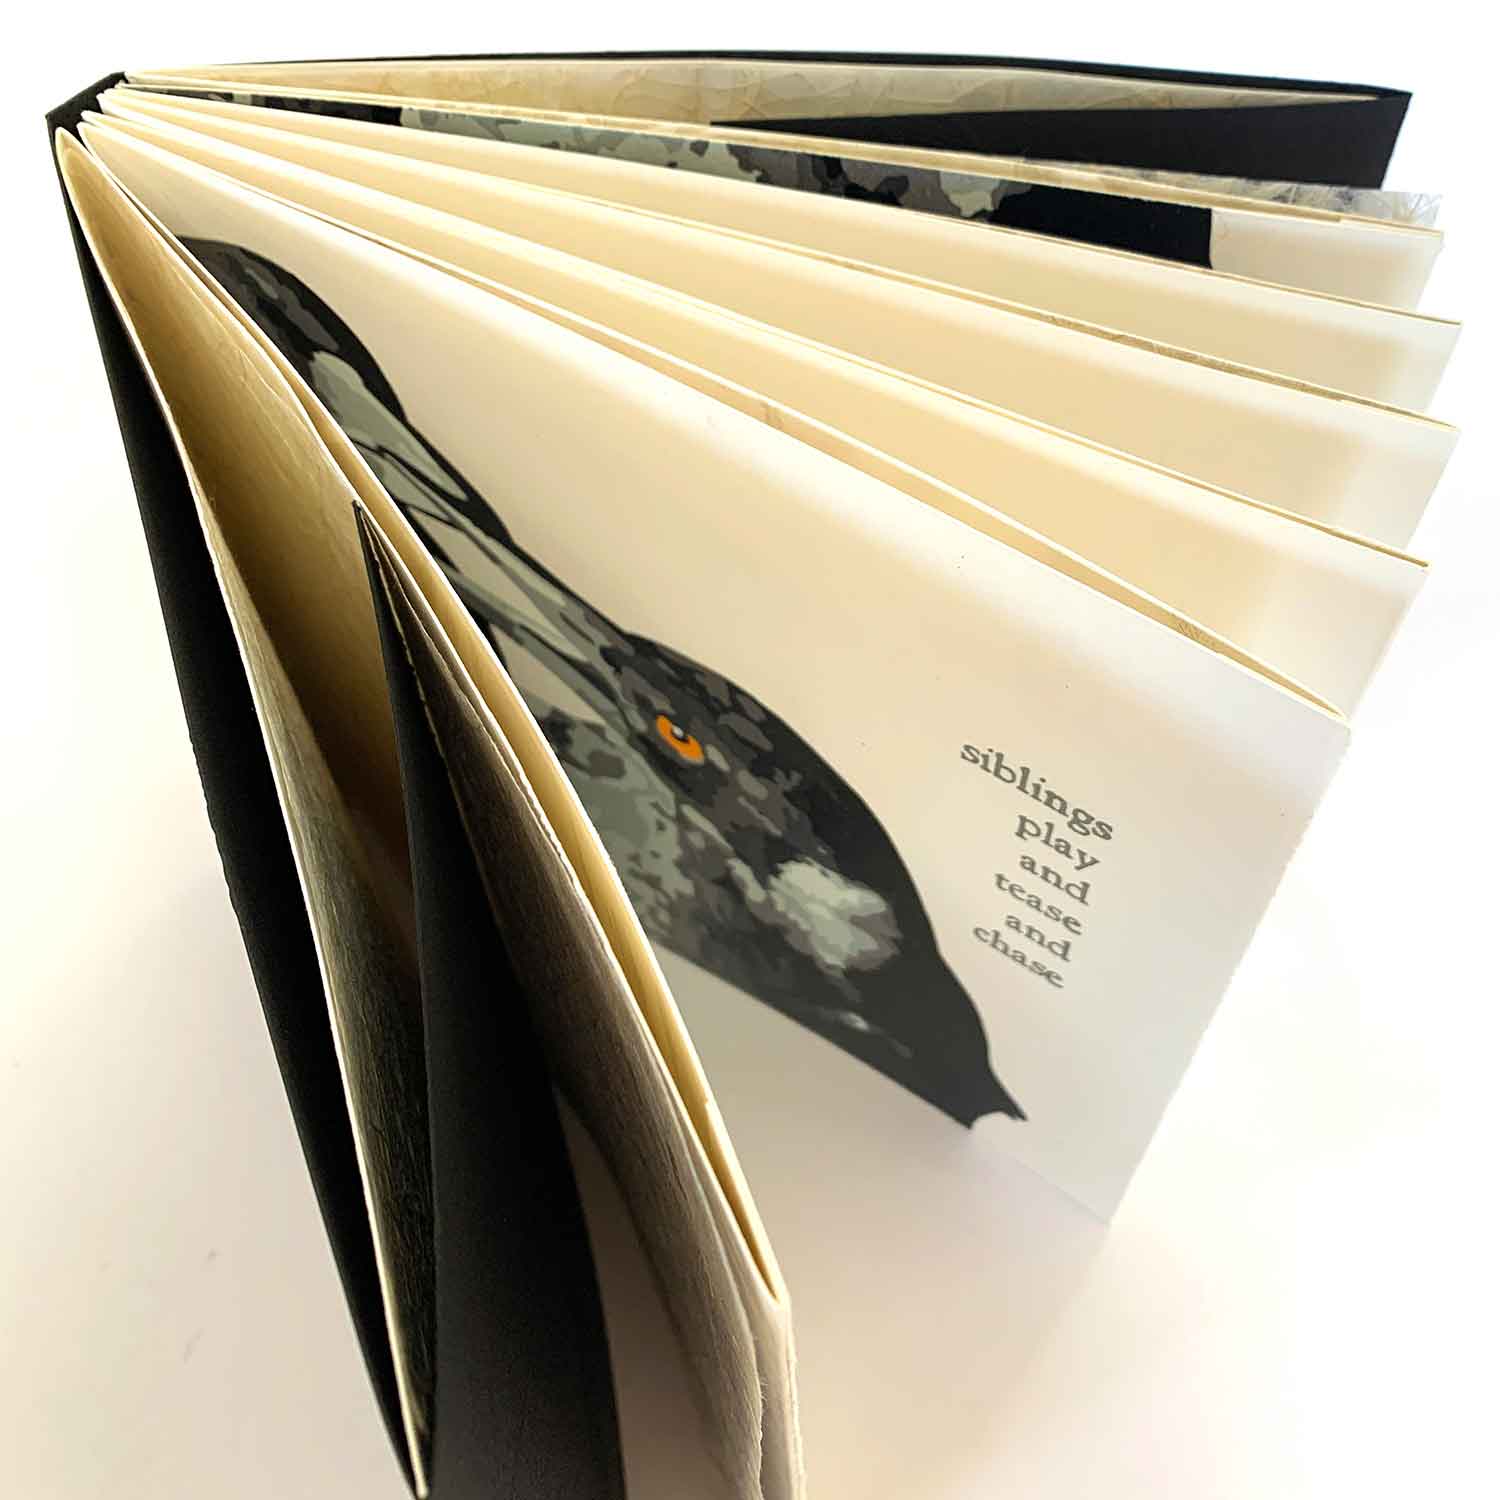
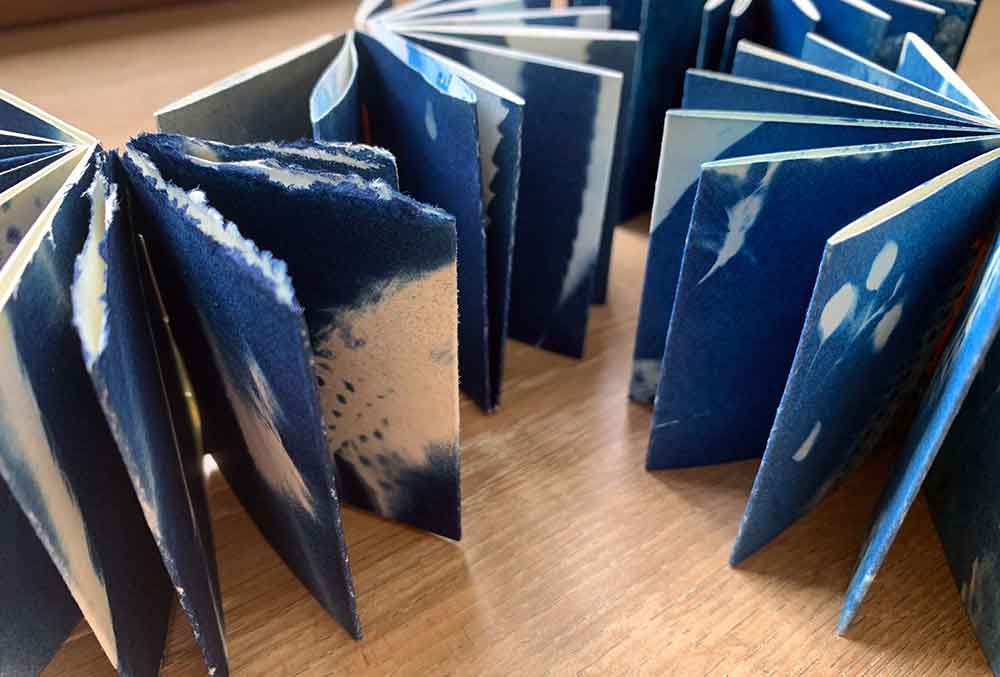
Book 3 – Cyanotype Artist Book (and a box and a few other books)
And with the completion of book 2, my mind started to wonder what next?
My other next-biggest collection of printed papers is my cyanotype print collection. I love all that blue! Trying to pick a favourite for the covers of this book was a little tricky. I love many of the cyanotype prints that I have in my collection.
There was a varied selection of printed ‘subject matter’ to choose from; but I admit that I am rather fond of the feather prints. I worked out my trimmed paper size, hence my book size, then poured through the pile to crop into then trim as many prints as I dared cut up. It was harder than I expected to cut into some of the prints. But better I crop, trim and use them as opposed to them loitering in the solitude of the work-samples cupboard!
I followed the same formula as the previous books – glueing prints to thick card for the covers, then trimming and single-sheet coptic binding them all together. There was no order to the prints. I love the variety of imagery across all the pages.
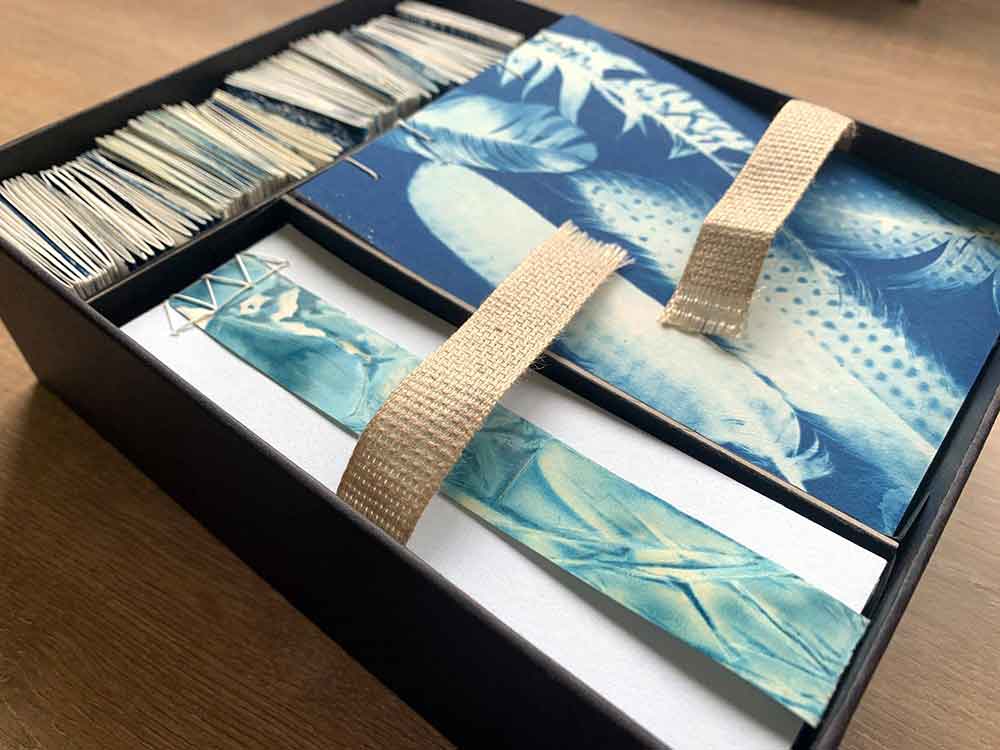
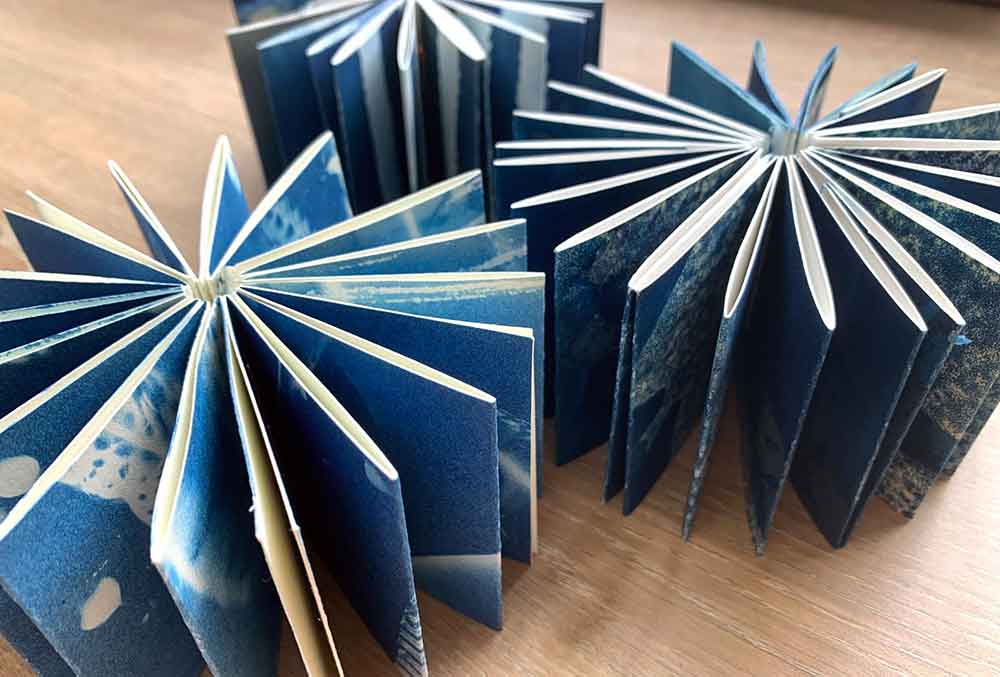
BUT … I wasn’t content with just the one book for my cyanotype prints. I wanted to use other cyanotype prints to make other little books – and then came the idea of boxing them all together. I dug out my old I’ll-use-that-one-day iPad box (you have to love the quality packaging anything Apple comes in!) and used the bottom box shell, adding some dividers so each different book had its own compartment to live in.
The big book (in the video above) had the biggest compartment. And I added some ribbon to make it easy to remove the book from the box.
I decided I wanted to bind the other books a little differently to the big books … so I made a series of stab-binding books, and accordion folded coptic bound books. You can see in the pictures below how they fit into box compartments …


I used some black Stonehenge paper to make the compartments, keeping the box nice and black inside. Now to contemplate the box lid. I’ve got a few different ideas and can’t settle on which one I want to run with. I’ll update this post once I do!
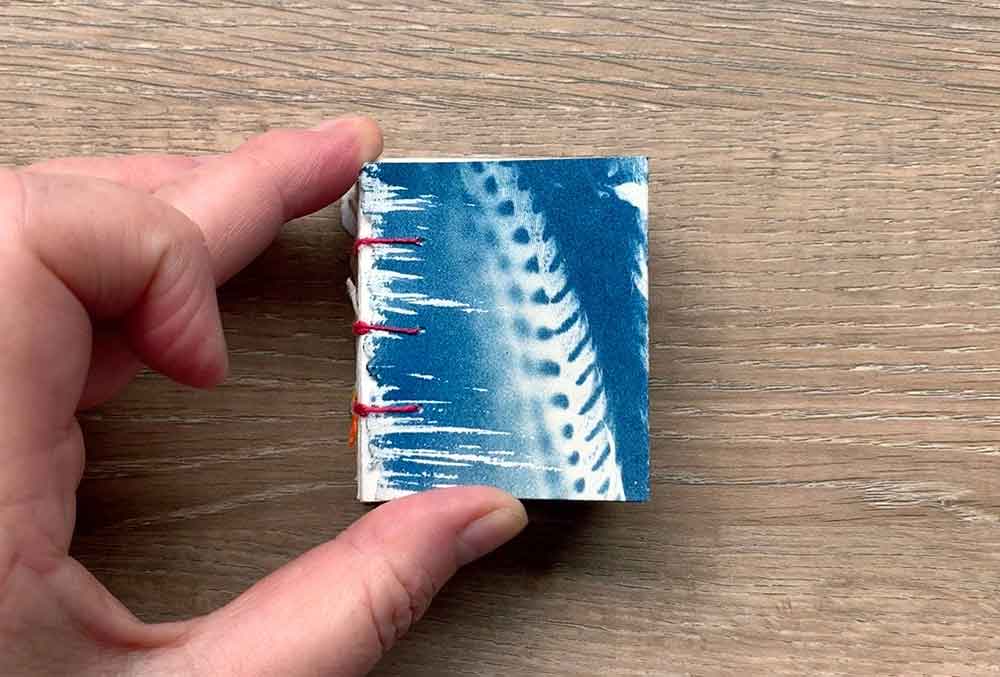
Ages ago I had made a series of cyanotype prints with guinea fowl feathers using paper offcuts (I keep all my paper offcuts, knowing I’ll use them for something one day). I wanted to craft these into little itty-bitty accordion books. And I wanted to keep the stitching theme going, so I bound each book using the coptic binding technique. The books sit nice and snug in their compartment in the box, but I love love love how they spring open when taken from their box.
There are 9 little itty-bitty-tiny-weeny cyanotype accordions in total.

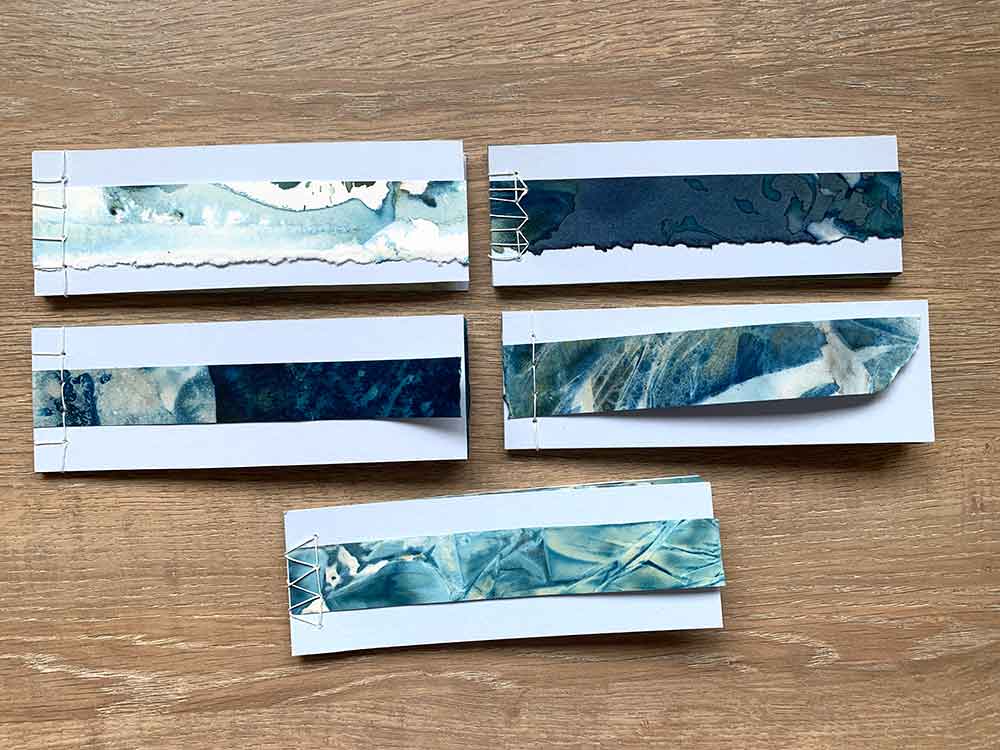
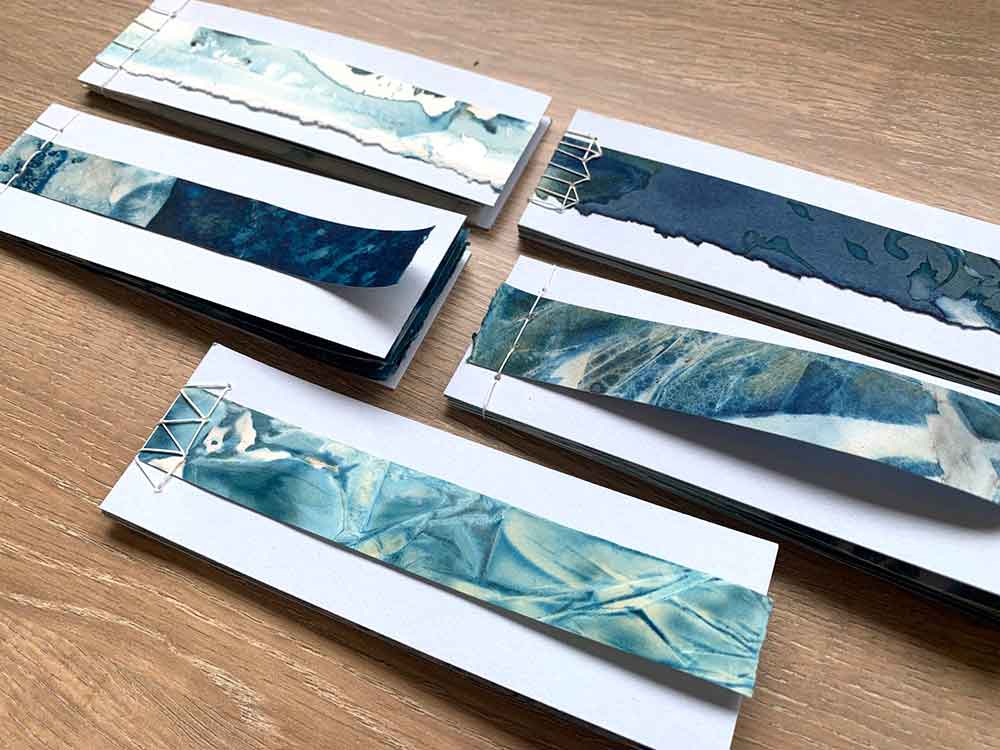
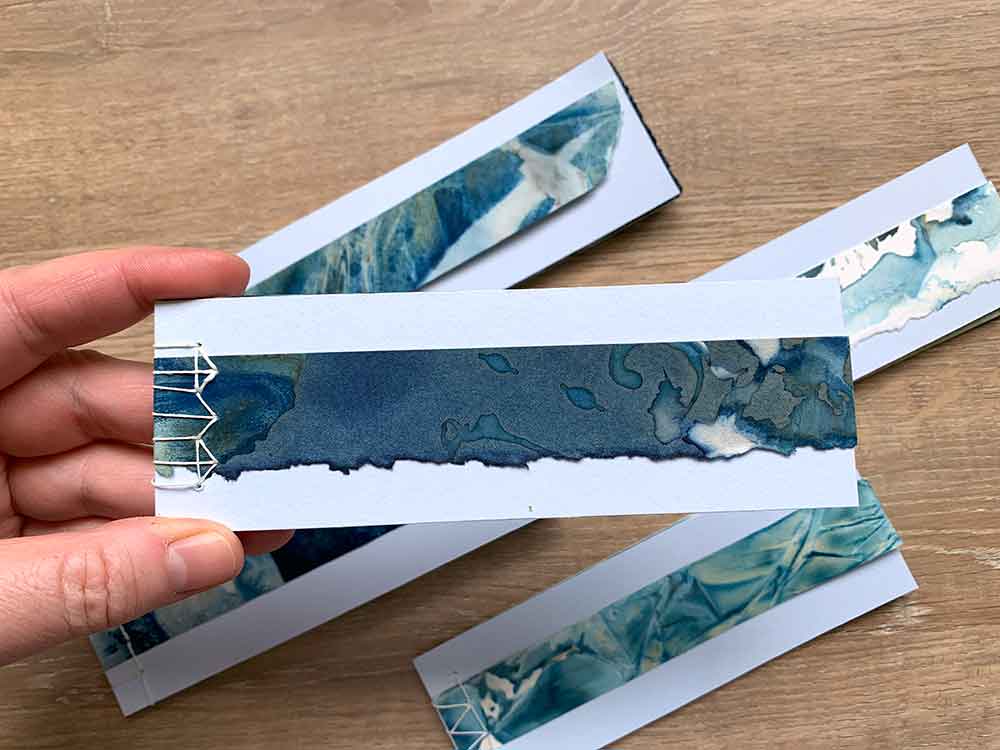
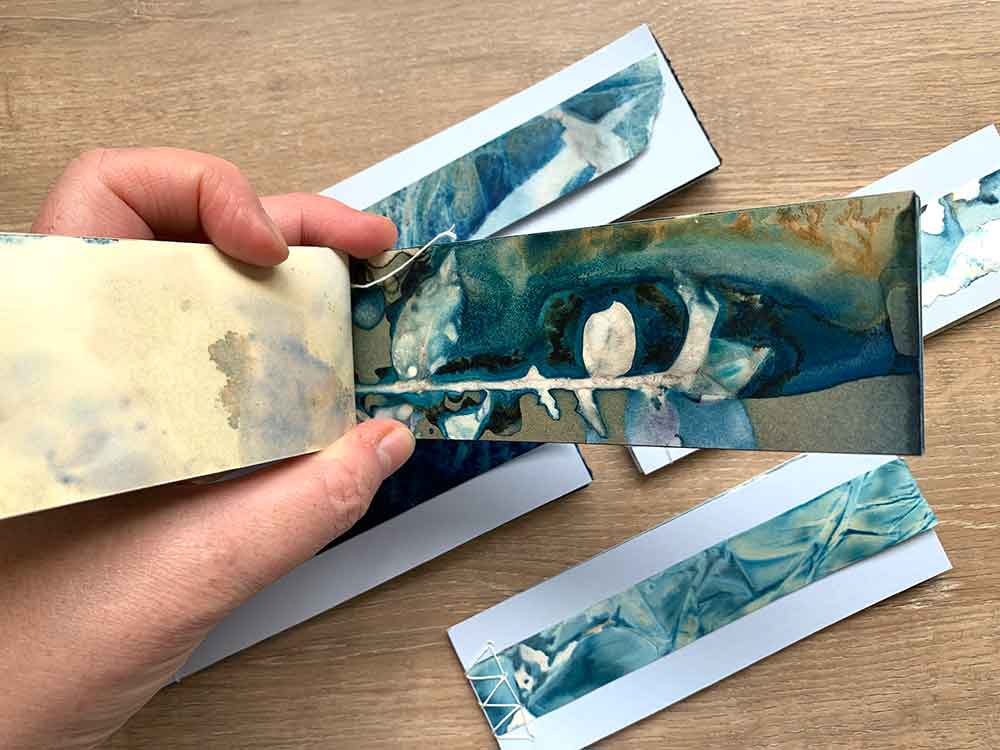
And then there were little stab-binding books to make … I’d not used this binding technique before, so I had some fun with it. I found gorgeous printed strips in my bigger cyanotype prints and collated them into little books. I used a different stab-stitching sequence to bind each book, using thin offcut strips on the covers.
All the cyanotype papers used for these books were wet cyanotypes. Some with oils added. Vinegar. Different additives for different experiments. There are 5 of these little books in total.


I know it’s been 2.5 years, but I just discovered this post. Your books are fabulous. I hope to take your classes as soon as work slows down. Thanks for taking the time to share them. They made my day!
Hi Michelle, thank you so much for your message 🙂 I’m chuffed you enjoyed my 3 little books. I looooove making them! cheers, Kim
Oh wow, I am so inspired by the idea of creating little books from all those prints sitting in the drawer! Putting it on the holiday downtime bucket list…
Perfect holiday activity. And even more perfect way to get those prints out from the drawers. 🙂
Kim your work is so beautiful and inspirational. May I ask a question? You mention that some if the wet cyanotypes had oil added? Is that essential oils or oil paints or pastels?
Hi Denise, the oil was me playing and experimenting. I played with adding vegetable oil to the print to see what would happen during the exposure and during the washout. i have played with oil pastels to see how the colour would transfer to the paper during the wet cyanotype process. So many possibilities !! cheers, Kim
Thanks for this inspiration. it is inspiring!
Marilee, you are so welcome. Thank you for visiting and reading 🙂
Exquisite work
You are so sharing, thank you.
I felt very mindful while viewing your films!
Hi Jane, my creative pursuits are my respite – and I aim to share that with others in the hope they find respite in my work, and maybe inspiration to create their own creative respite. I’m thrilled you had a mindful experience watching the little videos. Thank you so much for stopping by and reading. Kim 🙏 💙
Lovely to read about your book-making and eco-dyeing.
HI Rosemary, thank you much for reading 🙂 Kim