

Playing with Cyanotype and Printmaking with the Sun
Cyanotype (aka sun prints) is fun! Spontaneous. Unpredictable. Experimental. Well, at least the way I do cyanoytpe it is! I have had to put my linoprinting on hold for a few weeks as I wait out some joint pain issues as a result of Ross River Virus. Not one to not print for too long, I am occupying my creative mind and not-so-inky fingers with exploring and experimenting with cyanotype.
I was introduced to the process last year by a good friend and very talented artist Cholena Drew Hughes. Before our play day, cyanotype was a complete mystery to me. In this article I want to demystify the process and share some of the fun I have been having over the past few weeks.
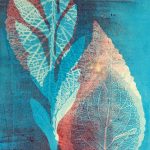
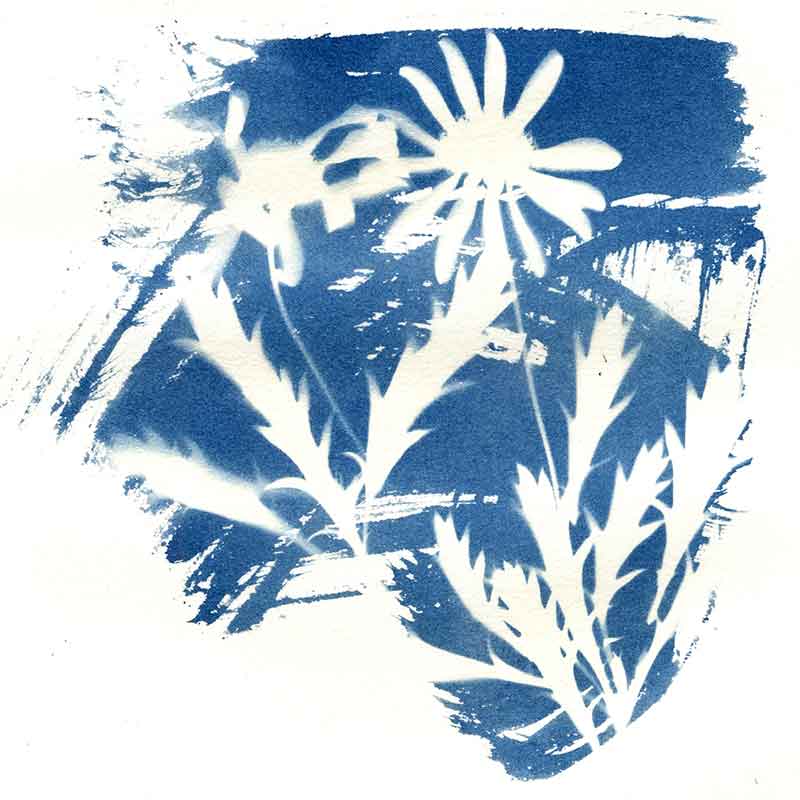
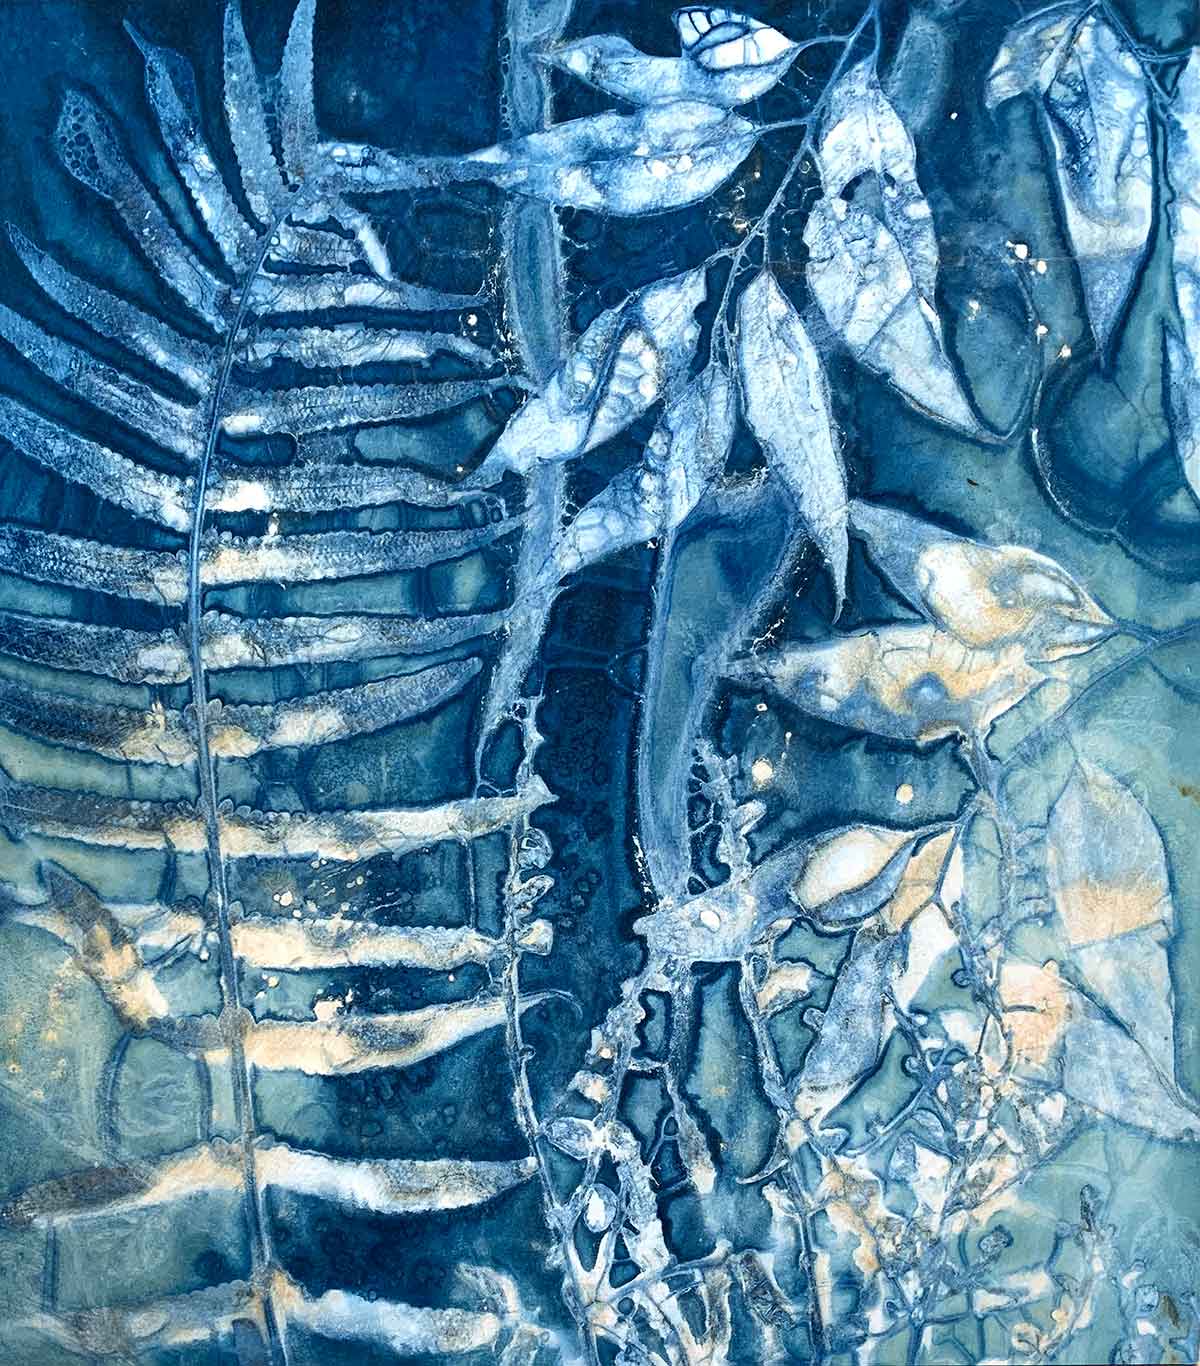
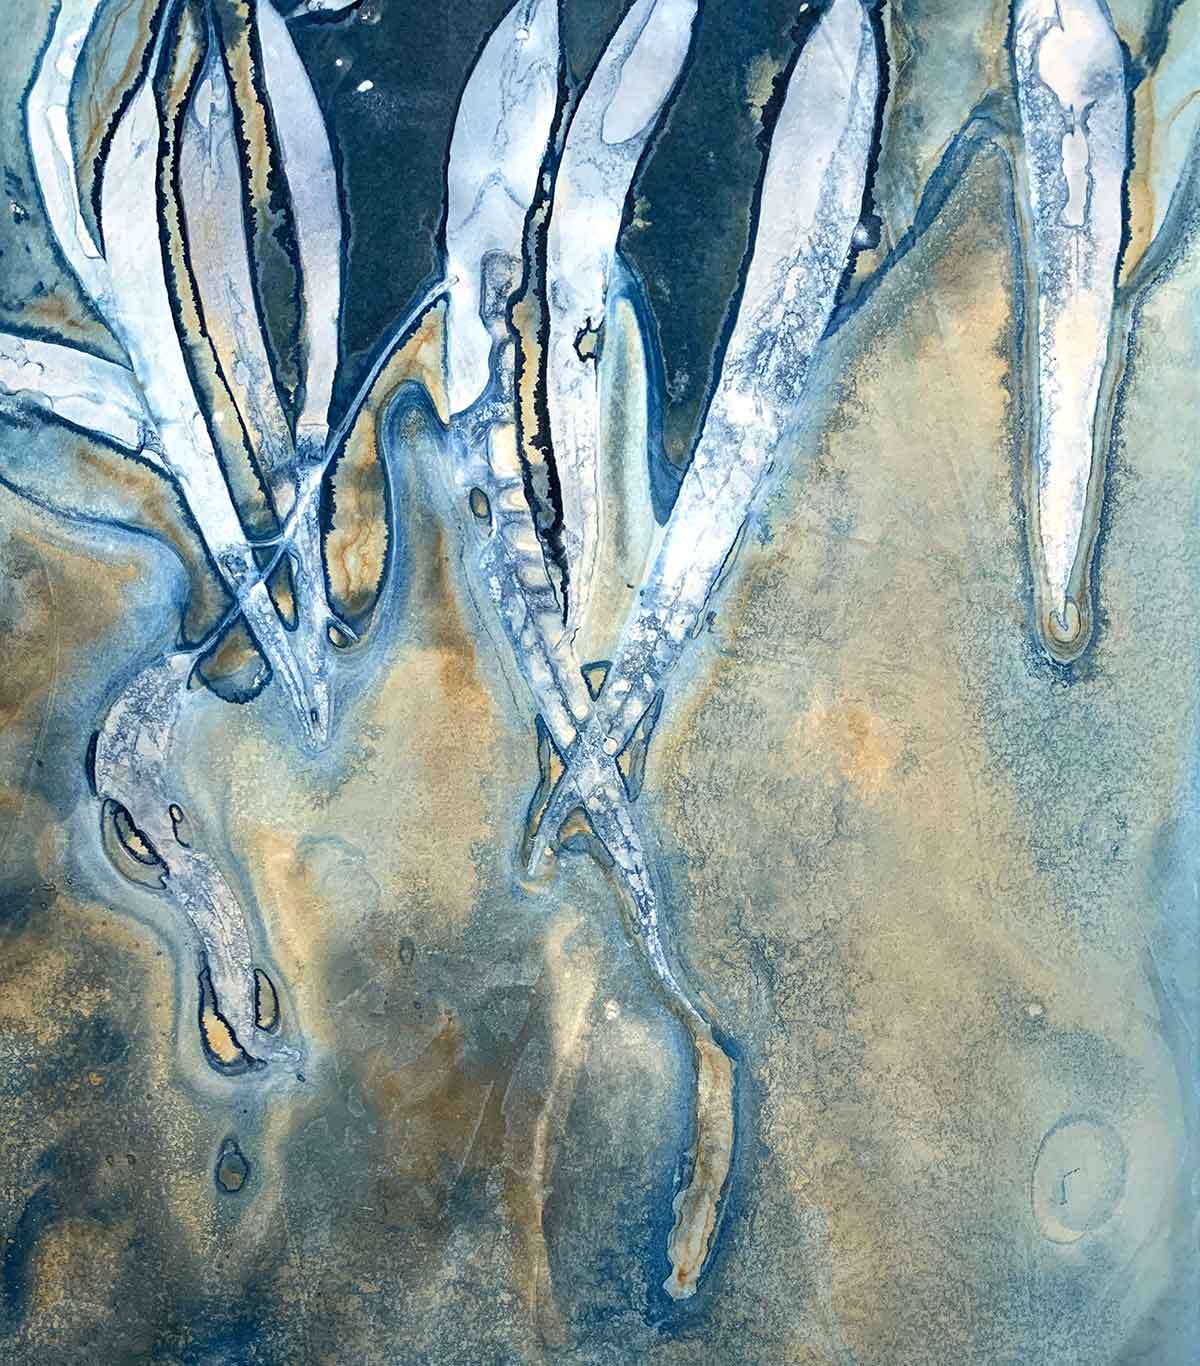
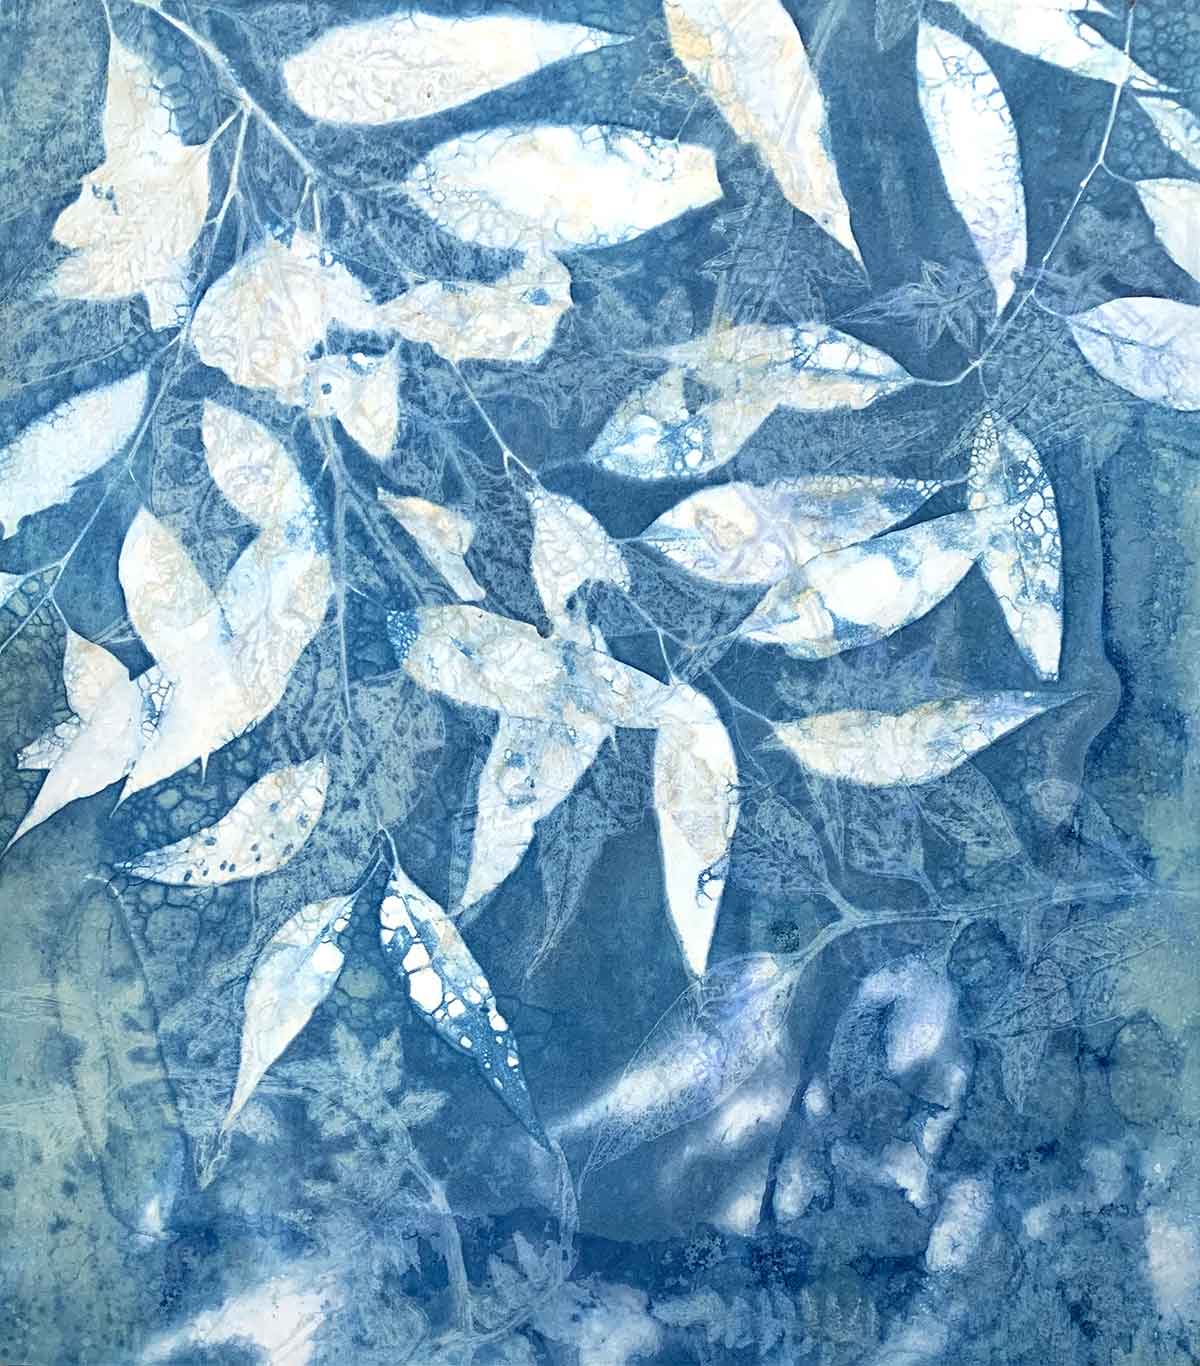
Recent small cyanotype prints

What is Cyanotype
Cyanotype is a photographic printmaking process
Do you remember the blueprints of technical drawings and plans used by architects and engineers? I remember them well form my Dad’s office when I was a kid (he was an engineer). Blueprints were created using a photographic negative or film positive placed onto a UV (ultra violet) light-sensitive sheet of paper. This process allowed for accurate and fast reproduction of documents, at a low cost, charactarised by their blue colouring. They were first used in the 1830s.

A cyanotype is effectively a blueprint. But in addition to using film negatives and positives, plant material and a host of other 3 dimensional objects can be used to create interesting and artistic images and marks on paper, fabric and a range of other surfaces able to absorb the light-sensitive chemical solution.
Have a look at my Cyanotype Pinterest board for a range of different cyanotype images.

The Process of Creating a Cyanotype Print
The cyanotype printmaking process is actually quite simple. And as with many printmaking, the possibilities of what can be created are limited only by your imagination. Below are the basic steps to creating a cyanotype print:
- Mix the cyanotype light-sensitive chemical solution
- Coat your paper/fabric/absorbent canvas with the mixed solution and allow to dry. This should be done in a room with no UV light.
- Store the prepared surface in a light-fast bag or box until you are ready to use it
- When ready, arrange your objects on your prepared canvas and place under a UV light source (sun or lamps).
- After the desired exposure time, remove the objects and wash your canvas in water.
- Once thoroughly rinsed, allow your print to dry
When objects (film negative/positive and/or 3D) are placed on your prepared canvas and exposed to UV light, a chemical reaction takes place. Once the exposure is complete, the placed objects removed and the canvas placed in water, the chemical reaction is stopped.
To create a cyanotype you will need the following:
- Light-sensitive chemical solution
- A canvas to receive your image
- Objects or film negative/positive
- UV light source
- Fresh water
Light-sensitive Chemical Solution
The light-sensitive chemical solution is mixed from two different chemicals – ammonium ferric citrate and potassium ferricyanide. The chemicals are purchased in individual preparations then combined to create the light-sensitive solution to coat, sponge or brush over your canvas.

Your Canvas
I love paper – so paper is my primary canvas for making cyanotypes.
When using paper, you need to be confident that it will handle the washout stage – meaning it will handle some time in water without degrading or damaging the paper. I use various printmaking papers, and various weights. Japanese Ho-Sho papers work well. While I play and experiment I am using primarily Stonehenge White 245gsm. I recommend experimenting with different paper types – different paper textures will yield different results.
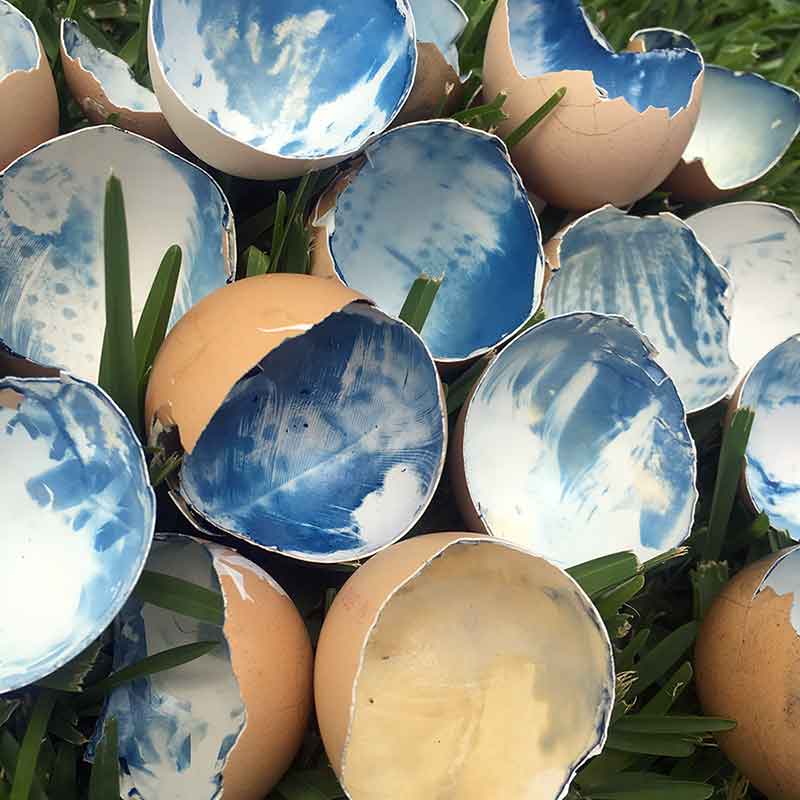
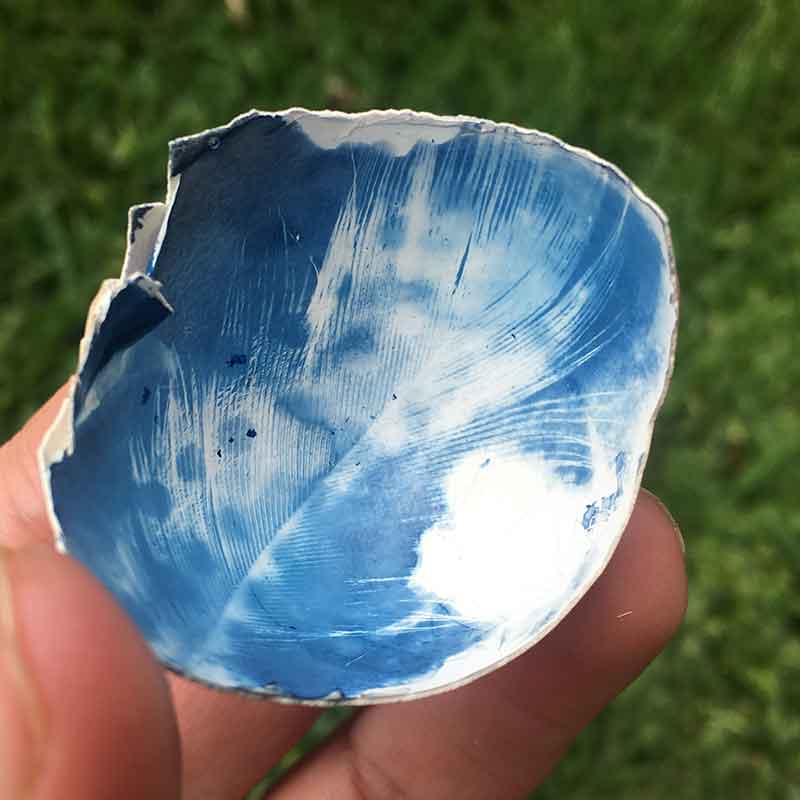
Cyanotpye can be done on fabric, ceramic surfaces and eggshells! As long as the canvas surface can absorb and hold the light-sensitive solution, as well as hold the final image after the washout.
Preparing your Canvas
The material you choose to use for your canvas can be just about anything that will absorb the light-sensitive chemical solution and then handle a water wash-out. In my studio I create cyanotype images with quality printmaking papers, fabric and eggshells. Watercolour paper will work. This is where experimenting with different surfaces can be a lot of fun. I will be experimenting with cyanotype on porcelain and timbers in the near future.
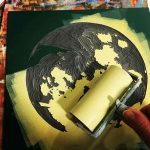
Once you have decided on your canvas material, apply an even coating of the light-sensitive chemical solution to that surface. I use a hake brush. A sponge will do well too.
A thin even coating is needed. I like to experiment here – I like to play with thick and thin applications. I try to get an even coverage over my canvas, and also play with painterly effects, splashes and brush marks on my canvas.
I do this in my studio in the evening and with low lighting. I have no artificial UV light source in my studio, so the regular studio lighting is fine to work with, as there is no UV light to expose the canvas.
Once your canvas is coated, leave it to dry then place in a light-fast bag until you are ready to expose it.
A hake brush is an oriental-style wash brush on a long flat handle. The brush bristles, normally goat hair, are bound into the flat, natural wood handle, with fine wire. These brushes are ideally suited for painting large areas of color, for wetting large surfaces, and for absorbing excess media, washes and glazing.

Objects for the Exposure
I use many different objects to create my images.
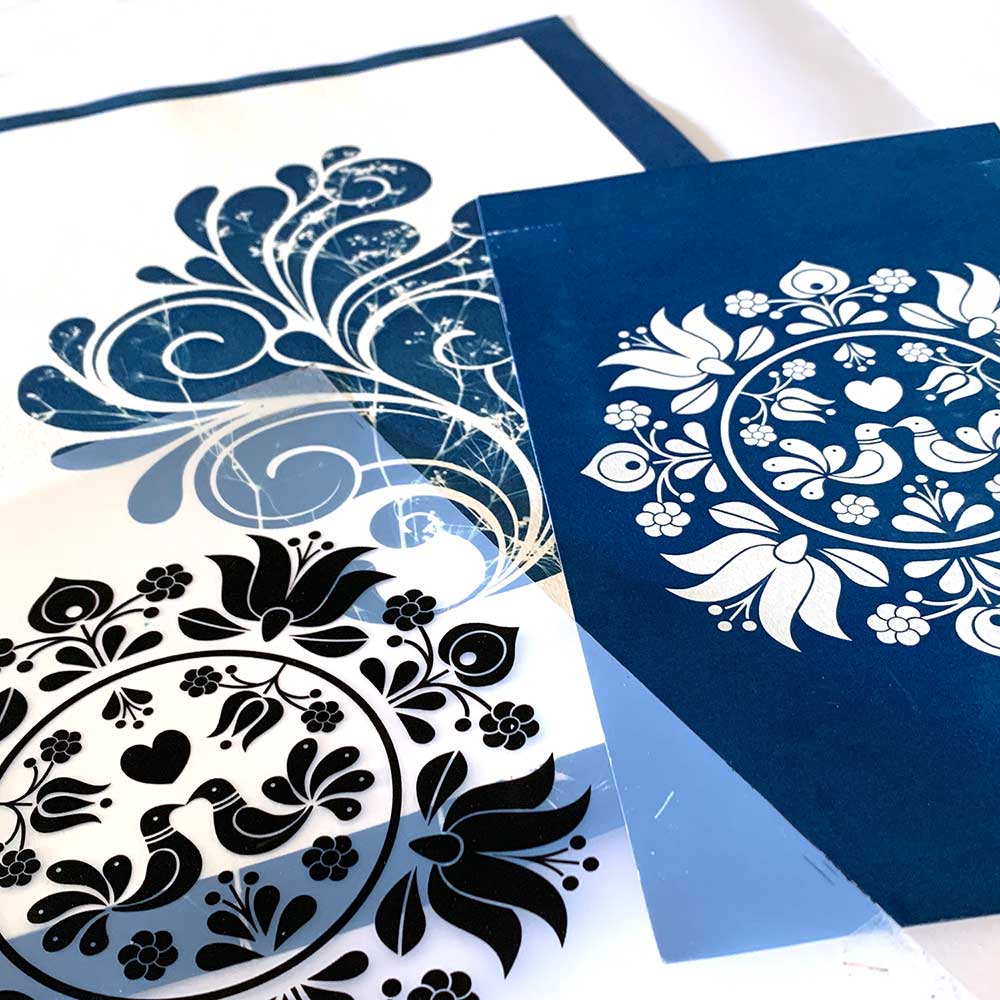
- Film negatives and film positives printed both on my own laserprinter and inkjet printer, using compatible transparent film
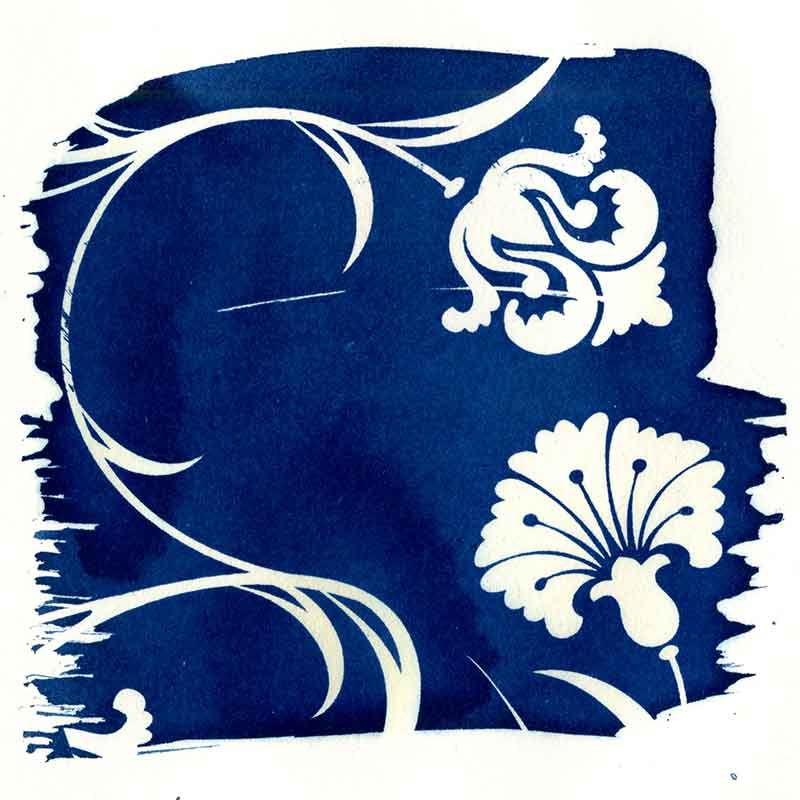
- Commercially printed cellophane used to wrap floral bunches. The graphic shapes and bold contract of black against clear cellophane give strong graphic results.
- Organic matter such as leaves, flowers and branches branches
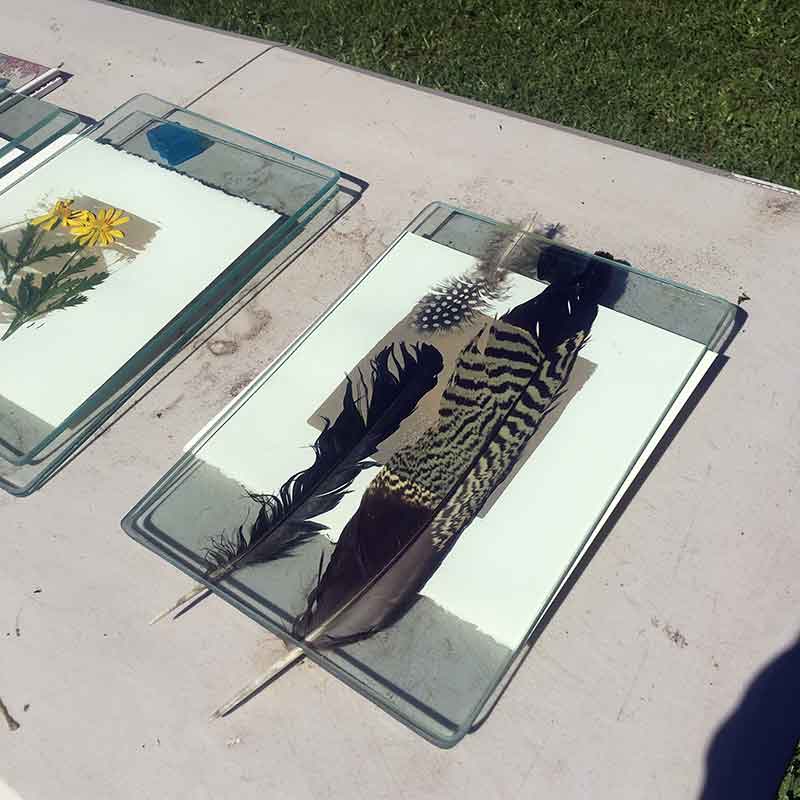
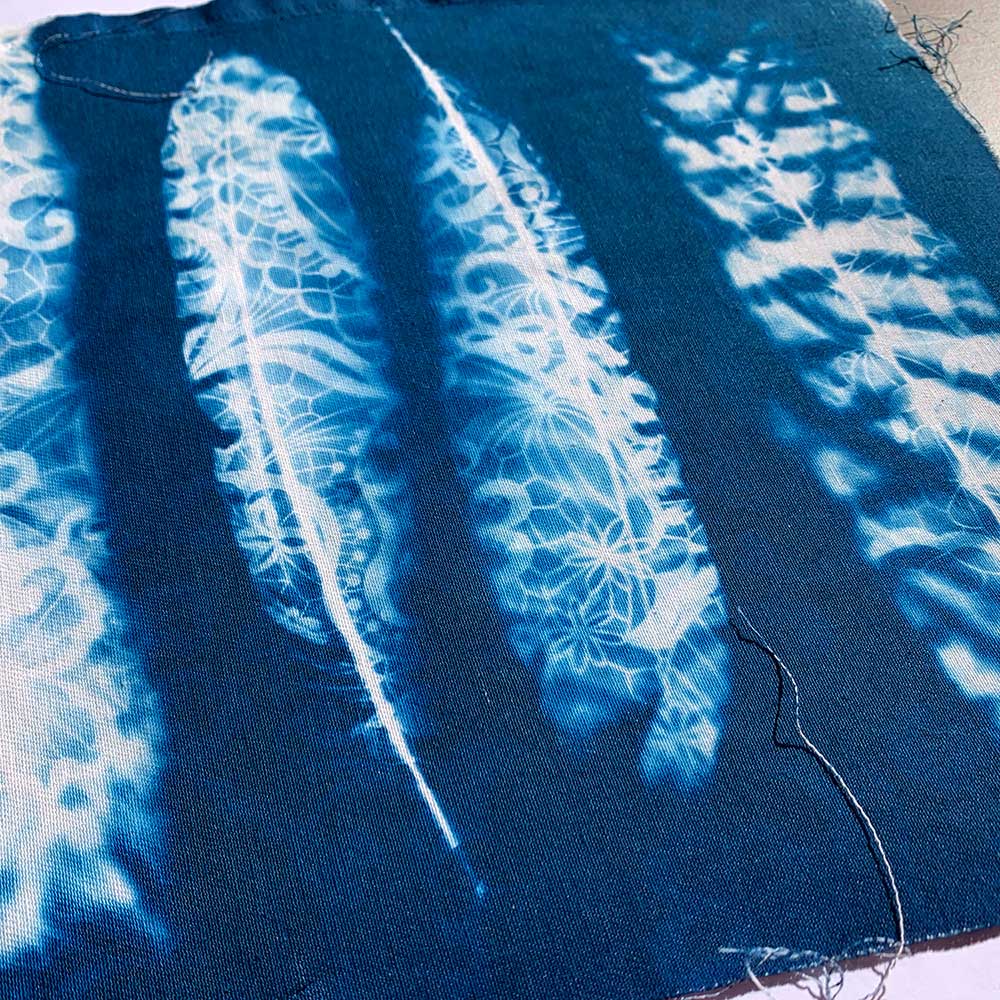
- Other 3D objects such as feathers, shells, glass, lace, papers or just about anything that will fit on your surface and block of filter UV light will work.
- And this is where you can really experiment with different objects and exposure times to create interesting, spontaneous and unpredictable results.
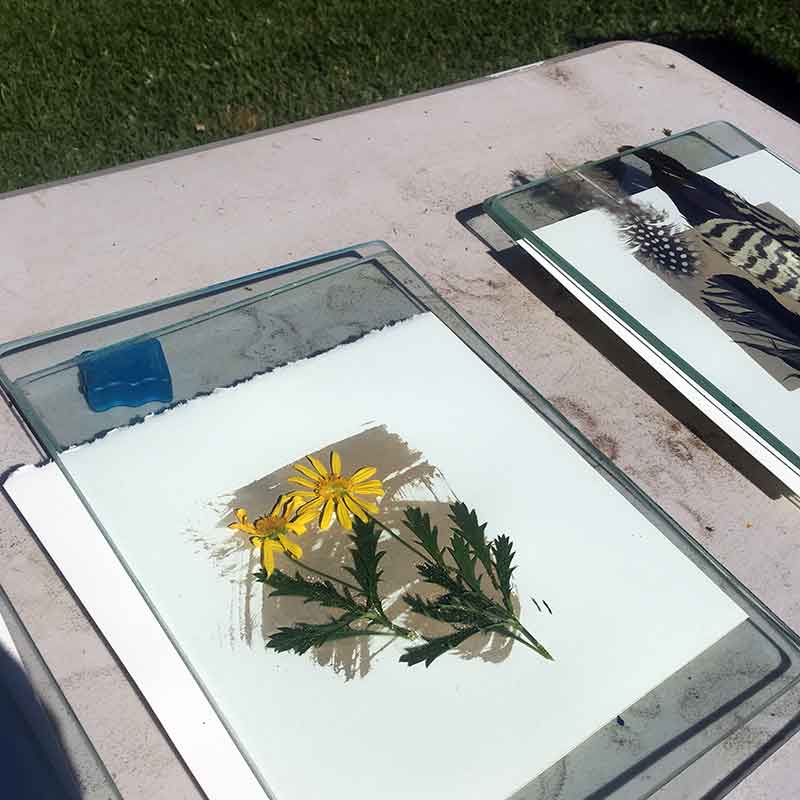
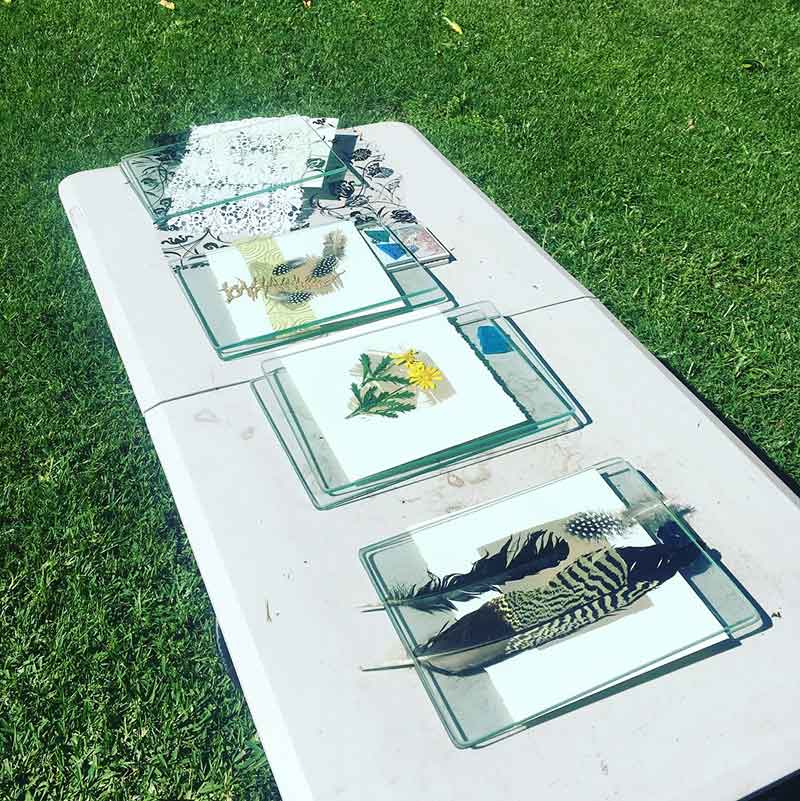
I place the objects on my canvas, preparing the arrangement in my dimly lit studio. Once I am happy with the arrangement I place the canvas on a table in full sun.
I like to place a sheet of glass over my objects to keep them in place and as close as possible to the canvas. The closer the object, the less UV light that can filter in around the object, then the sharper the image. Sometimes I use a sheet of loose plastic or acetate to protect my objects from the wind, but allowing space between them and the surface.
Again, this step invites a lot of experimentation to see what sort of results can be achieved with different materials and different arrangements.
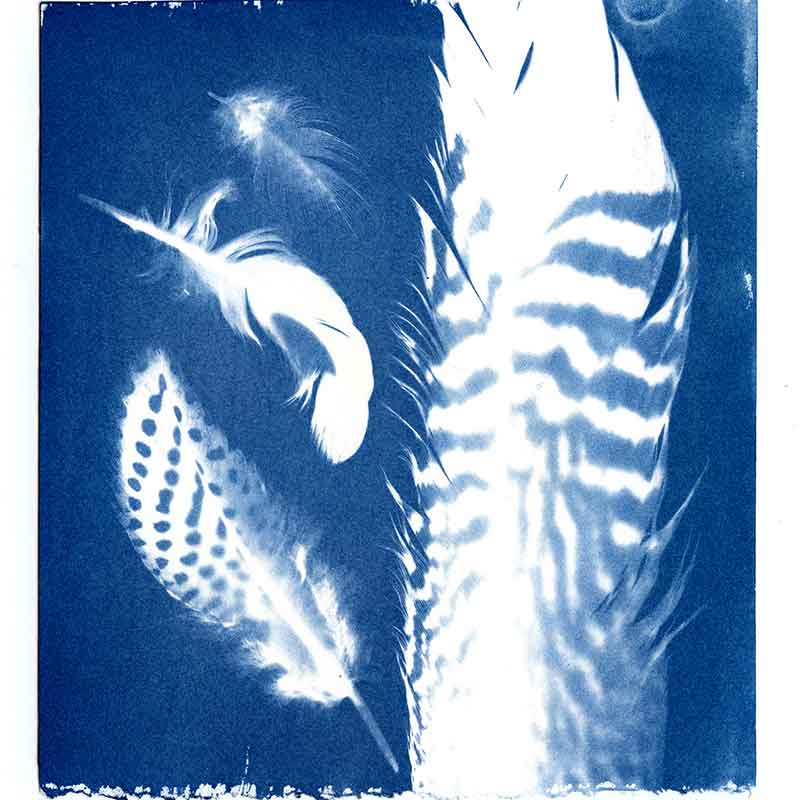
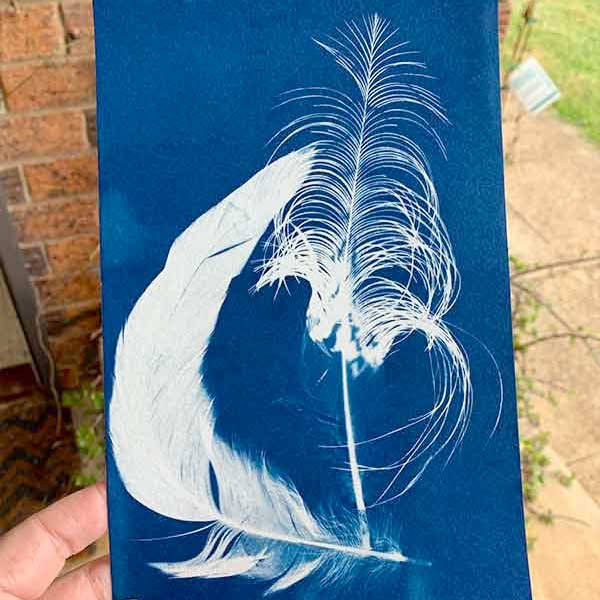
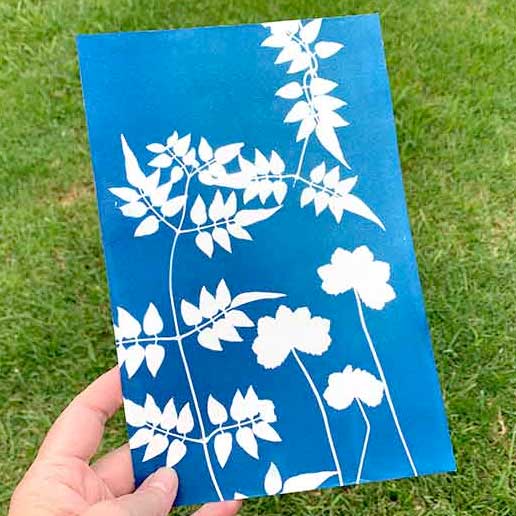
Recent exposures using feathers, flowers, lace and lace paper

UV Light Source
UV light is Ultra Violet light. The natural source for UV light is the sun. Special light bulbs can also produce UV light as an artificial but controlled environment. I like to use the sun as my UV light source.
Using a UV lightbox with a controlled UV light source will allow you control and recreate cyanotype prints.
Using the sun as your light source can create some unexpected and delighful results. Different times of day and different times of the year will produce different intensities of UV light – and this will have a direct impact on the exposure times required to achieve the final result you want.
I have used midday sun, morning sun and the afternoon sun. The more you play with the process yourself you will get a feel for how long to expose your canvas at different times of day for different results. In summer, where I live, I can use the sun from 9am-4pm with consistent results.
Add to a sunny day some clouds, and longer exposure times, and the final colour and exposed image can take on a new look and feel.
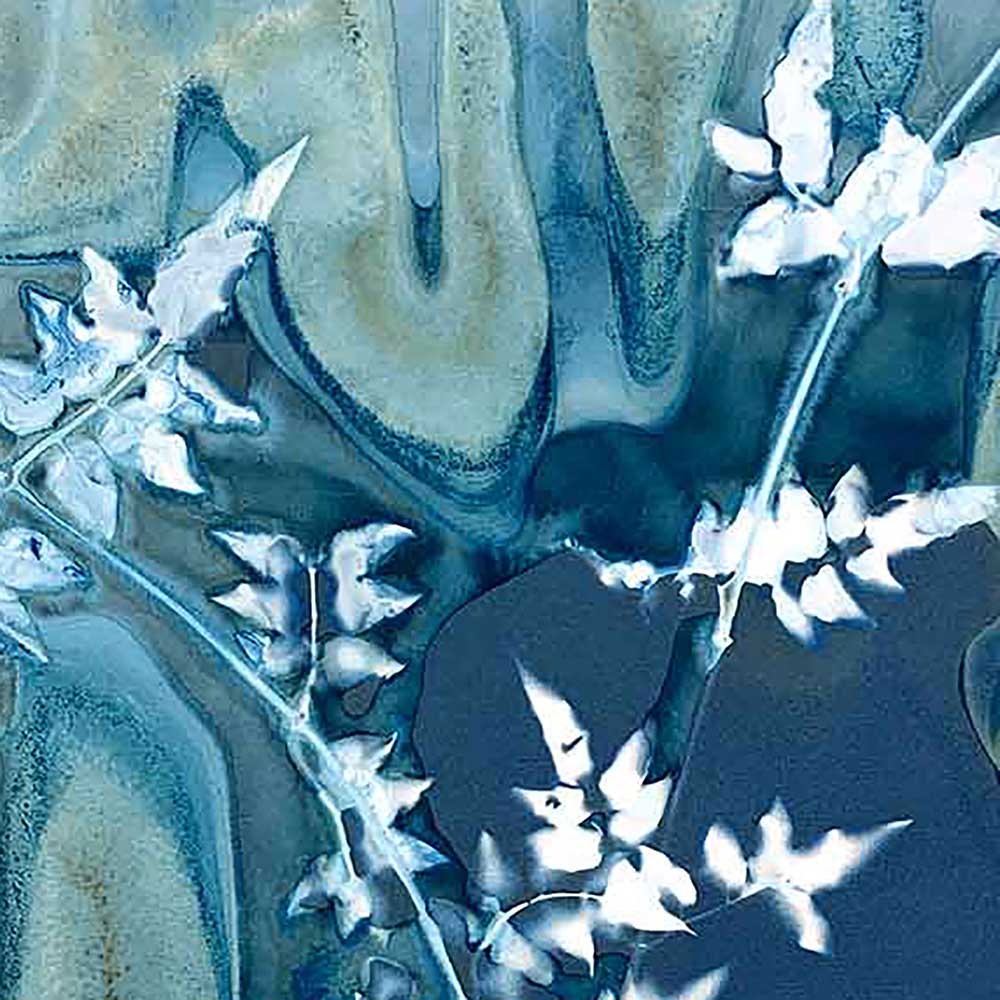
I have been experimenting with ‘wet cyanotype‘ and long exposures on overcast days. But more on that in another article.

Cyanotype Washout
This is where you stop the chemical reaction and your image will start to reveal itself.
Water will stop the UV light reaction with the light-sensitive solution. Once you have reached the desired exposure time, remove the object/s from your canvas and place the canvas in water.
This could be under running water in a tub, sink or from a hose. Or immerse your canvas in a tub of water.
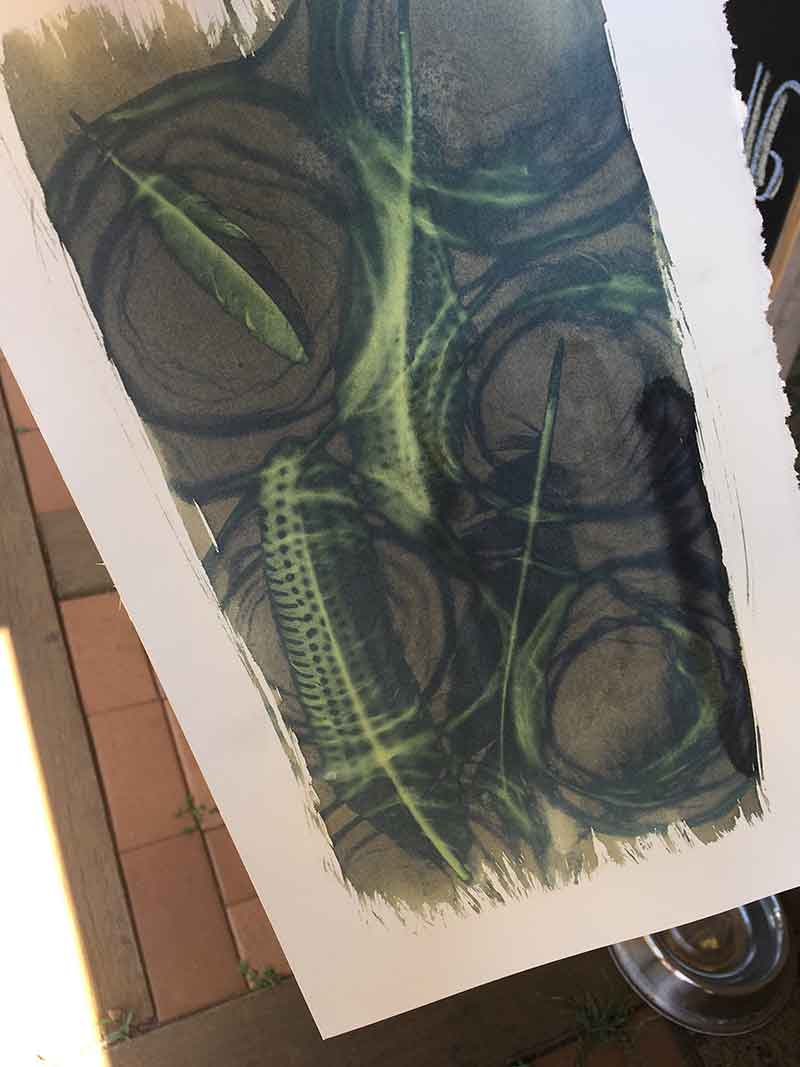
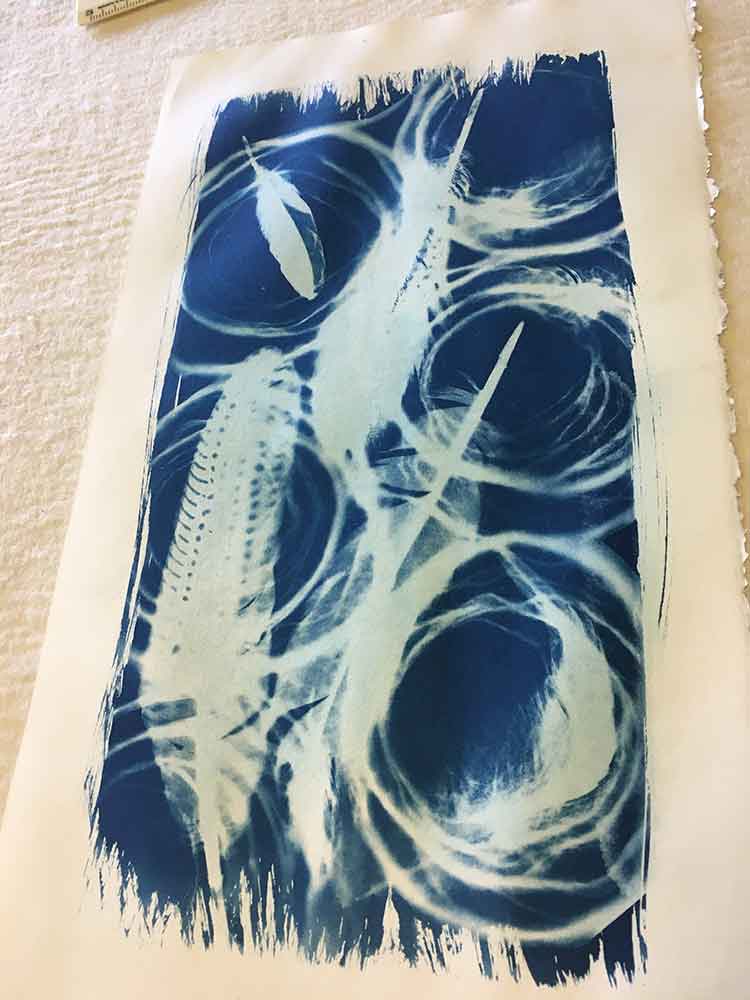
From once the objects are removed to the final washed out image you will see your image transform. Depending how long you left it exposing, and the intensity of the UV light source, the image may show strong dark blue with yellow/green highlights, or pale yellow/neutral tones. As the water works with the surface of your canvas, the typical blue will reveal itself on the canvas surface.
Watch the colours change during the washout stage

*** NEW Online Cyanotype Workshop ***
In January 2023 I launched my Cyanotype Online Workshop. In there I introduce you to the history or the process (it’s 180 years old!) and demonstrate several photogram and contact prints over 6 mondules. There are also 2 bonus modules where I demonstrate cyanotype on textiles and introduce you to the delicious extension of the process – wet cyanotype. If you’re interested, click the button below for full workshop details…


So What’s Next?
Play! I am experimenting! I am playing around with applying the cyanotype chemistry to other surfaces. Last week I played with cyanotype on eggshells. I am also playing with wet cyanotype, experimenting with toning and colouring the cyanotype prints, and mixing other wet and dry elements into the exposures for interesting results. Watch this space … I’ll document more experiments over time.

Update January 2022
I wrote this article a few years ago now. I have recently posted with a peek at some recent wet cyanotype prints. I am having a helluva lot of fun experimenting, playing and pushing boundaries. Click here if you’d like to click through to that post.
I have added some recent photos below…
Cyanotype Workshops
You can attend an in-person I day cyanotype workshops in Maleny, up in the Sunshine Coast Hinterland. We learn how to create your cyanotypes, with the focus on photogram cyanotypes, and you leave armed with a shopping list of what to buy where so you can continue to play with cyanotype at home or in your own studio.
I have also recently launched an online version of my in-person workshop – find out more about that here. The online workshop is self-paced and you can access from anywhere with internet.
Cyanotype Reference Books
Do you want to learn more but can’t get to a workshop? I have three cyanotype reference books on my bookshelf that have proven invaluable to my own self-education journey around the process. Click through to read what they are and where online you can buy them.


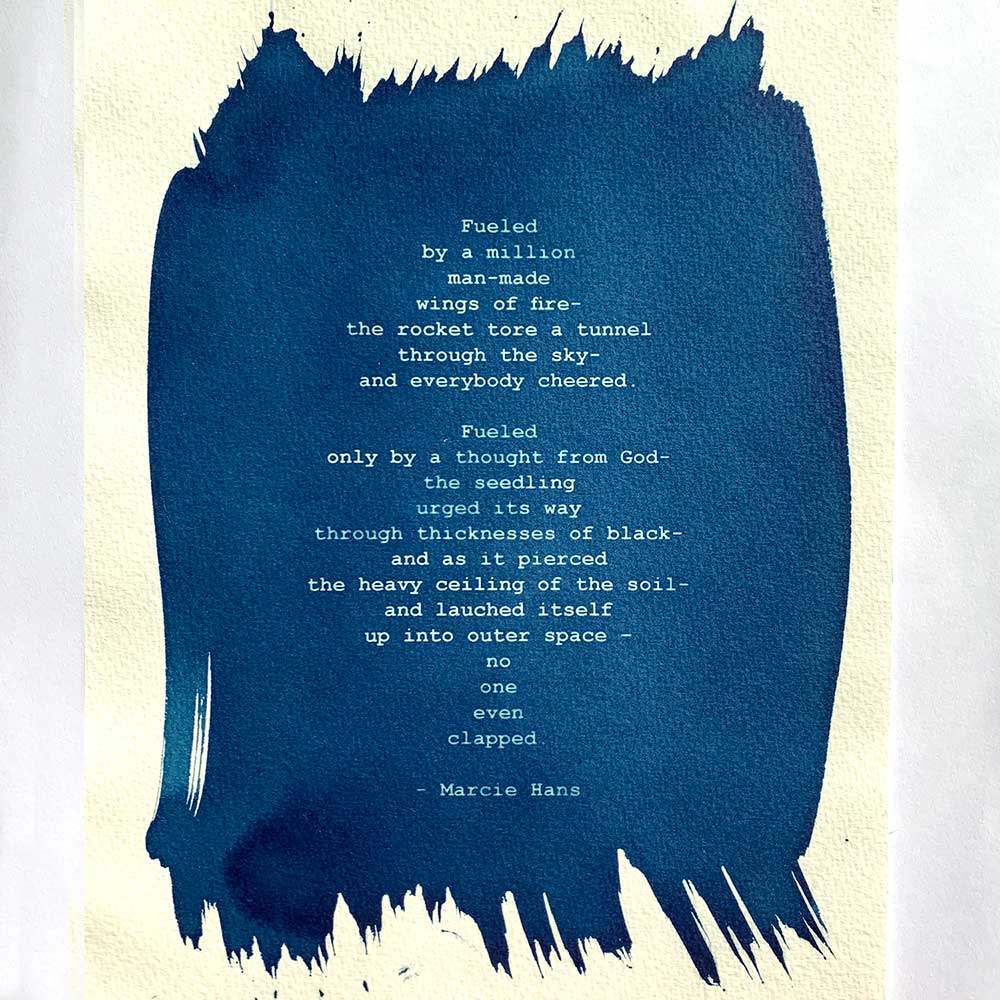
Hi, lovely work and amazing experimentation! I have a question on how did you achieve the poem cyanotype image that you have in this article? Also, did you try combining text with objects? Thank you!
Hi Sanchika, that poem was written on some clear acetate then placed over my cyanotype prepared paper. cheers, Kim 🙂
HOW CAN I PRINT TEXT USING CYANOTYPE ?
Hi Sarah, you can print or write onto transparency film, tracing paper or drafting film. If you write or print black text on a transparent film it will create white text with blue background. Print that as a negative on a computer, so black background and transparent text, you will create blue text with a white background. Does that make sense?
cheers, Kim
Thanks for all the info. I have a project Im working on where I need to expose my subject at a remote location. If I expose there, and then stick my cyanotype back into the black bag until I get back to my studio to wash it, will the exposure continue to degrade during transportiaiton?
Hi Brent, as long as you make sure to keep the bag light-proof and squeeze out excess air from it it should work. I’ve not done this – but do have an artist friend who does, and he has success with it. He travels with pre-prepared papers, exposes them, stores them, then does the washout one he is home again. The cyanotype chemical continues to oxidise after the wash out, I’ve not experimented to see how long you can leave it, exposed, before the washout, without any effect on the whites. I would recommend a few tests to satisfy yourself that you’ll get the results you want. cheers, Kim
Lovely work Kim! I am wondering if you have ever tried using cyanotype chemicals as a paint. I think it would produce some interesting effects if one could devise a thickener to prevent it spreading once applied to fabric, thus preserving fairly clear lines. Using a resist is an alternative way, but painting a thickened solution directly on fabric would be simpler.
Hi Linda, I’ve not tried it but love the idea of it. I’m not sure if it would mix with a medium or not. I might have to put some thought into that as an idea to play with. cheers, Kim 🙂
Hi Kim, love Your work!!!I tried for a while now with cyanotype inside the eggs shells but still can not achive the results that i am looking for…i work with negatives. My question is how do You prepare Your shells,are they completle free of membranes and do You use any kind of base before applaing the chemicals? It will mean a world to me if You can share this info with me. Thanks a lot!!!
Hi Ilona, thank you for reading 🙂 I don’t do anything special to the eggshell, so no special base coating or anything. I leave the membrane inside the shell – I have found that I get a much better result with them membrane than without. I also leave the shells for a lot longer exposure time than my papers. As for negatives – I have only worked with feathers and plant materials. I imagine it would be tricky getting a good contact of the negative to the shell – this may cause problems re the sharpness of your image. It took my quite a lot of ‘play’ to get consistent results – but I did keep it as simple as possible. I hope that helps???? cheers, Kim 🙂
Hello. We mixed and painted paper last night in a dark room. The paper is dry this morning but already dark blue! What has gone wrong?
Hi Claire, I have had this happen a few times. It could be the result of one of a few different factors – contaminated chemistry or the paper itself. I have also had it as coated paper ages before using it, which I think is as result of the chemistry oxidising on the paper. Was your mixed chemistry fresh?
Re- trying to do cyanotype on non-cooperative substrates, has anyone tried using a white primer?
I’m interested in the possibility of doing cyanotype on 3d objects. I do NOT want to wrap the object in the image; I want it to look projected onto the object, so that the exposed surface of the object will have the print on it legible from the same point of view as the light came from, but the image will look stretched as it extends down the sides of the image, and the unexposed back of the object would remain white.
Since it might be hard to find the 3D shapes I’d like with the right kind of absorbency to take the coating and not wash out, I’m thinking a primer might solve the problem?
I meant to write, “but the image will look stretched as it extends down the sides of the OBJECT…”
Hi Carolyn, your projects sounds very exciting !! I’ve not worked with any primer media and cyanotype. I hope someone can offer some advice. My only suggestion would be to test a range of primer options to find the one that works best with the results you’re looking for. You want something with absorbancy to hold the chemical through the washout process. cheers, Kim
Hi.
I want to make a cynotyoe of a building. I tried making a negative abd following the process but I could get the building only partly. Why do you think this happened?
Hi Shilpa, I don;t work with film negative so I’m not going to be able to ffer any help I’m sorry. I do know that you need to adjust the contrast of your image before making the negative, but I’ve not played around with it enough to tell people what does and doesn’t work. I would recommend looking for some cyanotype pages, websites or forums there photographers hang out. Even though cyanotyupe is an alternative photographic process, I cyanotype with found objects from a printmaking perspective. I’m sorry Ive not been any help for you. cheers, Kim
Hello Kim,
Thank you for all this information! I’ve looked online, but can’t seem to find any definitive answers: Do you know what environmental impact there is in the rinsing process? I’m interested in making cyanotypes in a natural environment, including the rinsing process and would love some information about how much chemistry is being washed away or safest practices. Any help or thoughts appreciated!
Hi Kevin, the chemicals are relatively non-toxic. I think one of the chemicals is used in the food industry somewhere. I know of a lot of people creating cyanotypes and washing them out in situ on the natural environment but I can’t speak with absolute authority re their environmental impact. My assumption is, in small quantities, it is benign, but I am not an expert. have you looked at the MSDS (Material Safety Data Sheet) for each of the chemicals? I’d download them and maybe contact a local landcare group near you for their opinion. I hope that helps?? cheers, Kim
Great idea about the MSDS information. Thank you, Kim!
Hi Kim,
I’ve just spent a delightful few days experimenting with Cyanotype… I never knew of it before…:)
Wondering if there is any way to halt the exposure process when the images are green and bronze… ?some amazing effects at that time get lost when things follow through to blue. Many thanks
Kate.
Hi Kate, welcome to the wonderful world of cyanotype 🙂 With regard to halting the process – sorry, but no. I take photos of pieces during the exposure and washout stages to capture the gorgeous colours. And I tell students in workshops to do the same. But the process is such that it will always develop through to the blue. You can modify the chemical ratios for different results, but they will still move to a blue once the exposure/development has finished. You can ‘tone’ and bleach cyanotypes to shift them to a limited colour range, but you cant stop the exposure/development process. Keep making blue, cheers, Kim
Hello Kim, I learnt wet cyanotype method which is wonderful and immediate. I have had great success with feathers and plants and did one successful photo negative printed onto acetate film. However every other attempt ends up with a blotchy faded finish where the film negative contacts the wet chemicals. I then tried coating the paper and leaving overnight in the dark (the only place I had was inside the fridge!) then tried the film negative and it was a failure. Another time I stretched cling wrap firmly and evenly over the wet paper and then put the negative on top and then glass and it was an ok image but not very sharp. I see lots of people working with negative film online and assume they all must work with dried paper but I can’t seem to make that work very well and I love the “wet” process so much. Any tips would be awesome – your work is beautiful! Sue from Hobart
Hi Sue, I work almost exclusively with found materials, not negatives. I do a lot of wet cyanotype – and admit that I have always felt cautious about using film negatives/positives with water on the cyanotype papers. Personally, unless you know that any film negative/positive you’re using is water resistant, I wouldn’t recommend it. Re adding cling wrap as a barrier between your wet cyanotype and the negative – you’re not getting a close enough contact of the negative to the paper which is why the image would loose its sharp details. You could try to see if there is a way to apply your negative image to glass, or somehow seal it with something water-resistant, to see if it will hold up through the wet cyanotpe process. I’m sorry I’m not much help. I hope you find some answers. Failing that – keep experimenting!! You never know where it will lead you 🙂
I tried double fired ceramics and colour is very faded….apparently you cant fire ceramics with cyanotype already on it as it releases toxic fumes. What can you paint onto double fired ceramics to make them porous ….will modge podge or gesso work …..or what else .
What paint creates a porous surface.
Must you wash your fabric when using it for cushions or can you leave the image as is to dry?
Hi Marelize, despite the toxic fumes problem, I think trying to fire a ceramic piece with and exposed cyanotype would burn away any printed result. I have seen results of cyanotype on ceramic work, but I’m not sure exactly how they have been able to create the print. My assumption is that it was may be a bisque fired piece and definitely not fired after exposure. I have played with trying to cyanotype-print onto high-fired porcelain, but the porcelain can’t hold the chemical through washout. Shame – because the exposed image was delicious! I am yet to try with some bisque fired pieces. I have seen someone coat glass with a clear gesso and get some great results. Are you able to get some clear gesso to apply to your ceramic pieces and see if that works? But I dont think you will be able to fire it afterwards. As for “Must you wash your fabric when using it for cushions or can you leave the image as is to dry?” – the normal washout process should be all that you need to do. If you need to wash your cushion covers to remove stains, I would recommend hand-wash only. Avoid normal laundry detergents as they will strip the colour from your cyanotype print. And if you find that the blues fade over time, place your fabric in a dark cupboard for a few days and that should restore the beautiful blue colour. I’m not sure if Ive been able to help you or not? I hope so! cheers, Kim
Hello,
Your work is beautiful! I’ve used ready coated sun paper many times. and would now like to try using the chemicals on a range of other materials. Is it possible to print onto metal or is ceramic the most solid I can get?
Thank you!
Hi Elaine, whatever you cyanotype print onto needs to be a porous surface that absorbs the chemical, then holds it during the washout stage. Metal would need to be coated in something that will hold the chemical and withstand the washout. Ive not tried ceramic, but want to – but you may only be able to work with bisque or earthenware fired ceramic. I dont think that high-fired ceramic works will hold the chemical during washout. The most important thing to remember/consider is that the surface you want to capture your cyanotype onto needs to absorb the chemical then hold it through the washout process. Paper, textiles, leather are perfect. I have seen someone work on glass – they did coat the glass with something but I’m not sure what. Good luck Have fun experimenting !! 🙂 cheers, Kim
Hello Kim,
These are beautiful! When you say “Over time the prints will oxidize and the blue will naturally darken.” Is that only until the wash-out process happens? Or will the cyanotype continue darkening after the washout process. Once completed on paper, how do you care for your image? Is it pretty stable if you put the finished product under glass in a low-light area?
Thank you for bringing such joy to us,
Patti
Hi Patti, that ‘oxidize’ comment relates to AFTER the washout. The blues will darken naturally. You will get a whole range of grey-blue-purples pre-washout, but those colours will disappear during the washout stage, sadly never to be seen again. They are very stable after washout. I don’t have any of mine behind glass, but I know people who do. It is possible they may fade a litte with in/direct light, BUT if you put them in a dark cupboard for a few days, the deep blue is supposed to restore itself. I’ve not done that, but have read about a lot of people who have. Personally, I feel very confident about the stability of the colour – the chemical has penetrated the fibres, its not just sitting on the surface. I have cyanotype on silk and cotton fabric and not noticed any fading (they’re a few years old now). I hope that helps??? Go forth and print 🙂 cheers, Kim
Hi! I love your work! How do you get more of a turquoise tint with this process? Thanks!😊
Hi Shannon, the process on its own only lends itself to the deep prussian blues. Over time the prints will oxidize and the blue will naturally darken. That is the chemical nature of the process. You can tone and tint your cyanotypes, where added chemicals and tannins can shift the folours, but it is still a limited colour palette. You can also bleach your cyanotype – where you wash out the blues, but leave the image, then add colour back to the print by immersing it in a tannin bath (eg tannin from tea). That may be worth investigating – to see if there are any online resources looking at toning and staining cyanotype prints toward specific colours. YOU CAN get soft greens when you start to add water to the exposure process – creating wet cyanotypes. That is very unpredictable, and the water works to dilute the chemical, giving different tones of colour. Jill Welham from Mirrored Image achieves some beautiful tones in her wet cyanotype prints. I hope that helps a little?? cheers, Kim 🙂
Hi Kim,
Just found this website. Love your beautiful work. I have recently begun to experiment with cyanotype on paper using pressed flowers, leaves, etc. I also cut out a bunny shape on fairly transparent paper and it worked nicely. I saw a video the other day where a man who did paper sun prints rubbed wax on the paintings once they were done before matting and framing them, perhaps to secure the colors? Do you know of or use wax to finish your images? I’d like to find out what he used and how it works. Meanwhile, I’m having fun with this sun art. Thank you.
Hi Lindsay, so happy you found my site 🙂 I’m not sure what you mean by “who did paper sun prints rubbed wax on the paintings once they were done”. They cyanotype itself is permanent, once it has been through he washout process. There are soooo many things you can add and to do a cyanotype print to embellish it – may be was adding the wax as am embellishment? Or to seal the print/paper to protect it without having to frame it behind glass? I’m not sure. If you can find the link and send it through I’ll have a look and let you know what I can see there. cheers, Kim
I am sure you have seen encaustic artworks. https://en.wikipedia.org/wiki/Encaustic_painting
Maybe even Thomas Dodd (b. 1961)
Are you able to advise where these chemicals can be purchased? thanks so much.
Hello again 🙂 You can buy ready-made solution from Gold Street Studios. If you want to do a lot of cyanotype I recommend buying the raw chemicals in bulk. I buy mine from Vanbar.
I have just discovered this process and you! Thank you so much for this detailed description of the process. So fascinating! It has given me enough to be excited and itching to get started. I would love to do a workshop, but I see you are in Queensland and I am in WA. I will just have to plan my travel itinerary around it when we eventually are able to travel again. Take care and thanks again!
Hi Jill, yay for new discoveries 🙂 so excited you have found a new process to explore. I just had a quick look at your blog. You have some gorgeous image there! I would love to see what you create with your cyanotype work 🙂
Hello Kim, I am new to Cyanotype. Have tried a few and sometimes I love the coloring before it is rinsed. Is there anyway I can maintain this color?
Also I found some stretched canvases and I have gesso. Would cyanotype work if I apply the chemicals to the dried gesso?
Thanks so much. You are truly an inspiration…be safe. arlene
Hi Arlene, I know what you mean about the colours that appear just before your rinse the cyanotype. They are beautiful! And no, there is no way to maintain that colour. You could photograph it, which I have done, but the nature of the process goes through that blue/purple stage, then washes out to the typical cyanotype blue. Re your question about gesso … I’m not a painter and haven’t used gesso much. If the gesso absorbs the cyanotype solution and doesn’t wash out in the rinse phase, than definitely it will work. I would suggest doing a test on a small piece of gessoe-ed canvas and see how the solution holds during the washout phase. If you get it to work I would love to know! And love to see photos 🙂
Enjoyed your article. I haven’t made any prints yet but. I am waiting for my chemicals to come in. I want to try printing on hand made paper. I think I would like being able to produce everything part of the print.
Hi Tommy, cyanotype would look beautiful on hand made paper. The only thing to be mindful of is how well the paper will hold up during the washout. Handmade papers generally have short fibres so may tear or fall apart in the water. Give it a go as you might with any other paper to see how it holds up. It might help to back the paper on to some acetate or something to help hold it together during washout. I’d love to see what you create. Please share 🙂
Is there a way to draw an image on some kind of acetate or plastic (with sharpies?) and place that on top of treated paper? I’d like to do this with 6th grade students!
Hi Gretchen, yes, absolutely! You can buy acetate film the will take ink and sharpie drawings beautifully, but it can be expensive for a pack of 20 sheets. Your school may be able to get hold of it form school suppliers. But have a go drawing onto some cheaper acetate sheets. If it holds – all you have to do is place the acetate over the cyanotype solution coated paper, make sure the acetate has good contact with the paper (so no light gets in between the drawn lines and the paper itself), then expose. This is a perfect project to do with students to introduce them to playing with cyanotype 🙂
Hello,
Do you have any tips on how to keep the paper flat – like a nice “photo-print”. After washing it in water after exposure?
Hi Rafa, I like to dry my prints between layers of towel or newsprint. That helps keep them flat. Otherwise I will iron them, ironing the back side of the print. I also find, that once dried, and when I store them in folders, they flatten naturally then too. I store my work in large folders with plastic sleeves – there is a fair amount of weight in them so that helps flatten them out too. I hope that helps. cheers, Kim
In your feathered images with the circles, did you do that with oil pastel, wax, liquid latex or something? Really great read – thanks.
Hi Courtenay, I love working with lace papers with my cyanotype. The circles on that print are made with a lace paper that I then placed feathers on top of. I buy the papers from an art store. The lace papers are delicate and prettier than paper doillies.
Thank you for this information . I have had success with cyanotype on paper but am attempting to print a silk scarf . it is difficult to dry a long piece of fabric so I laid the printing material(feathers) on the wet surface and left it . Being winter it was still damp when I removed the feathers but the silk had changed colour significantly. I thought this would be enough . on rinsing the fabric I was left with a delicate shade of the palest blue and only a hint of the prin!. Question does the surface have to be dry initially to take the print? thank you so much best wishes anne
Hi Anne, I don’t have too much experience with cyanotype on fabric – yet! I suspect that maybe there is a coating or something on the silk that is stopping the fibre from absorbing the chemical. I did some cyanotype on unglazed porcelain a while ago – the colours changes went to plan during the exposure, but washed out almost completely at the washout stage. I put that down to the fact that the porous porcelain held the chemical, but didn’t absorb it, therefore if was washout out very easily. Did that make sense? I find the same on egg shells. Its tricky to get the timing of exposure and washout right so that you don’t lose all of the blue. And I have found that the egg shells fade over a series of weeks too.
Being wet to start will dilute the chemical on the fabric – and produce some different and interesting colour results. Try it with dry silk. And/or try washing the silk first, or try some different silks.
I am planning a lot of experimentation through December, so I’ll comment back here when I have some more useful information for you. I’d love for you to share any findings you make in your own workings.
Hi Anne,
you are correct, try drying the silk first in a dark room before exposing the print on to it. You shouldn’t have a problem then getting the sharp image.
Thanks Charlotte. I had a play with cyanotype on silk and cotton in February. yummy! I didn’t pre-wash anything, but I did let the solution dry overnight. I don’t have a cupboard space to dry it in, so I left it outside by moonlight, bought is an packed away once dried, then used it the next day. This link will take you to a Facebook post where I uploaded some cyanotype prints on silk. Some are straight cyanotype, some are wet cyanotype.