

Paper – Part 3: Storing Printmaking Papers (and other information you didn’t know you needed to know)

There are so many different aspects to paper. Beyond identifying what makes printmaking paper printmaking paper, there is storage, preparation, to-stretch-or-not-to-stretch, watermarks, pricing and a million other questions I haven’t even thought about yet.
This article is Part 3 of a 4 part series looking at printmaking paper. The full 4 part series covers:
WHAT MAKES 'PRINTMAKING PAPER' PRINTMAKING PAPER?
MY FAVOURITE PRINTMAKING PAPERS
STORING YOUR PRINTMAKING PAPERS
(and other information you didn’t know you needed to know) – where you are right now 🙂
- Storing your Printmaking Papers
- What is a Watermark?
- What is Buffering?
- Do I need to Stretch my Printmaking Papers?
- Soaking and Blotting Printmaking Papers for Intaglio printing
- Where is Printmaking Papers made?
- Why is Printmaking Paper so expensive?
Paper Part 3 – Storing your Printmaking Paper
(and other information you didn’t know you needed to know)
Storing your Printmaking Papers
Once you have invested in buying your Printmaking Papers – you need to be able to store it.
Printmaking paper generally comes in individual sheets, and these sheets are generally large.
Most of the papers I work with are 56cm x 76cm (22″ x 30″) sheets. And I try to buy 10-100 sheets of any one paper at a time, taking advantage of bulk buying price savings. With that comes a real storage concern.
I think the key considerations for storing paper are to:
- Keep it flat;
- Keep it dry; and
- Keep it away from pests.
I used to store my papers in the plastic sleeves they came in, nested inside large shallow cardboard boxes under my bed. I got quite resourceful hunting down the paper sheet sized plastic sleeves and boxes. The plastic sleeves used for framer’s matt board can be very helpful – ask you local framer for some when they throw their next batch of plastic sleeves away.
Storing the paper on the floor wasn’t ideal, but at the time it was my best and only option. The cardboard boxes worked to keep the papers secure and flat, and the plastic keeps it protected from dust and moisture. I also threw in a handful of silica gel desiccant sachets to help eliminate moisture. I live in a sub-tropical climate, so moisture can be a real problem that I need to be mindful of.
You can buy silica gel desiccant sachets online, in bulk. I also collect them when I find them in shoe boxes and other packaging.
Warm damp conditions often invite pests. Paper invites pests! Silverfish are pests, and Silverfish loooooove paper! I have the studio pest-sprayed every 12 months to keep on top of those tiny, soft, scaly silver-coloured critters.
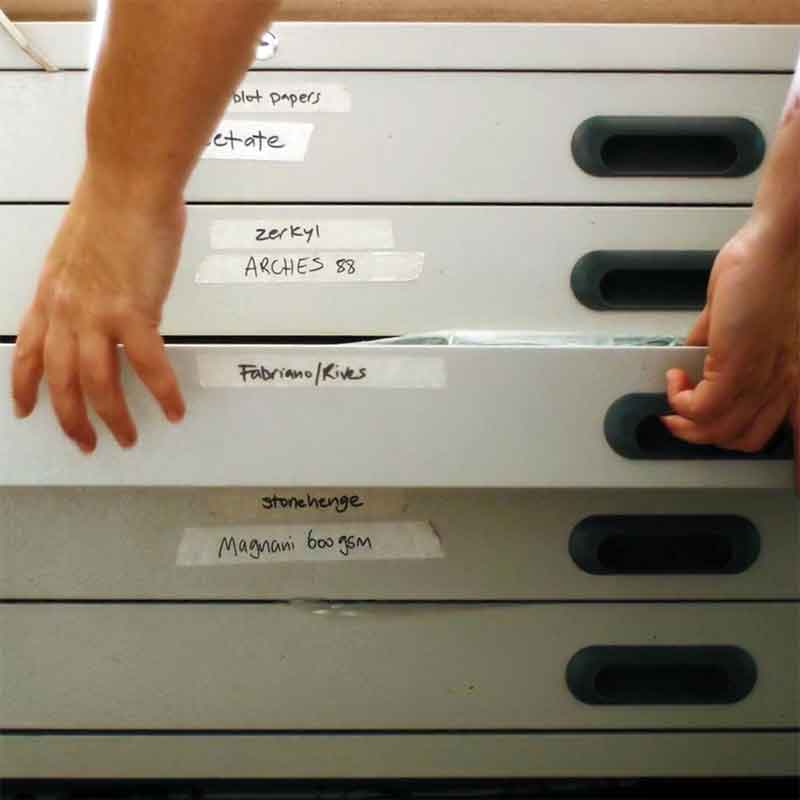
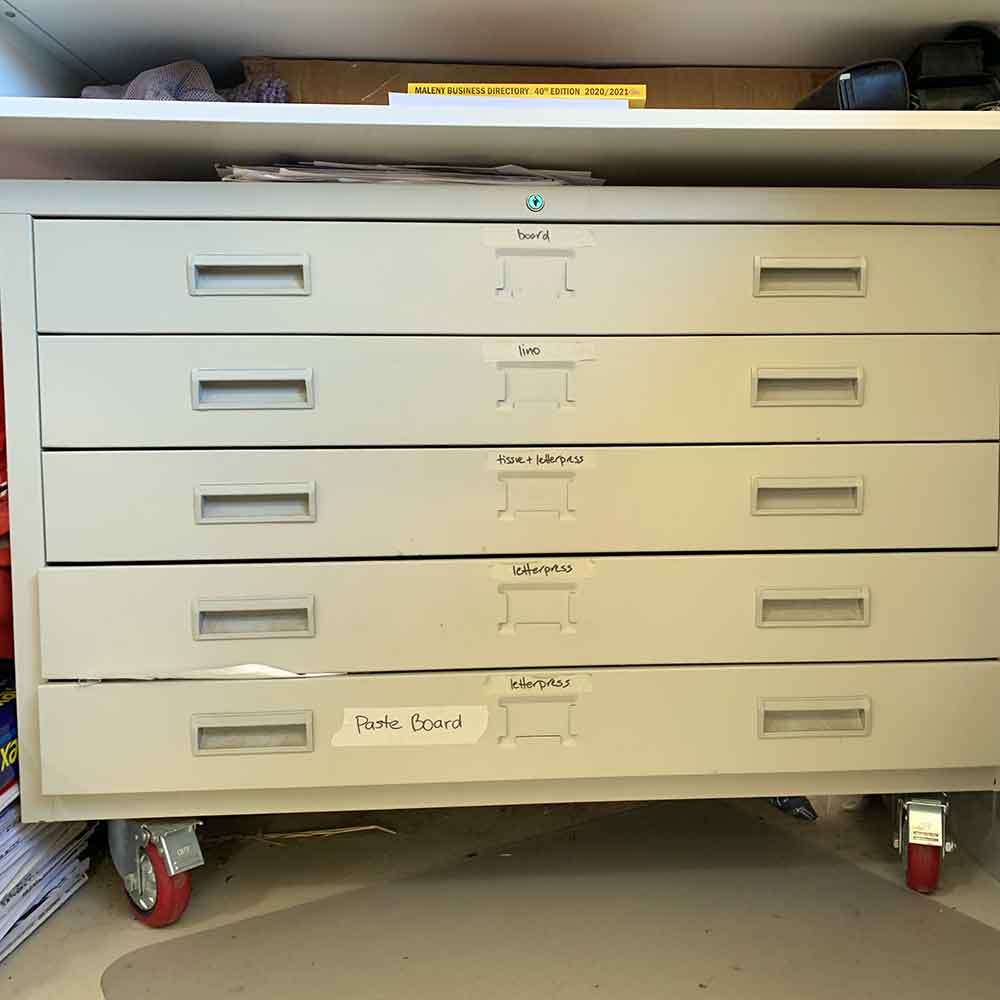
Over time I collected and bought several purpose-built paper storage drawers – also known as Map Drawers and Plan Drawers. The digital revolution has done away with the need for these drawers at many office sites, making them very hard to find second-hand, and costly to buy new.
I found my first wooden drawer set online at a second hand store in Adelaide (a long way from where I live). The others I bought from an office storage company in Sydney (again, a long way from where I live) – Multifile Plan Storage. I love them! I have 4 sets of drawers – and I would love another few sets, I just don’t have the space for them. There’s no such thing as “too much paper storage” 🙂
I still keep my papers in the plastic sleeves or paper packaging them come in. It works to add a protective wrapping around the paper, keep out moisture and makes it easy to identify and handle in the drawers. If there isn’t any labeling on the sleeve the paper is in – LABEL IT!


I was never a fan of placing labels on drawers, cupboards or canisters – but boy it makes life easier! I’ve labelled my paper drawers so I know which papers are where. Plus the labels work to remind me of the papers I have on hand if I’m looking to work with something a little different to my regular paper choices.
It is very frustrating to pull out paper but not know what it is. Generally watermarks will help identify the papers, but some paper won’t have a watermark, or you can’t find reference to that watermark anywhere.
I know that not everyone has access to purpose-built drawers – so look for somewhere in your studio or house where you can keep your papers flat in as dry an environment as you have access to.
I had a shelf added under the benchtop in my studio. It works as additional paper storage, where I keep the papers in their plastic sleeves inside cardboard boxes, labelled and waiting to be printed on.
It looks messy, but there is order in that chaos!
What is a Paper Watermark?
I love paper watermarks. To me they feel like secret messages tucked away in the corner of a sheet of paper.
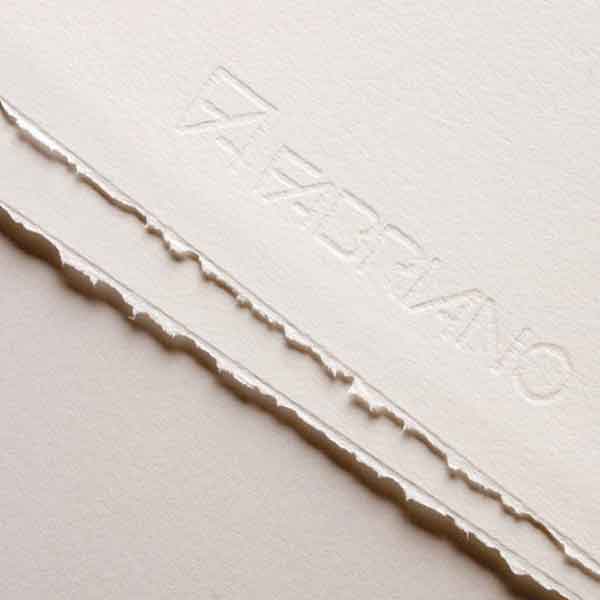
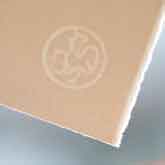
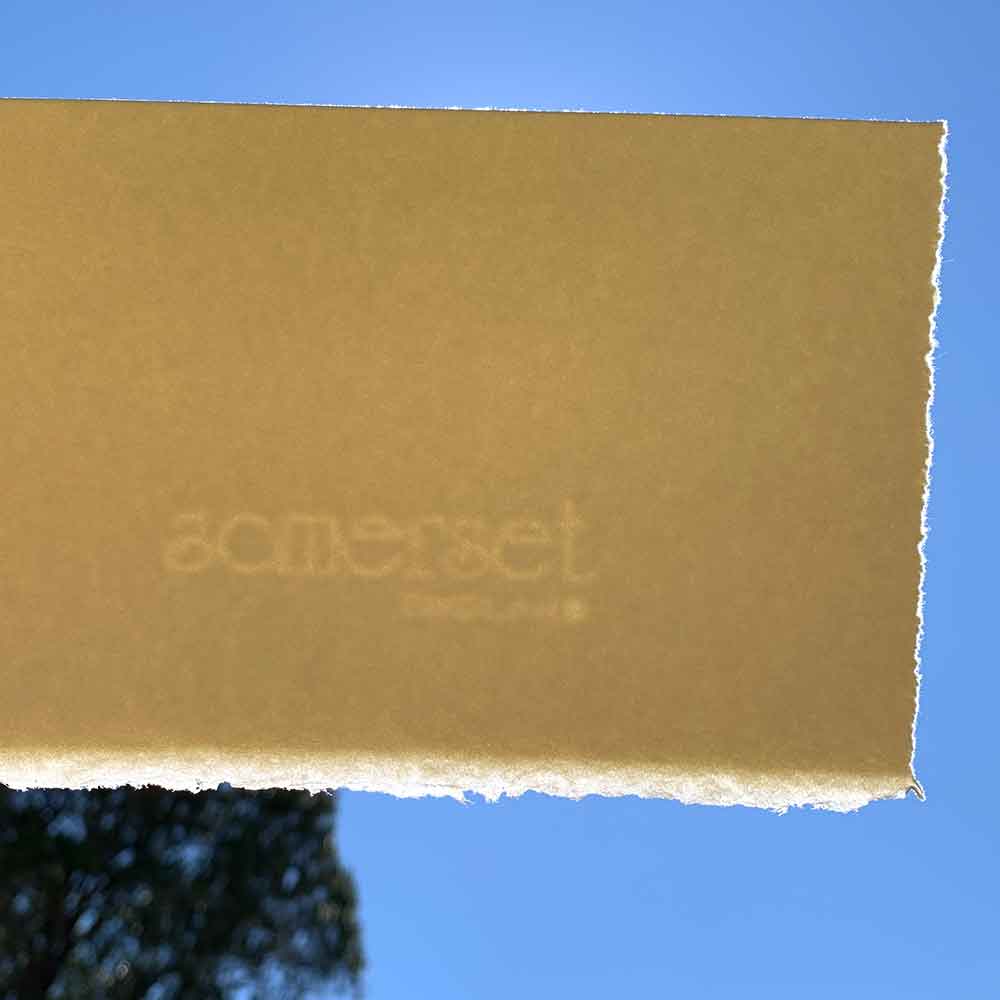
A watermark is a small design, logo or text produced by creating a variation in the thickness of paper fibre in a sheet of paper while it is being made – like a stamp into the paper. Watermarks are often used to identify the manufacturer and/or the quality of paper. They work to articulate authenticity.
If you hold the paper up to the light you will be able to see the watermark text or symbol.
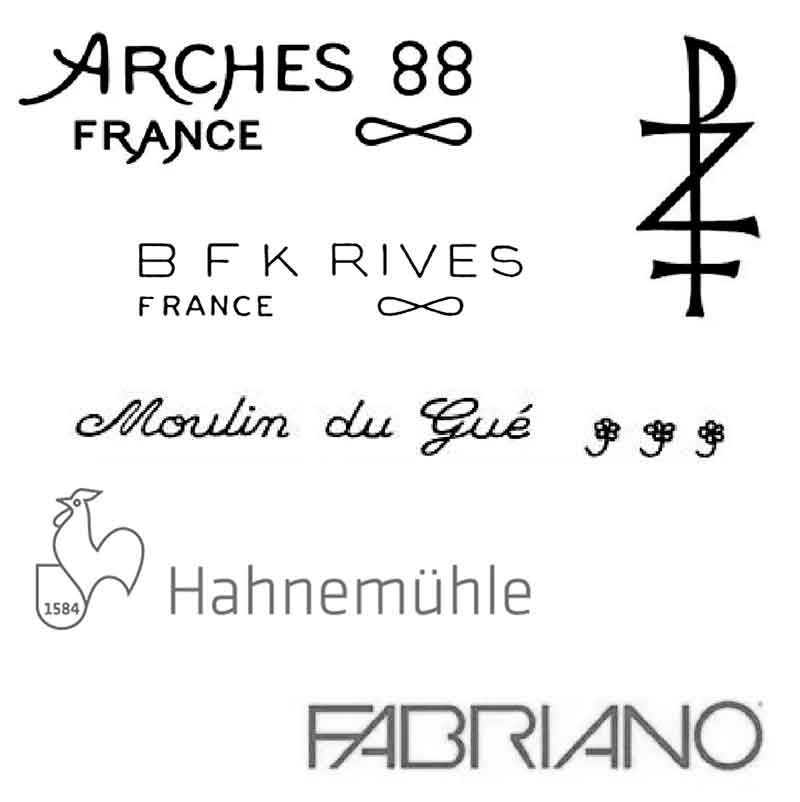
Watermarks can be very useful if you haven’t made a note of the name of a paper you want to print with (not as silly as it sounds as you build your collection of printaking papers!). The watermark may be the name or symbol of the paper mill and can help identify the paper. I didn’t name the packaging I stored my Hahnemuhle paper in, so I had no idea what the paper was. I could see a rooster watermark symbol, I Googled that and viola! I knew what I was printing with.
A watermark can (but not always) also work to tell you the right side of the paper. If the watermark reads one way and not the other, then you’re probably looking at the right side of the paper.


To keep or trim/tear away the watermark?
I love to buy mould made printmaking paper sheets. I love their deckled edges and watermarks. I trim/tear my paper to size out of the big paper sheets – and this leads to two questions:
- Do I leave the watermark showing on the paper I’m printing onto? or
- Do I trim/tear the watermarked area of the paper away?
I’m going to be honest – I don’t know. There may be an ‘official’ rule around this, but I am not sure.
If I am printing with a full sheet of paper, I will obviously leave the watermark in place on the paper, making sure that the watermark is reading the right way (not reversed) and does not impede on the print.
And sometimes, when trimming smaller sheets from one big sheet, the watermark will show on one smaller sheet. If I think that the watermark is going to cause issues with the printed result, or presentation of it, then I will plan how I trim my papers from the bigger sheet, working to get the maximum number of smaller sheets while avoiding the watermarked corner.
It needs to be noted that a right-facing watermark doesn’t not always indicate the best printing side of the paper.
I think the answer to this is very much about personal preference. What do you think?
What is a Buffering?
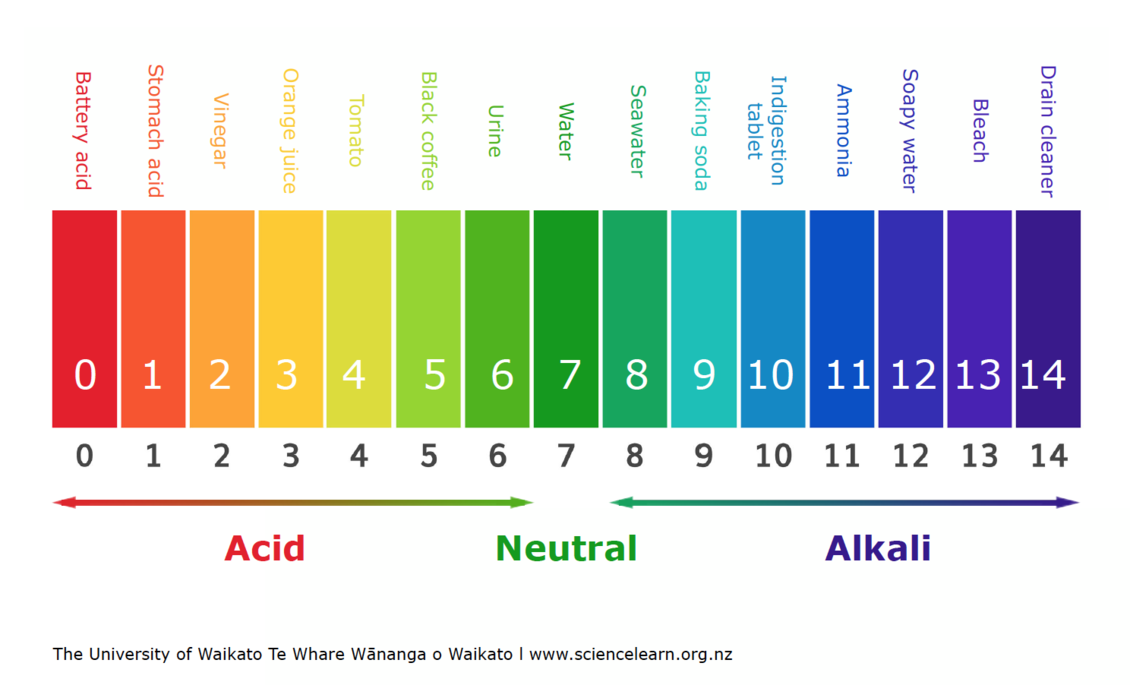
You may see the term ‘buffer’ or ‘buffering’ in some paper descriptions. ‘Buffering’ refers to the addition of a ‘buffering agent’ to paper to raise the pH level to the alkaline side of the pH scale (7.5 > 14). Calcium carbonate (chalk) is one buffering agent added to the paper manufacturing process.
The addition of a buffering agent works to make a paper non-acidic and archival.
In the context of acid-free fine art papers, ‘unbuffered’ paper relates to papers made with archival and acid-free ingredients and processes during manufacture. Cotton papers, made with ‘rag’ and cotton linters, are unbuffered acid-free archival quality papers.
The environment your paper is stored in can affect the acid content of your paper. In buffered paper, the buffering agent can work to also neutralise acids in the environment (boxes, shelving, other papers) that may make any paper acidic over a period of exposure and time.
In the context of papers I use in my own printmaking practice, when looking for papers to work with for cyanotype, I aim to cyanotype-print with unbuffered papers.
Do I need to Stretch Printmaking Paper?
As a general rule – No.
It is, however, important to stretch Watercolour Paper. Why? If you intend to use a lot of water in your watercolour painting, not stretching your paper before you start painting can lead to cockling. Cockling is where a sheet of paper wrinkles and forms hill and valleys that are almost impossible to remove and make it hard to control the paint on the paper surface. Jackson’s have written an article about stretching watercolour paper for a better painting experience.
If you are printing intaglio (eg etching or drypoint print), you will pre-soak your paper before printing. Assuming you are using a Printmaking Paper designed for intaglio printing, the paper’s sizing, dimensional stability and weight will work to maintain the integrity of the paper through soaking and printing.
If you are printing a relief print (eg linocut or woodblock) you do not need to soak you paper as, due the nature of the process, it should hold its dimensional stability without a problem.
However – I have had reduction linocut prints cockle months after printing and I can not for the life of me work out why. They were flat when the print was finished and editioned, but once framed, they developed a distinct wave. It has happened a few times; never a full edition but rather 1 maybe 2 prints from an edition. People have suggested I stretch my paper before printing, but stretching is not something that should need to be done with printmaking papers. This is still a unsolved mystery as to why the paper has cockled. And a frustrating mystery at that!
Another However – if you are hand colouring a relief print, you may want to consider what paint/pigment you will use to colour your print. If you are colouring with watercolour paint, then consider how much of the paper you are covering with the watercolour paint. You may want to test to see if the watercolour paint causes issues with your paper. I have seen articles online about people stretching paper for linocut when they plan to handcolour with watercolour paint. What I have not been able to verify is if the paper they are using is Printmaking or Watercolour paper.
Soaking and Blotting Printmaking Papers for Intaglio printing
If you are printing intaglio, YES, you will need to soak your paper before printing (most of the time*).
If you are printing relief (eg lino or woodblock), NO you don’t need to soak your paper (with the exception of Mokuhanga ).
SOAKING then blotting your printmaking papers will dampen and soften the fibres. This makes the fibres pliable, helping them pick up ink from the etched/incised lines on your intaglio plate when pressed through the rollers of your etching press. If you tried to print the same intaglio plate on dry paper through your etching press, you will see that the paper will not take up much or any of the ink from the incised lines of the plate.
BLOTTING your soaked papers is important to remove excess water from the paper before printing. Too much water on the paper will spoil the printed results.
The trick is finding the sweet spot between soaking/dampening and blotting your papers:
- soaking your paper for too long can lead to ink bleeding and undesirable printed results
- not soaking long enough and the fibres will be too dry to pick up the inks
If you do soak your papers for too long, leave them to dry between interleaved blotting sheets or towels to draw out the excess moisture.
How to Soak your Printmaking Paper
You can buy purpose-designed trays for soaking your printmaking papers. I found them hard to source and was able to get hold of two large dough-rising trays (used in a bakery). They are perfect – deep enough to hold a few centimeters of water so I can fully immerse my paper, and dimensionally big enough to allow me to soak large-ish sheets of paper. Photography trays would work too. Any vessel that will hold water and (ideally) keep your paper flat will do the job.
The other way to dampen your paper if to spray with water from a spray bottle. Spray a good saturation on both sides of the paper before blotting.
Soaking time will vary depending on the papers you are printing and the inks used. The idea of soaking is to saturate the paper’s fibres. Heavier weight papers may need a little longer in the soak. Generally I would leave my papers to soak for 30 minutes. Some papers can handle being left in a water bath overnight.
I am currently printing my intaglio prints with Charbonnel Aqua Wash Etching Inks. I dampen my paper, but not nearly as much as for other etching inks I have used – the inks don’t need heavy fibre saturation. If I soak my papers for too long a time, I find that the ink bleeds.
Instead, I spray my paper with water from a spray bottle, spraying a heavy soaking on both sides of the paper. I then leave the paper to sit between cotton bath towels (I have bath towels set aside for this purpose – so they are clean and fluffy) to absorb excess water. If I leave the paper too long and it dries too much, I spray again. I did previously use purpose-designed blotting paper but found them expensive and hard to source. The towels work a treat!
How to Blot my soaked/dampened Papers
If soaking your papers in a tray of water:
- Lift the paper from the tray and let the excess water drain off the paper in to the tub;
- Place the paper on a sheet of blotting paper;
- Place another sheet of blotting paper on top;
- Gently press and rub over the top blotting sheet – this action will help the blotting paper absorb excess moisture from the soaked printmaking paper.
As I noted above, because of the etching inks I am using, I spray water on my printmaking papers to damped them, then blot between cotton bath towels. I use the cotton towels the same way as the blotting papers – place the damp paper between two towels and gently press.
*I have printed some intaglio work where I included chine-collé papers. I found that the lightly glued chine-collé paper did the work of soaked paper, so I didn’t need to soak the actual paper I was printing with. It needs to be noted that the chine-collé paper covered the entire print area.
Where is Printmaking Papers made?
Paper is generally made in ‘paper mills’. There are paper mills across the world. Generally, a paper mill with specialise in one, or maybe two, types of paper.
I found this link in Wikipedia that listed the paper mills around the world – en.wikipedia.org/wiki/List_of_paper_mills
I also listed which country the papers I use in my own studio are made.
I have not been able to confirm is there are specialised Printmaking Papers made in Australia. My thinking is that there are not, which is a real shame!
I have listed a few countries below and the papers made in each. It really looks like a northern hemisphere gig for fine art papers:
- England – Somerset at St Cuthberts Mill
- France – Arches
- Germany – Hahnemuhle
- Italy – Fabriano
- Japan – Awagami
- USA – Stonehenge
Why is Printmaking Paper so expensive?
Good quality fine art papers are expensive. Printmaking paper, watercolour paper, pastel paper, paper, paper, paper! It seems to get a little more expensive each year. But so does everything!
My motto in life when it comes to buying art supplies is to buy the best quality I can afford at the time. Cost doesn’t guarantee quality, but it is a good indicator. I have noticed some products getting a little cheaper, but at the same time that product’s quality drops. Its frustrating – but I do get it that consumer demands drive prices lower, but business still needs and wants to make a profit – so they cut costs to delivery a cheaper product.
I’ve put together some considerations to remember when it comes to accepting/justifying/contemplating/working with the ongoing increase in pricing of Printmaking Paper.
This factor isn’t restricted just to paper. I think material and operating costs for everything the world over are increasing. The better quality the paper, generally the better quality and more expensive the materials used in making the paper. Demands on the forestry industry to improve environmental standards works to increase the cost of raw material production. Freight costs also work to increase the cost.
Consumer demand of improved environmental standards has added compliance obligations and pressures to paper production. The cost to research, investigate and implement better and more environmentally responsible and sustainable practices needs to be covered. I firmly believe it is unfair to demand high standards from manufacturers without being equally agreeable to helping the business cover the costs – there needs to be a balance.
There are two (or three) parts to the freight cost:
- Delivery of raw materials to the paper mill; and
- Delivery of the paper to the retail outlet; then
- Delivery of the paper to the consumer (if not bought from the retail outlet).
Freight is expensive. Fuel and infrastructure is expensive. As fuel prices rise, so does the cost of freight, and infrastructure and everything else. When it comes to Fine Art papers, I’ve not been able to confirm if there is a paper mill in Australia making it. Most, if not all, Printmaking Paper used in Australia is imported – which means, for us, added freight costs as papers sail their way over the seven seas to get here.
Fine art papers are a niche sector within the paper making industry. Their production volumes are less than commercial papers. And their manufacturing processes are generally more labour intensive than commercial papers.
Overall, that means higher prices for fine art quality papers. Be it Printmaking Papers or others.
Quality cotton fibres and wood pulp, hand sorting, deckled edges, watermarks and strict quality control measures to meet the requirements of the different art techniques the papers are made for call for additional attention, labour and materials that mass produced commercial papers do not require.
That combined with their lower demand (than commercial papers) keep production volumes low.
And that contributes to a high cost-per-sheet of good quality Printmaking Paper when comparing it to commercial papers and cheaper student-grade art papers.
This applies more to commercial paper mills than the fine art paper mills, but it still a reality.
I think every industry experiences this – rising operational costs and changes in consumer demand force businesses to rationalise their sustainability. Paper mills are no exception. The ‘digital revolution’ reduced demand for commercial papers, but perhaps increased the demand for office papers (I think the paperless office is a myth). Mills have been forced to close in the USA and Europe due to changing demands, plus the impact of COVID on both consumer demand and operating costs during shutdowns.
Many fine art paper mills have been in production for decades, if not in excess of 100 years. Here’s hoping they stay that way!
Magnani Paper (Italy) closed its mill in 2015.
Constant changes and fluctuations in international currency exchange rates can have a big impact on the pricing of raw materials and finished goods as they are shipped around the world.
In Australia, we import most or all of our Printmaking and other fine art papers. We are very much at the mercy of exchange rate fluctuations.
A weak domestic currency in any country means that the price paid for imported goods will generally rise; and a stronger domestic currency may reduce the prices of imported to some extent.
Managing, predicting and covering changes in international exchange rates is a challenge for any business dealing with buying imported goods.
Paper Part 3 – the end. But wait, there’s still more!
We’ve covered a fair bit of paper ground. I hope you found something useful and interesting in there. I know I did as I was reading and putting it together.
If you’re ready for more information, or want to read over the earlier articles, head over to the other three articles in this four-part series:
WHAT MAKES 'PRINTMAKING PAPER' PRINTMAKING PAPER?
MY FAVOURITE PRINTMAKING PAPERS
References and Further Reading
Content coming 🙂


Hi Kim,
Thanks for the tips, just started trying to print again and found some of this a reminder from past experience as well as helping to flatten the learning curve.
One thing you mentioned I believe I can answer, but it will be a question of inks on the paper, breathable or not that I couldn’t answer. So you mentioned why does a print later cockle in the frame. I believe this is because the ink acts as a moisture barrier/ glue and therefore as the paper acquires humidity the ink acts as a rigid layer tensioning the paper whilst the fibres in the paper expand due to absorption of the moisture creating a bend. Think movement in a bimetallic strip for example. However the expanded fibres Dont re contract once the humidity reduces. Options to resolve – print on the back of the paper a mono colour of the same type of ink or brush with some thinned pva glue again stabilising paper depending on ink type would be my choice. My latest print was sat on the table drying when I noticed it cupping when we had a rainy day. So guess I’m preparing for the same problem
Hi Richard, that makes total sense. Thank you! I live in an area where the humidity varies greatly throughout the year, and we get months of wet then sometimes months of dry. Thank you for sharing that. All the best with your return to printmaking. Viva la print!! cheers, Kim
What a wonderful resource – thanks so much Kim for your generosity in sharing what has obviously been a mammoth research task. Very much appreciated.
Hi Pauline, You are so very welcome. Thank you so much for reading. I enjoyed my research task. And the more I read the more I realised I didn’t know (which I guess is always the way). cheers, Kim 🙂
Thanks so much Kim for this excellent and very helpful series of articles. Gelli and Eco Printing are my favourite methods. I found print paper in Office Works and am using this on the gelli plate and for printing my collage master boards. The brand is Spilman, “A4 Premium Copy/Laser Paper, acid free archival safe multi-use” – quoting from the label. I like that it’s thin and I can add lots of prints into my Art Journal – I use it in my inkjet printer as well, printing on both sides with a little rest in between the first side to let the ink dry. Having a “no-frill” A4 set of paper to hand has freed me up a lot to experiment and play. Best wishes with your work – I love your blog posts and appreciate the research and detail you generously share. Mairim
Hi Mairim, thanks for that! I’ll definitely check out that paper. Always on the lookout for new papers to try, especially ones that suit different budgets. Thank you so much for reading my post. I’m glad you got something out of it. cheers, Kim 🙂