Make an Infinity Cube
An infinity cube is a fun, endlessly foldable structure made from smaller cubes cleverly hinged together. It’s relatively simple to make and very addictive to play with!
A big thank you to @printedmaterial62 for the idea and motivation to tackle one of these nostalgic toys. I loved playing with them as a kid; they had a sense of magic in them as they endlessly flipped and folded. It took me a little time to find clear and straightforward instructions. Once I did, there was no stopping me!
After a few mockups (and endlessly flipping and folding), I created the cube you see in the video above. From there, I set about crafting my own step-by-step instructions that I hope are even easier to follow. These will guide you through building a “forever-folding” structure and understanding how the hinges work.
I recommend starting with a mockup first – use masking or washi tape to hinge the cubes temporarily. This lets you get a feel for how the cube folds and the hinges function. Once confident, deconstruct and rebuild it with your own decorative papers for a polished, personalised finish.
Have a go, and enjoy the endless satisfaction of creating your own infinity cube. You can follow the instructions in this post or scroll down the page to download a pdf template.
I’d love to hear if you found my instructions helpful.
Materials to Get Started
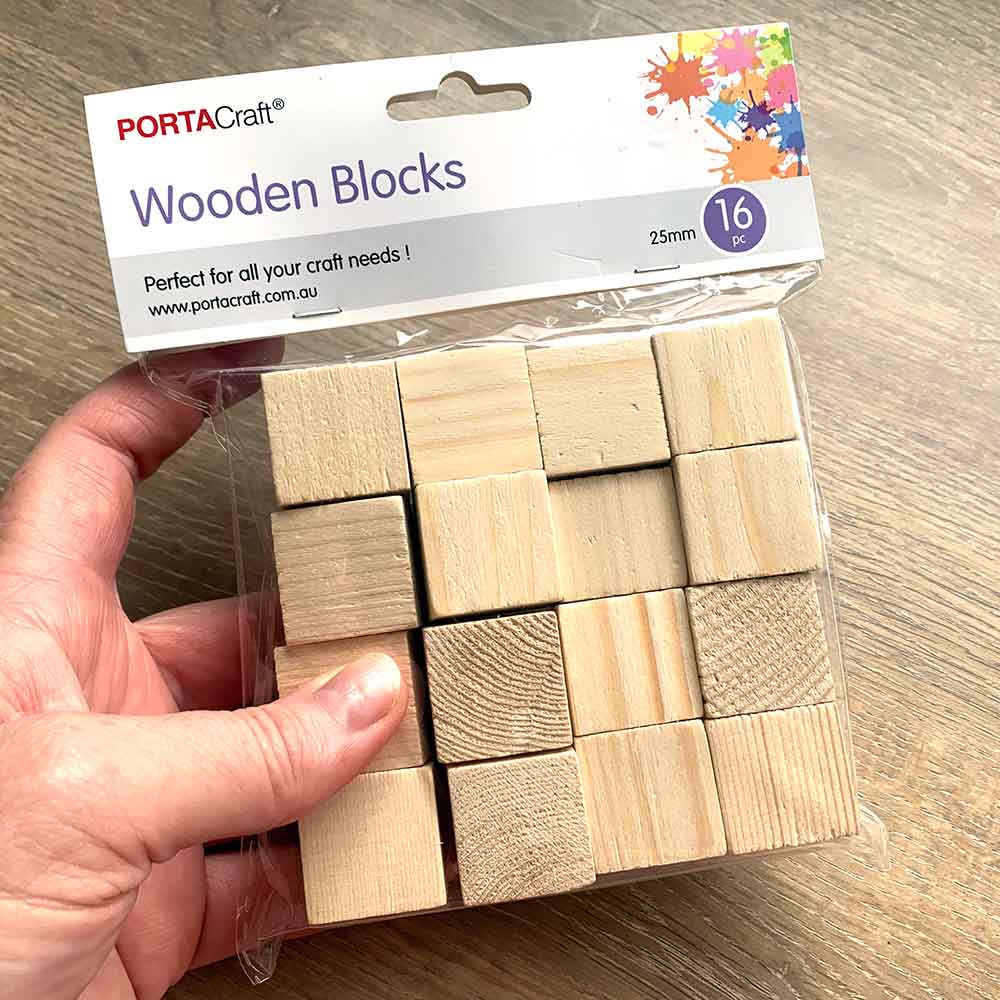
- 8 cubes of equal size (I buy packs of 8 and 16 wooden cubes from a local craft store)
- Masking tape or washi tape (for the mockup)
- Decorative papers (gel plate monoprinted papers and cyanotype prints on light- to medium weight paper work perfectly!)
- Glue to stick the decorative papers to the cubes (I used a PVA glue)
- Scissors or craft knife
Get Started Making
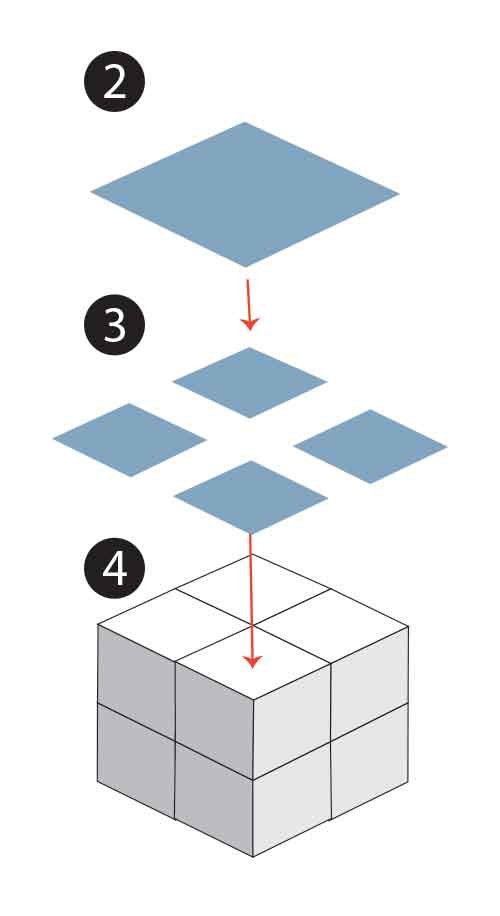
1 – Arrange 8 cubes into 2 rows of 4 cubes.
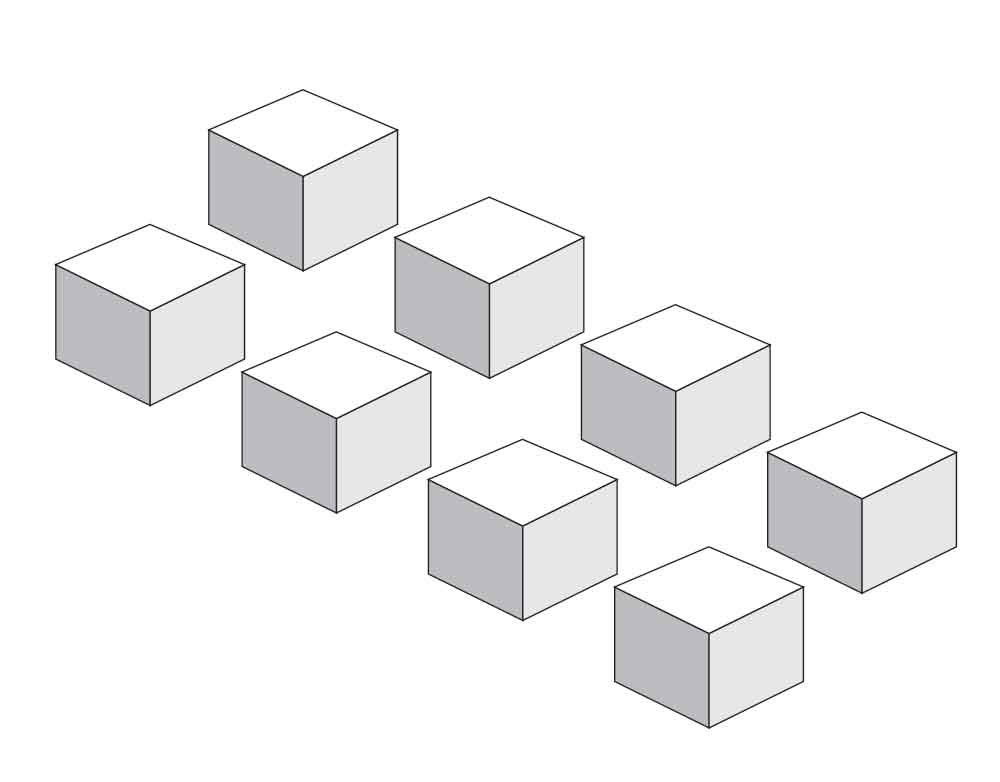
2 – Push pairs of cubes together to create 4 pairs.
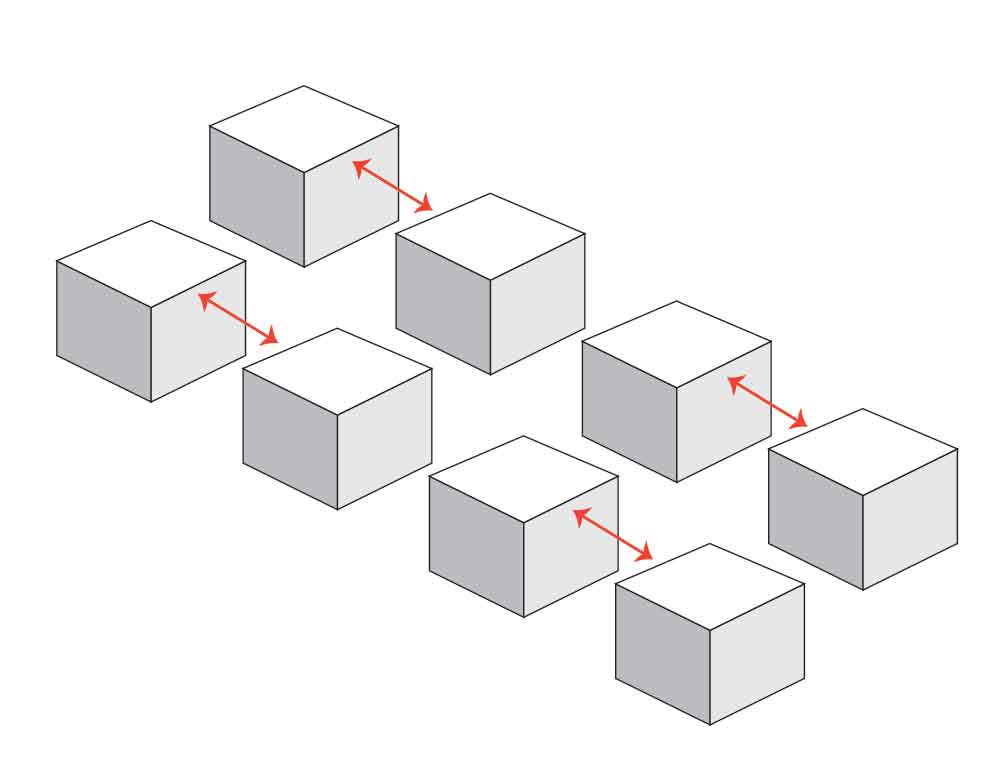
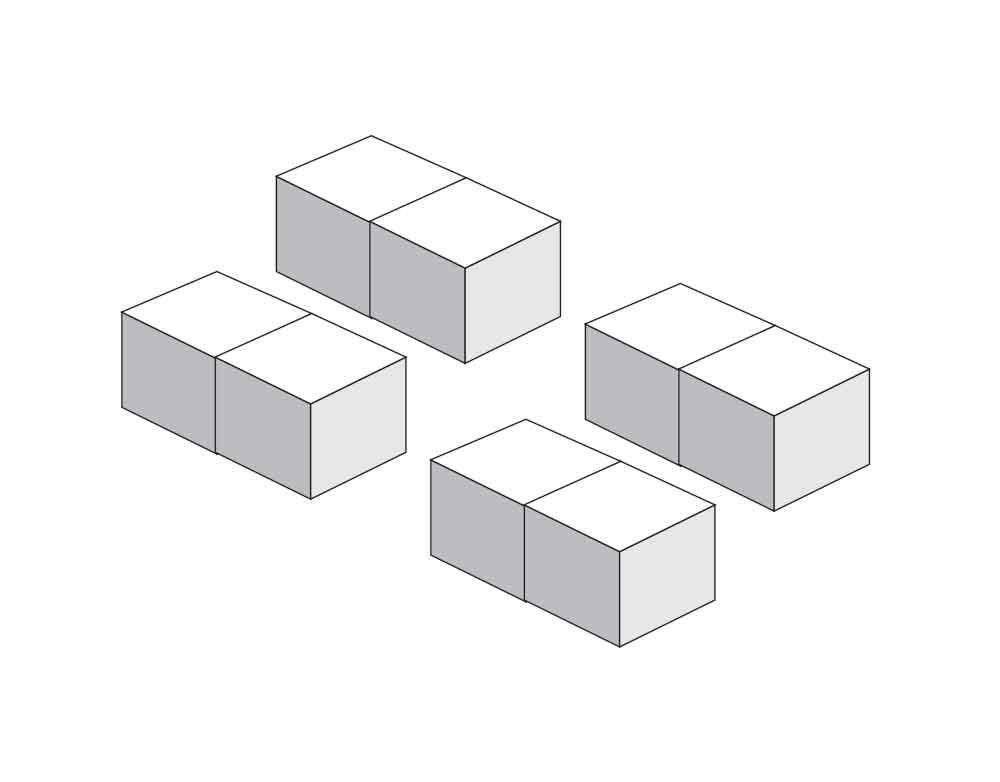
3 – Apply tape across the top of each pair, making sure the tape acts like a hinge between the paired cubes.
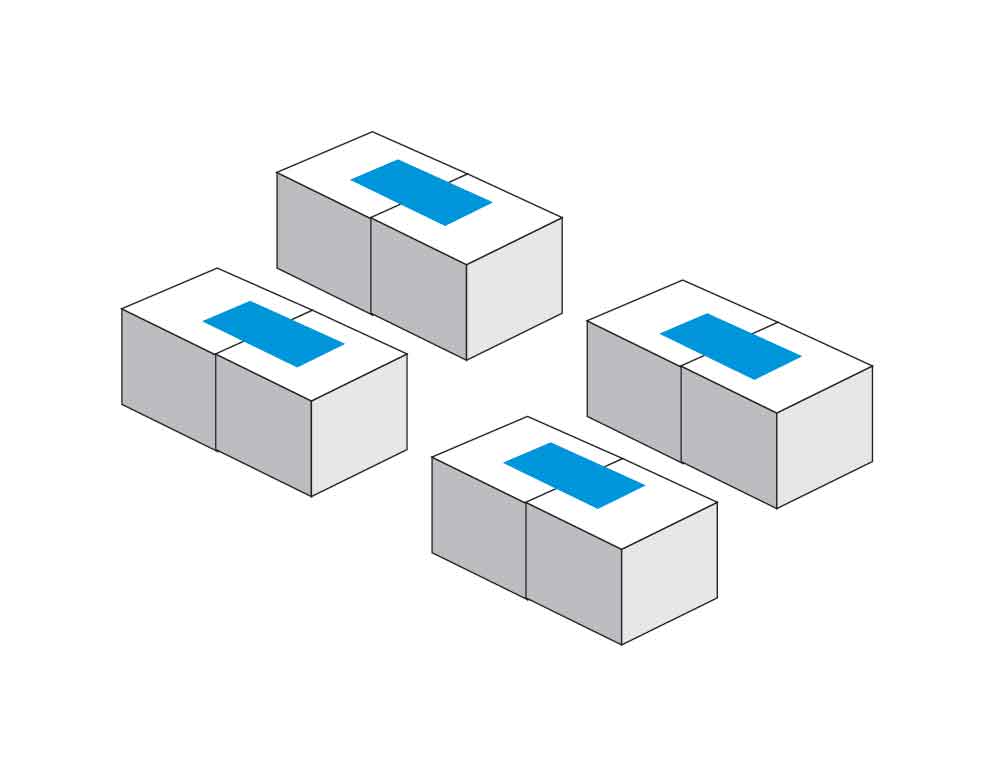
TIP: For a more secure hold, use a piece of tape slightly longer than the paired cubes. This way, the tape wraps across the top and over the edges, ensuring a stronger connection.

4 – Push 2 pairs together to create 2 rows of 4 cubes.
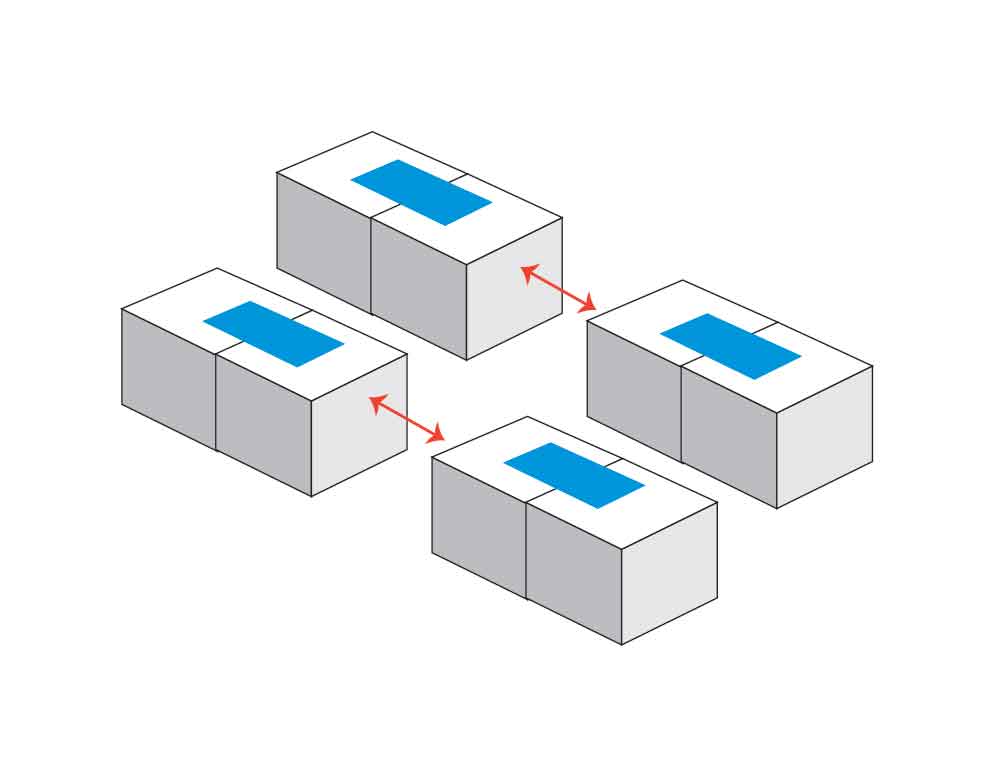
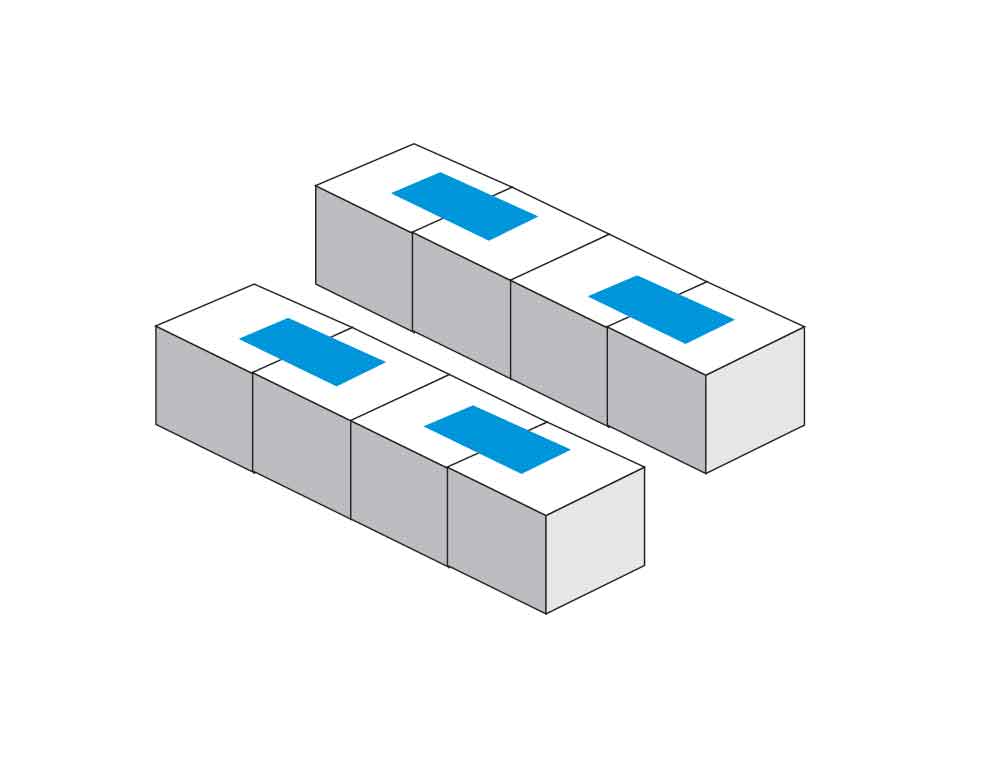
5 – Rotate each row 90° INWARD. The original taped tops of the rows will face each other on the inside of the 2 rows.
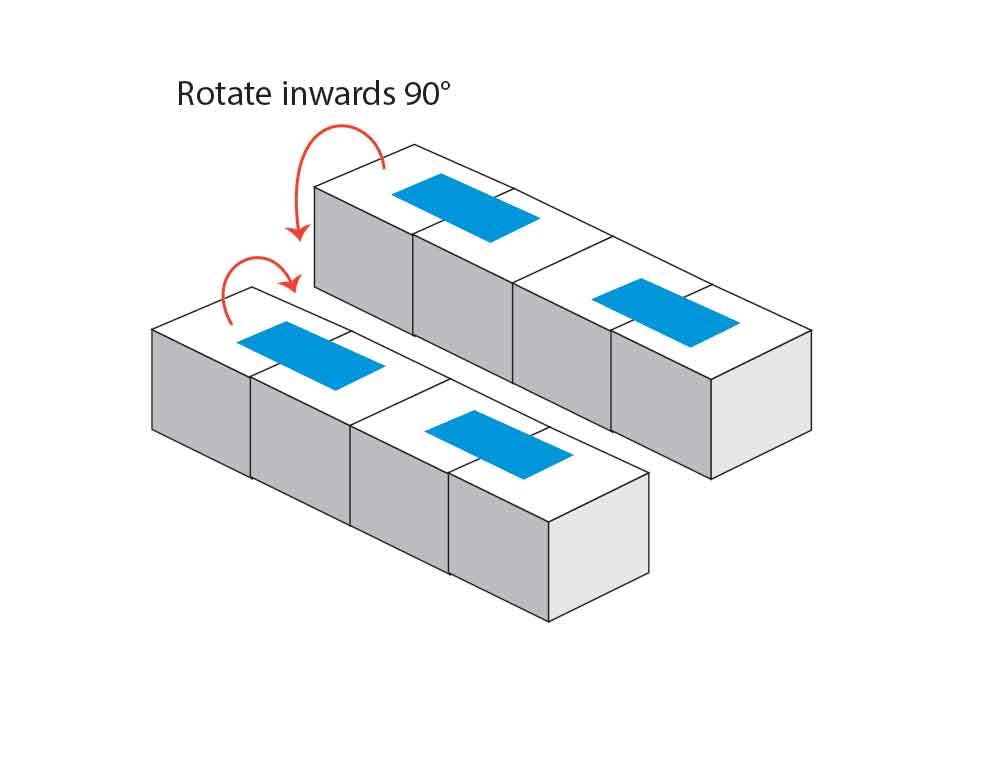
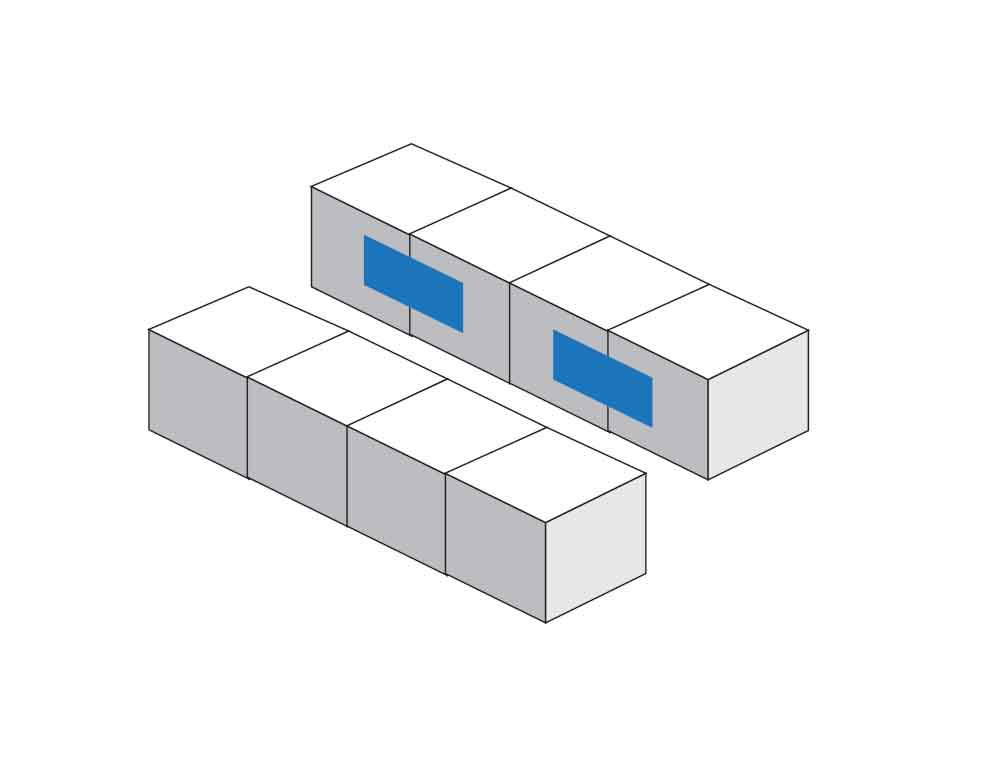
6 – Apply tape across the top of the centre pair in each row, making sure the tape acts like a hinge between the cubes.
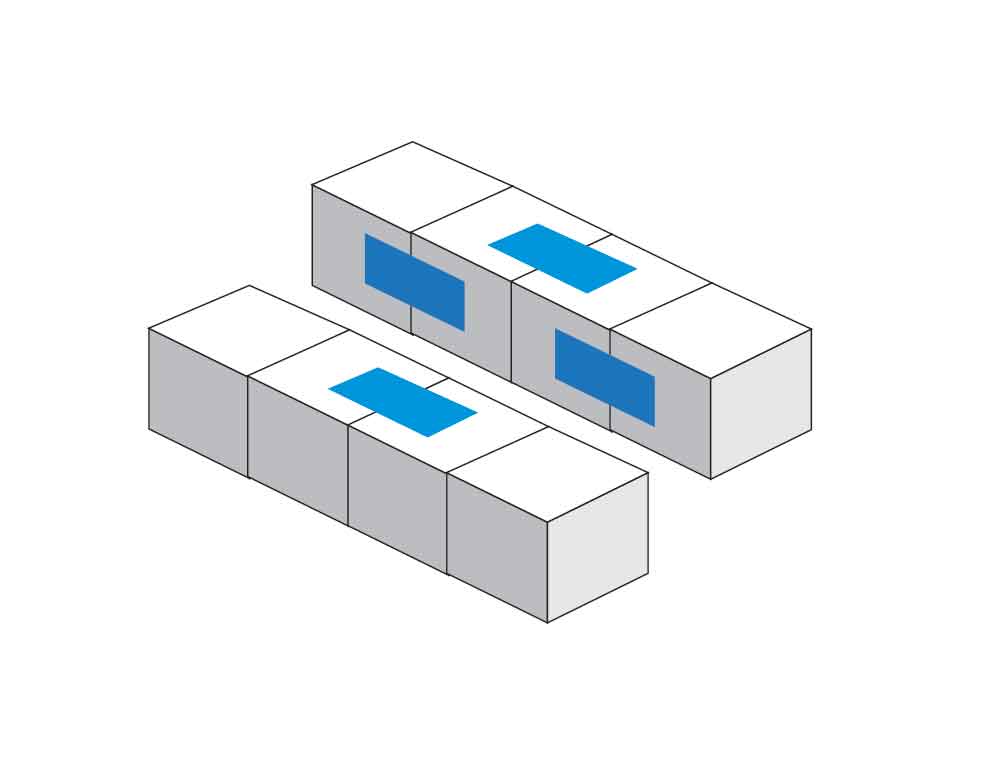
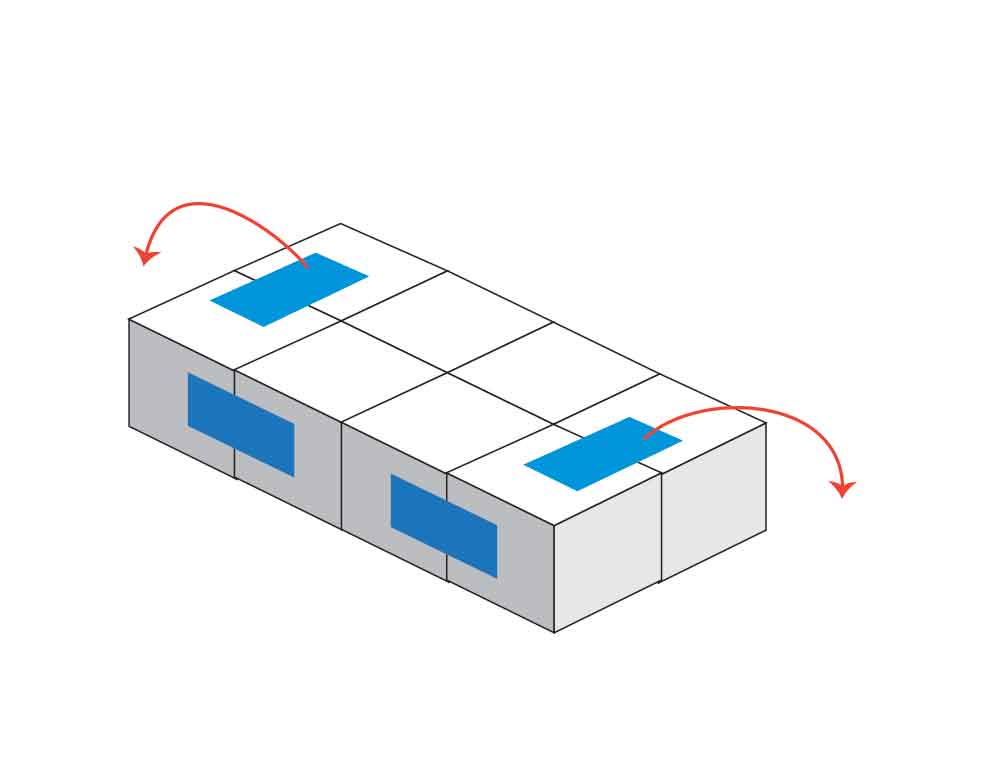
7 – Rotate each row 180° OUTWARD. The original taped tops will now be facing out and away from the rows. The tape applied in step 6 will now be on the bottom of each row.
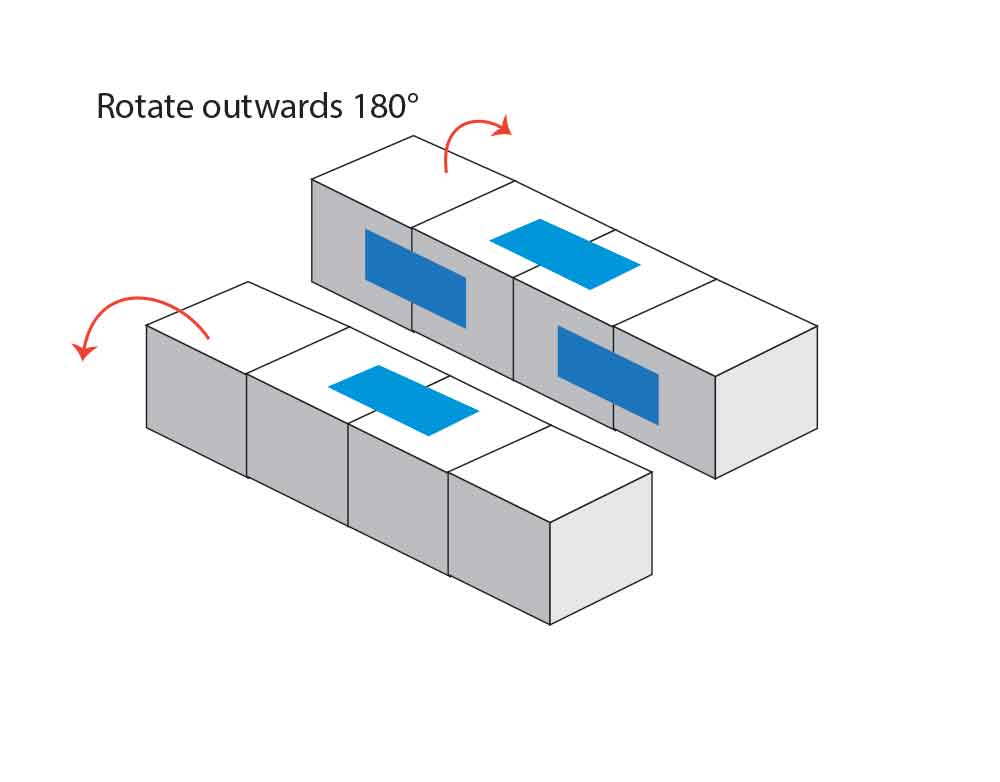
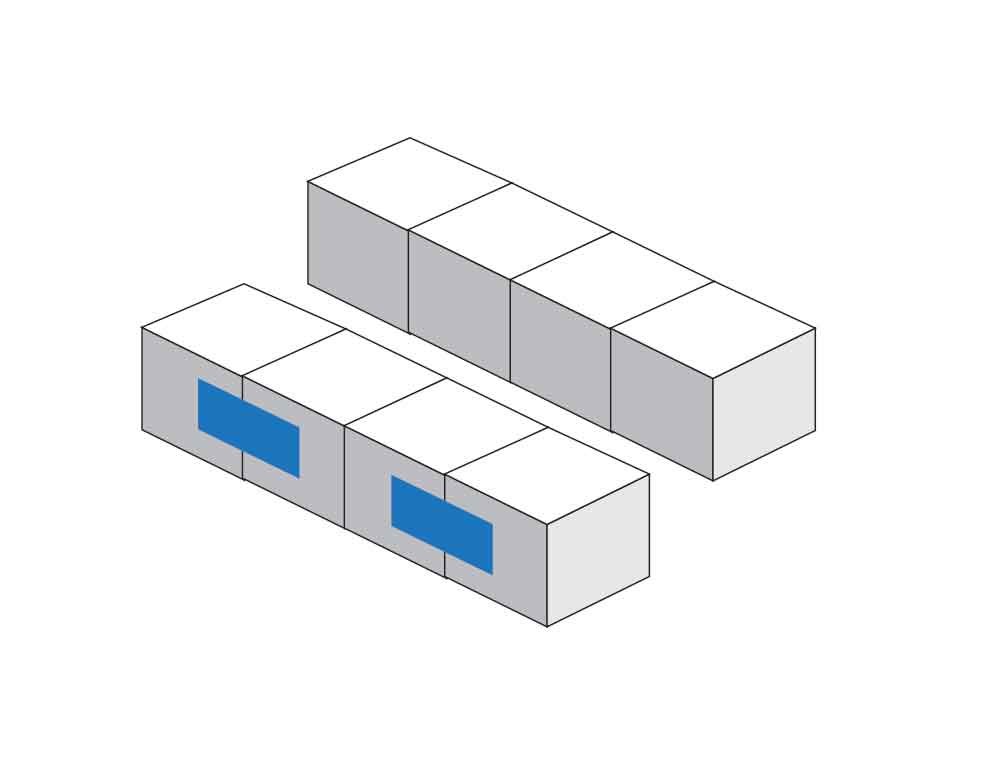
8 – Push the 2 rows together. You now have a block of 8 cubes.
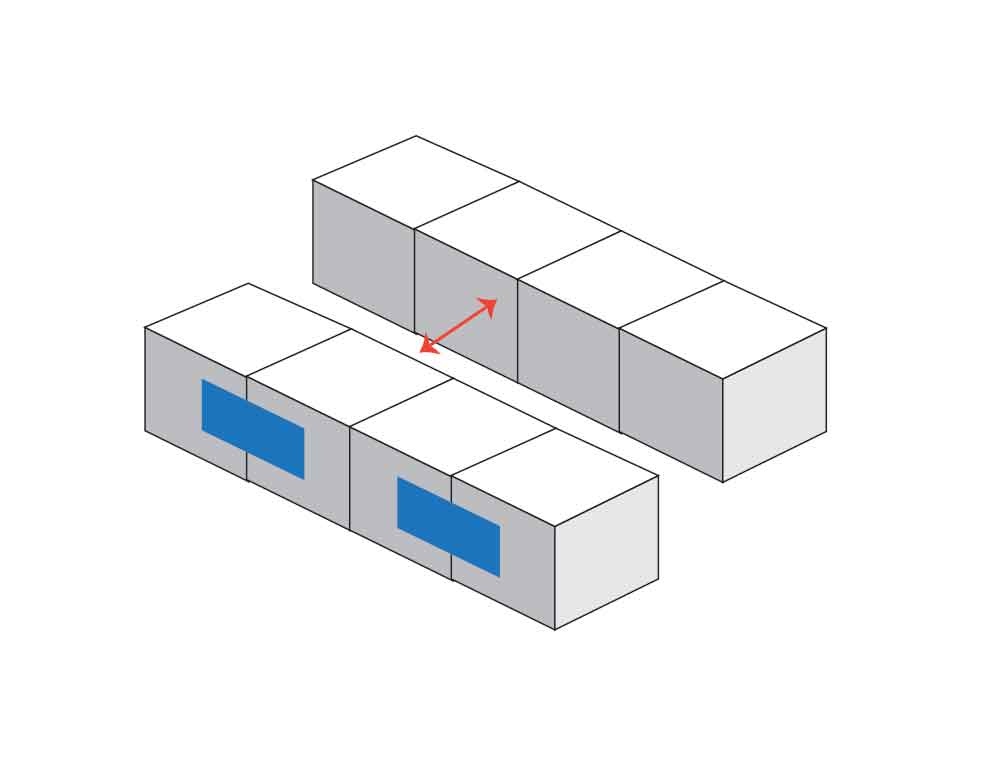
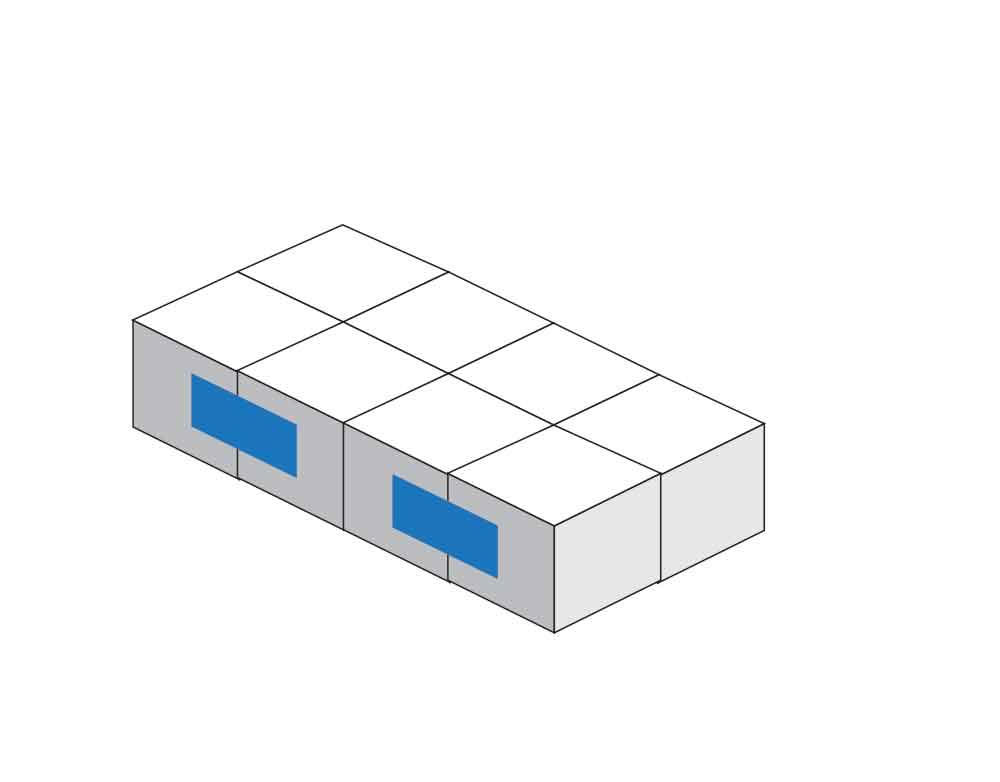
9 – Tape the end pairs, as shown. Note that you are taping along the short end of the block.
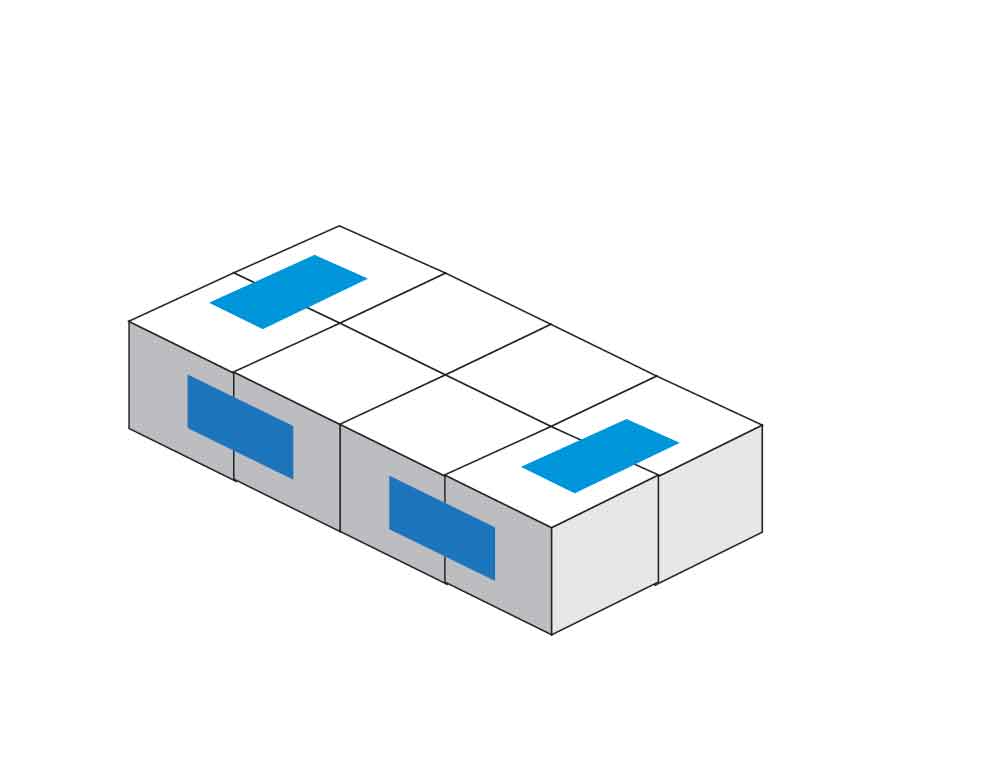
TIP: Gently open and adjust the structure as you fold around the hinges. This will allow you to apply additional tape to the reverse side of each hinge for added reinforcement, if needed.
Now you’re ready to test the movement!
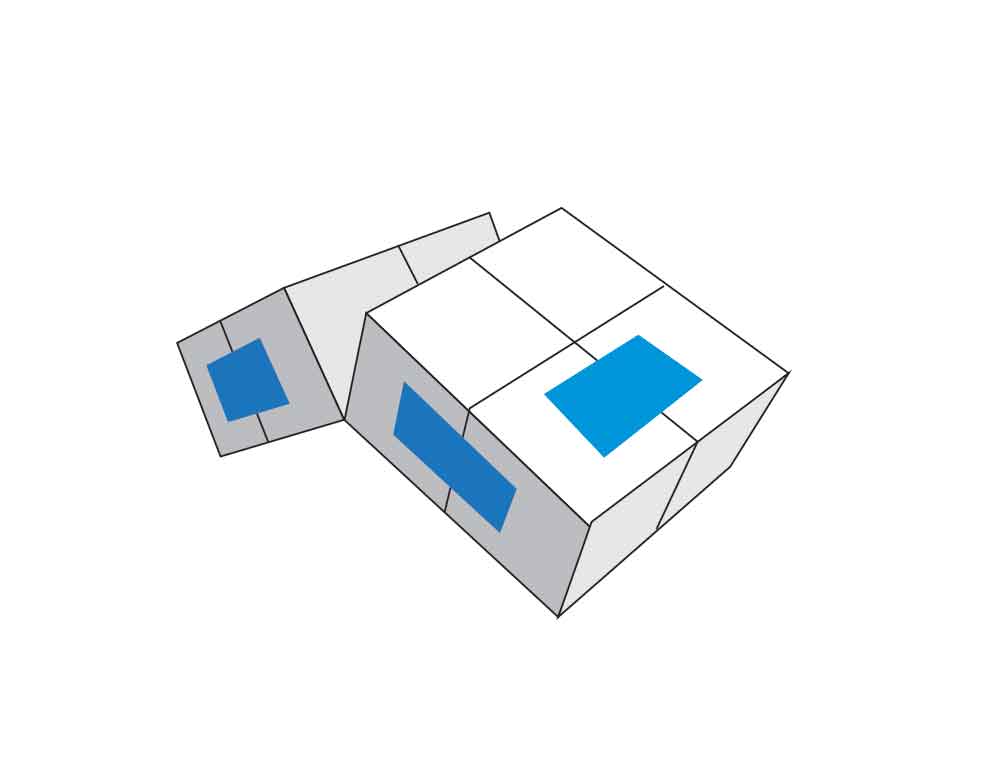
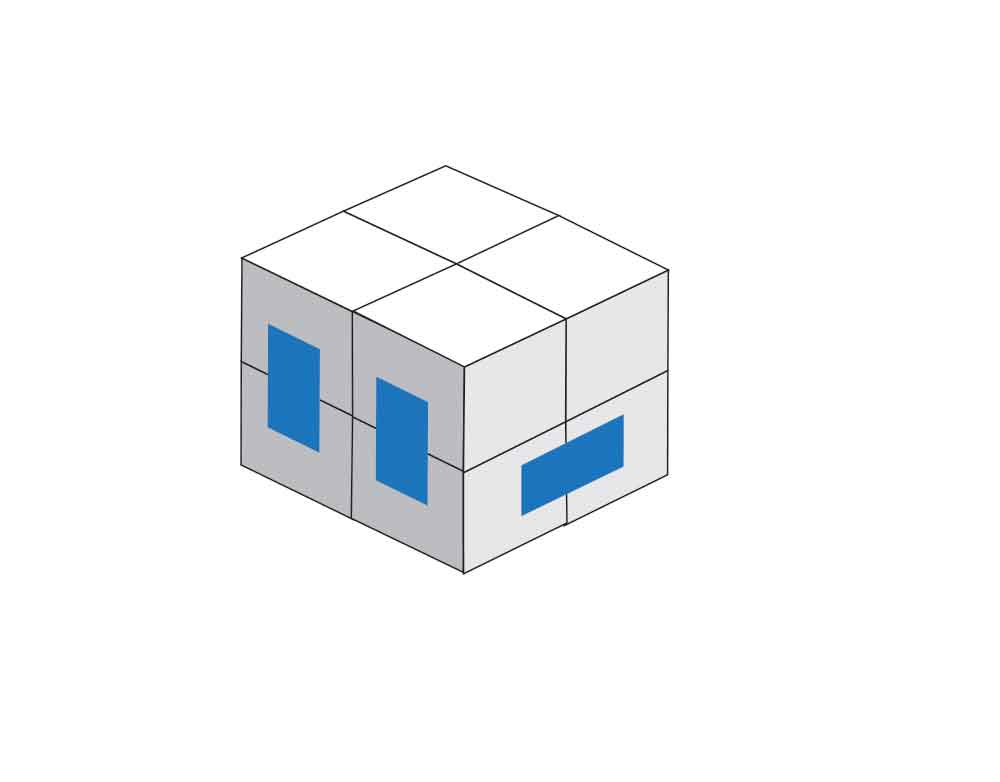
In one of my mockups, I used different coloured washi tape for the hinges to better understand how the structure folds. There are three stages where tape is added to the cube pairs—steps 3, 6 and 9. By using a different colour for each step, I could see how the hinges come together to create the cube’s endless folding motion.
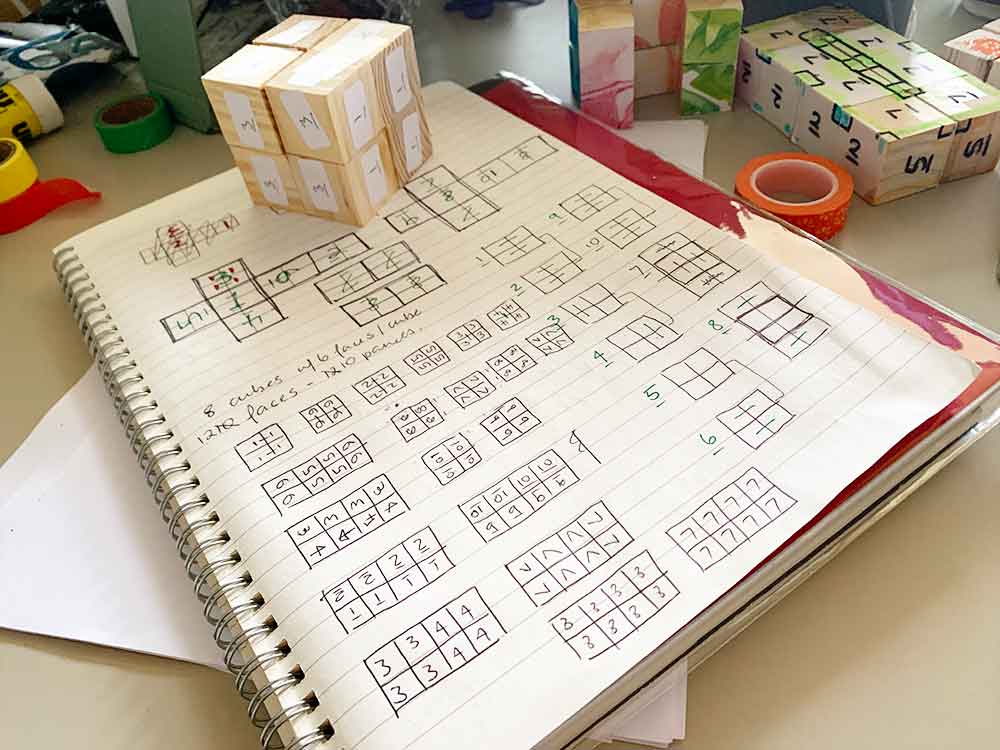
In doing this, I started noticing patterns in how some panel combinations came together. I wanted to understand how the faces of the small cubes aligned to form each panel in both the larger cube and its flat structure.
To explore this, I stuck a series of numbers on each face of the small cubes. As you’ll see in the photograph below, I underlined each number to make the sequencing easier to follow.
With this visual map, I could identify all the variations of 4-cube and 8-cube panels within the structure. From there, I deconstructed my infinity cube and carefully reconstructed it, this time gluing gel-printed papers onto the cube pairs to create the final hinges.
Sometimes my brain enjoys working out semi-complex combinations like this, and other times it feels a little befuddled! If I’ve done my calculations correctly, the flat infinity cube contains 12 individual panels made up of 4 cubes each, and 8 larger panels made up of 8 cubes.
Option 1 – Single Cube-Face Panels
- Using tape, hinge the cubes together as outlined in the steps above.
- Cut squares to the size of each panel face of the folded cube. You will need 12 squares.
- Divide each square into 4 equal smaller squares. You’ll end up with 48 individual squares.
- Glue each small square to the corresponding face of each cube.
This method is quick and effective, with no need for extra planning.
Option 2 – Hinging Pairs and Individual Faces
This approach requires some thought and planning but creates a smoother look with fewer visible seams.
- Cut 12 squares to match the size of each panel face of the folded cube.
- Plan* and cut the following:
- 14 hinging pieces: These span across two small cube faces and act as the “hinges.”
- 20 individual cube-face panels: These cover the remaining single cube faces.
- Glue the paper pieces onto the corresponding cube faces to fully cover the structure.
*PLANNING TIPS: To make this easier, I highly recommend creating a mockup first and carefully planning your trimming and positioning. Here’s how to approach it:
- Number the panels and cube faces: Make a mockup infinity cube and label each panel and its corresponding cube faces. This will help you track which pieces go where. Using different coloured washi tape can be helpful here, as pictured below.
- Prepare your paper pieces: Cut the 12 large squares and lay them out in a clear, logical sequence that makes sense to you.
- Plan one panel at a time: Decide whether each panel needs to be cut into hinging pairs or individual cube faces for the best result.
- Trim and glue as you go: Work systematically, gluing each piece to its matching cube face.
Viloa!
Below are photos of my final cube, which I decorated using a combination of hinging pairs and individual small pieces.
Make Your Own Decorative papers
If you don’t already have your own decorative papers, or know how to make them, you may be interested in learning how to create colour gelatin plate monoprints and cyanotype sun-prints. I run year-round in-person workshops as well as offering these as online workshops:
Gelatin Plate Monoprinting Online Workshop
Price : $97
Self paced
– 6 Learning Modules
– 2 Bonus Modules
– Lots of Tips & Resources
Gelatin Plate Monoprinting
Beyond the Basics
Online Workshop
Price : $137
Self paced
– 6 Learning Modules
– 2 Bonus Modules
– Lots of Tips & Resources
Price : $97
Self paced
– 6 Learning Modules
– 2 Bonus Modules
– Lots of Tips & Resources


